Pumpkin Triangle Crunchers: Homemade Dog Treats
If your dog is ready for something a little more exciting than the usual bone-shaped biscuit, why not change up the shape?
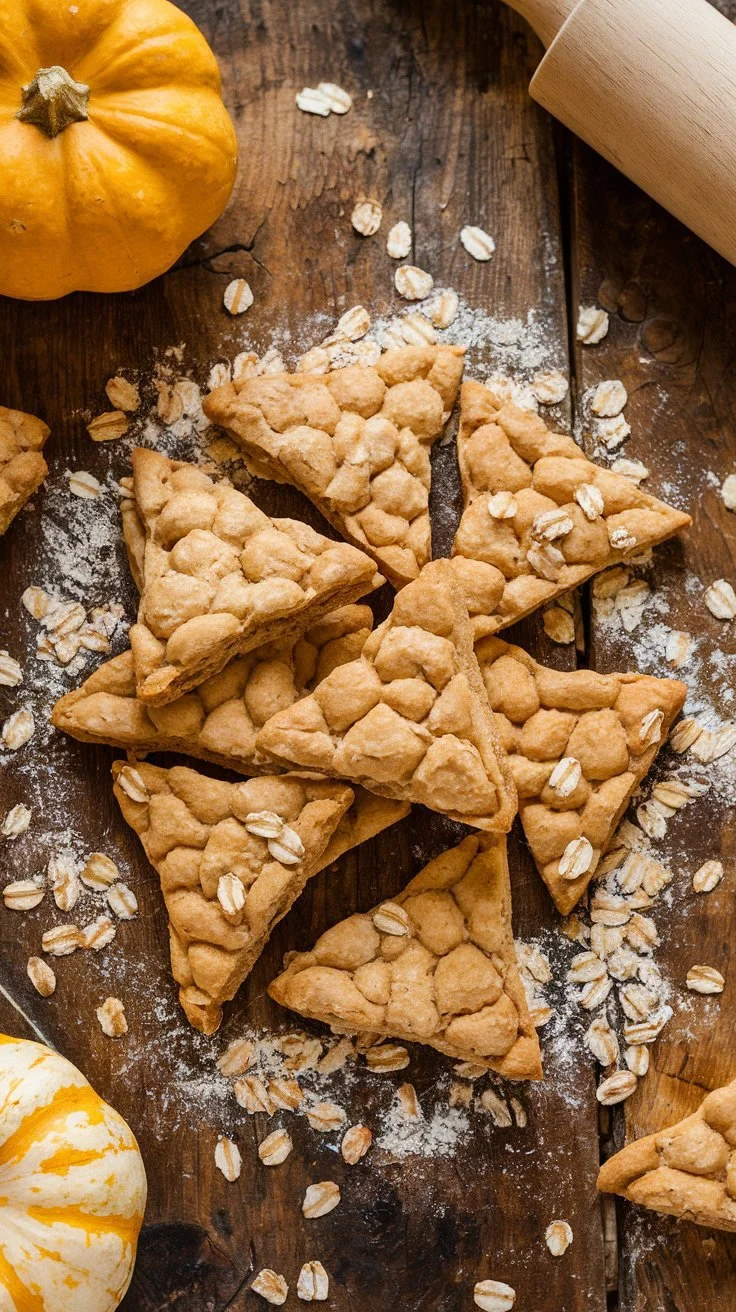
These Pumpkin Triangle Crunchers are an easy homemade dog treat made with pumpkin, flour, egg, and an optional touch of peanut butter. Cutting the dough into triangles gives these biscuits a fun seasonal look while keeping the recipe simple enough for a beginner baker.
They’re especially nice for fall, but there’s no reason your pup can’t enjoy them throughout the year.
One important note before you begin: homemade treats are still treats. They aren’t meant to replace your dog’s complete and balanced everyday food, and extras should generally stay within about 10% of your dog’s daily calories.
What Makes It Awesome
There are plenty of reasons to make your dog’s treats at home, but one of the best is having control over the ingredients.
Pumpkin gives these biscuits their warm color and seasonal flavor, while flour provides structure and egg helps hold everything together. The optional peanut butter can add another flavor that many dogs find appealing.
The triangle shape is also a fun change from the standard cookie cutter designs. You don’t need any special equipment—just a knife or pizza cutter and a little patience.
Plain pumpkin can be used as an occasional dog treat ingredient, but remember that adding more ingredients doesn’t automatically make a homemade biscuit nutritionally complete. These are best thought of as occasional snacks rather than a substitute for your dog’s regular diet.
Ingredients
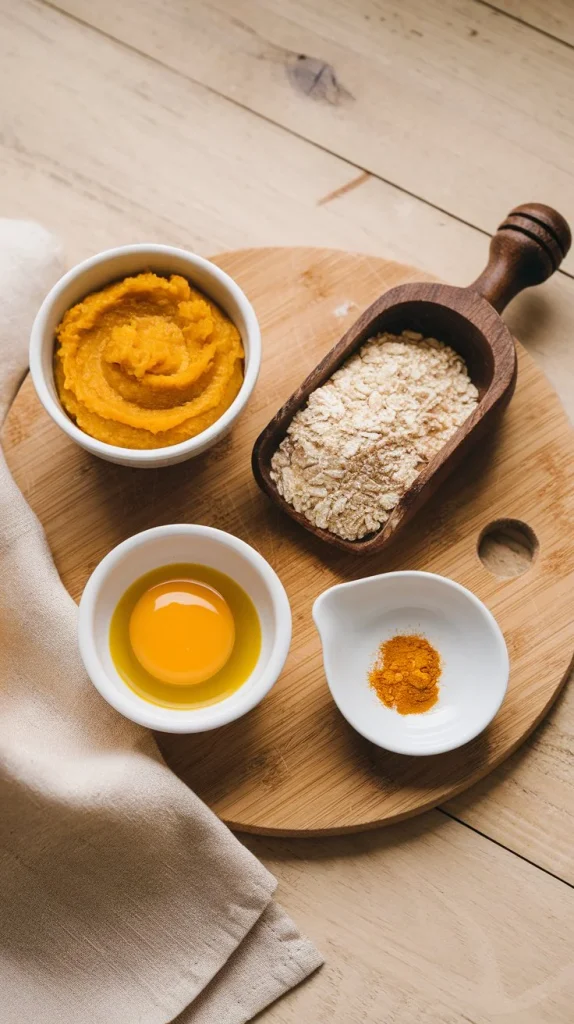
Here’s everything you’ll need to make a batch:
- 1 cup plain pumpkin puree — canned or homemade, with no added spices or sweeteners
- 2 cups whole wheat flour — or another flour your dog tolerates
- 1 egg
- 1 tablespoon xylitol-free peanut butter — optional
- ¼ cup water — plus a little more if necessary
A note about the peanut butter
If you decide to include peanut butter, check the ingredient label carefully. Never use peanut butter containing xylitol or birch sugar, which can be dangerous and potentially life-threatening to dogs.
Plain, unsalted peanut butter without xylitol is the better choice, and because peanut butter is calorie-dense, a small amount is plenty.
Step-by-Step Instructions
- Preheat your oven to 350°F (175°C). Line a baking sheet with parchment paper.
- Combine the wet ingredients. Add the pumpkin, egg, and optional peanut butter to a mixing bowl. Stir until the mixture is smooth.
- Add the flour. Gradually mix in the flour until a dough begins to form.
- Adjust the texture. Add the water little by little until you have a workable dough. You want it soft enough to roll but not sticky.
- Roll out the dough. Place it on a lightly floured surface and roll it to approximately ¼-inch thickness.
- Cut the triangles. Use a knife or pizza cutter to divide the dough into small triangle-shaped pieces. Keep the pieces appropriately sized for your dog.
- Arrange on the baking sheet. Leave a little space between the pieces so they bake evenly.
- Bake. Place the tray in the oven and bake for approximately 25–30 minutes, watching closely toward the end of the baking time.
- Cool completely. Remove the treats from the oven and let them cool fully before offering one to your dog.
For a crunchier biscuit, you can leave the cooled treats in the turned-off oven for a little longer to help remove additional moisture. Avoid simply increasing the temperature, since that can cause the outside to brown before the center dries properly.
Alternatives

You can make a few simple substitutions depending on what ingredients your dog tolerates.
Oat flour can be used instead of whole wheat flour. If you use coconut flour, keep in mind that it absorbs considerably more liquid, so it isn’t always a straightforward one-for-one substitution.
You can also replace the pumpkin with plain cooked sweet potato puree if your dog enjoys it and tolerates it well.
If you’re avoiding peanut butter, simply leave it out rather than adding another sweetener. There’s no need for honey to make these treats appealing, and cinnamon isn’t necessary either.
When changing ingredients, introduce new foods gradually, particularly if your dog has a sensitive stomach or known food allergies.
Common Mistakes

One of the easiest ways to ruin homemade dog biscuits is getting the dough too wet.
Add water gradually rather than pouring in the full amount at once. Pumpkin can vary in moisture content, so your dough may need slightly more or less water than the recipe indicates.
Another common problem is rolling the dough too thick. Thick pieces take longer to dry and may remain softer in the middle. Keeping the dough around ¼ inch thick helps produce a more consistent biscuit.
Don’t rush the cooling stage, either. The treats will continue to firm up as they cool, and your dog should never be given a freshly baked biscuit that’s hot enough to burn their mouth.
Finally, keep an eye on the baking time. Oven temperatures vary, so use the recipe’s timing as a guide rather than an absolute rule.
FAQ
Here are answers to some common questions about these pumpkin dog treats.
Can I use all-purpose flour instead?
Yes. All-purpose flour can work in this recipe if your dog tolerates wheat.
The main consideration is your individual dog’s dietary needs rather than whether one flour is automatically healthier. If your dog has a diagnosed food allergy or is following a veterinary elimination diet, use only ingredients that have been approved for that diet.
How long do these last?
Because these are homemade treats without commercial preservatives, storage life depends on how thoroughly they are baked and how they’re stored.
Once completely cooled, keep them in an airtight container and watch for signs of spoilage. For longer storage, freezing is a better option.
If the treats remain soft or contain more moisture, refrigeration or freezing is preferable rather than assuming they’ll safely last for weeks at room temperature.
My dog’s allergic to eggs—what now?
If your dog cannot have eggs, don’t simply assume every egg substitute will be appropriate.
You can try making a small test batch without the egg and adjust the pumpkin, flour, and water until the dough holds together. The final texture may be somewhat different.
For dogs with diagnosed food allergies, make sure every ingredient—including substitutions—is compatible with the diet recommended by your veterinarian.
Can I freeze the dough?
Yes. You can prepare the dough, roll it out, cut the triangles, and freeze the unbaked pieces for later.
Arrange the pieces in a single layer first so they don’t stick together. Once frozen, transfer them to a freezer-safe container or bag.
When you’re ready to bake, you may need to add a little extra baking time. Check that the treats are fully baked before allowing them to cool and serving them.
Why triangles? Why not stars or something?
You absolutely can use another shape.
Triangles are simply an easy option because you can cut them with a knife or pizza cutter without needing a cookie cutter. Stars, hearts, circles, or small squares can work too.
Just keep the pieces an appropriate size for your dog’s mouth and chewing ability.
My treats aren’t crunchy—help!
If your biscuits are softer than you expected, they may simply contain too much moisture.
Next time, try rolling the dough slightly thinner and using a little less water. You can also give the baked treats additional drying time at a low temperature.
Make sure the biscuits have cooled completely before judging their final texture.
If they remain soft, store them appropriately rather than assuming they have the shelf life of a commercial dry biscuit.
Are these safe for puppies?
The basic ingredients can be appropriate for many dogs, but puppies have individual nutritional and dietary needs.
These biscuits should be treated as occasional snacks rather than a major part of a puppy’s diet. Start with a very small portion when introducing any new treat and monitor your puppy for digestive upset.
If your puppy has a food allergy, digestive condition, or is eating a veterinarian-prescribed diet, check with your veterinarian before introducing homemade treats.
Final Thoughts
These Pumpkin Triangle Crunchers are a simple way to give homemade dog treats a fun seasonal twist.
The recipe doesn’t require complicated equipment or unusual ingredients, and the triangle shape makes the finished biscuits look a little different from the typical homemade dog cookie.
Use plain pumpkin, choose safe ingredients, keep portions small, and let the treats cool completely before serving. If you include peanut butter, always verify that it contains no xylitol or birch sugar.
Most importantly, remember that homemade biscuits are an occasional extra—not a replacement for a nutritionally complete dog food. Keeping treats within your dog’s daily calorie allowance helps you enjoy snack time without letting extras take over their diet.
So grab the pumpkin, roll out the dough, and give your pup a batch of homemade triangles to crunch on.