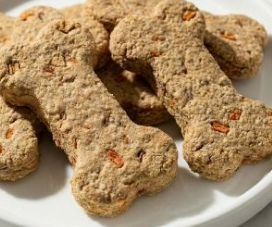
Apple Carrot Hard Bones for Dogs (The Ultimate Dental Chew)
If my dog finishes soft treats in seconds, I know I need something tougher. These Apple Carrot Hard Bones are exactly that—long-lasting, crunchy chews that keep dogs busy while also supporting dental health. Instead of quick snacks, I like giving treats that take time to chew and actually serve a purpose.
Save For Later
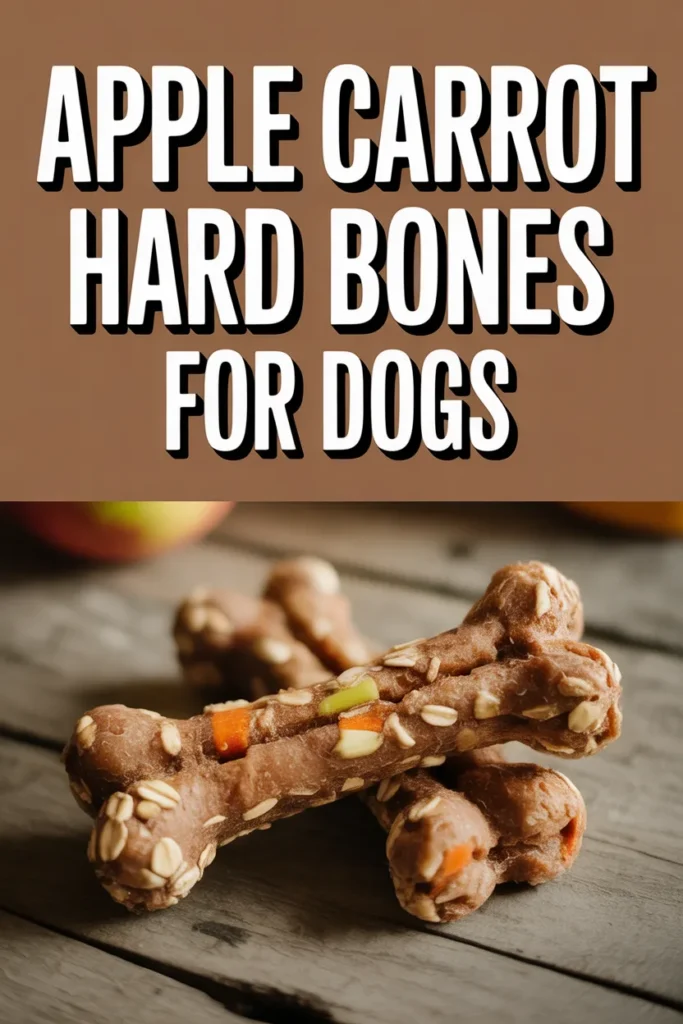
In this guide, I’ll show how I make these hard dog treats from scratch using simple ingredients like carrots, apples, oats, and whole wheat flour. I’ll also explain why removing moisture is the key step, how dehydration creates that rock-hard texture, and how to store them safely. If you want a natural chew alternative without additives, this recipe works really well.
Key Takeaways
- These hard dog treats last longer than soft biscuits and reduce boredom
- Dehydration removes moisture, making them shelf-stable and crunchy
- Carrots and apples add fiber, Vitamin A, and natural sweetness
- Proper drying prevents mold and extends storage up to 1 month
- Always supervise dogs while chewing hard treats for safety
Why Make These Hard Chews?
I prefer making hard chews because they do more than just taste good. The firm texture helps reduce plaque buildup, which is important since about 80% of dogs show dental disease signs by age 3. Chewing also keeps dogs mentally engaged, especially high-energy breeds.
I also like that these treats are not empty calories. Apples bring fiber and antioxidants, while carrots are rich in beta-carotene. Instead of processed store-bought chews, I know exactly what goes into these.
Pro Tip: If your dog gets bored easily, harder treats like these can increase engagement time by 3–5x compared to soft cookies.
Ingredient
- 1 cup grated carrots (squeezed dry)
- 1 cup grated apple (seeds removed, squeezed dry)
- 2 cups whole wheat flour
- ½ cup rolled oats
- 1 large egg
- 1 tbsp honey (optional)
Step-by-Step Instructions
Step 1: Prep the Fruit & Veg
I start by preheating the oven to 350°F (175°C) and grating the carrots and apples. The most important step here is removing moisture. I always squeeze the grated mix using a towel until it feels almost dry.
If I skip this, the treats turn soft instead of hard. Moisture is the biggest reason homemade dog treats fail to get that crunchy texture.
Pro Tip: The drier the mix, the longer the treats will last on the shelf.
Step 2: Make the Oat Flour
I blend the rolled oats for a few seconds until they become a coarse flour. I don’t over-process them because a bit of texture helps improve the chew and structure.
This step also helps bind the dough better without needing extra flour.
Step 3: The Mix
I combine carrots, apples, flour, and oat flour in a bowl, then add the egg and honey. Since everything is dry, the dough feels stiff, so I usually knead it by hand.
If it doesn’t come together, I add a tiny amount of water—just 1 teaspoon at a time. Too much water will ruin the final texture.
Step 4: Roll and Cut
I roll the dough to about ¼–½ inch thickness and cut it into bone shapes. Thicker treats take longer to dry but last longer when given to dogs.
I place them on a lined baking tray, leaving small gaps between each piece.
Step 5: The Initial Bake
I bake them for 20 minutes to set the structure. At this stage, they are cooked but still slightly soft inside.
This step is important because it stabilizes the shape before dehydration.
Step 6: The Hardening (Dehydrator Method)
I transfer the semi-baked treats to a dehydrator at 160°F (70°C) for 3–4 hours. This removes nearly all moisture, turning them into hard chews.
When done right, they should snap cleanly instead of bending. That’s how I know they’re ready.
Insight: Removing moisture below 10% significantly increases shelf life and prevents bacterial growth.
Storage Tips
I always check texture before storing. If the treats don’t feel fully hard, I dry them longer.
- Click Test: I tap two treats together—they should sound sharp, not dull
- Room Temperature: Store in an airtight jar for up to 1 month
- Freezer: Store up to 6 months for long-term use
Moisture is the main cause of spoilage, so I never skip proper drying.
Feeding Guidelines & Safety
Supervise the Chew
I always watch my dog while giving hard treats. Since these are tough, there’s a risk of large chunks breaking off.
The 10% Rule
I keep treats within 10% of daily calories to avoid overfeeding.
- Small dogs: 1 small bone per day
- Large dogs: 1–2 bones per day
Frequently Asked Questions
I don’t have a dehydrator; can I use my oven?
Yes, I lower the oven to around 170°F and leave the door slightly open. I bake for 2–3 hours until the treats are fully dry and hard.
Can I use all-purpose flour instead of whole wheat?
I can, but I prefer whole wheat because it has more fiber and nutrients. The texture stays similar either way.
Do I have to peel the apples?
No, I leave the skin on for extra nutrients. I just make sure to remove the seeds and core because they contain harmful compounds.
Why did my treats get moldy?
From my experience, this happens when moisture is still inside. Either the fruit wasn’t squeezed enough or dehydration time was too short.
Can I leave out the honey?
Yes, I often skip it. The natural sweetness from apples and carrots is already enough.
Final Thoughts
I’ve made a lot of dog treats, but these Apple Carrot Hard Bones stand out because they actually last. They take more effort due to dehydration, but the result is a durable, healthy chew that keeps dogs engaged.
For me, the best part is hearing that solid crunch and knowing I made something both safe and useful. If you want a natural alternative to store-bought hard chews, this recipe is worth trying.
All content on this site is written and reviewed by our experienced team to ensure it is accurate, reliable, and helpful for our readers. Our Our Process page explains how we carefully research and create high-quality content, while our Team page introduces the professionals behind our work. We also provide clear guidelines for content or image concerns on our Image Removal page, so you can trust that we prioritize transparency, quality, and reader safety.