Homemade Green Bean Crunchies for Dogs
I started making these green bean crunchies when I noticed my dog watching me prep vegetables in the kitchen every day. Instead of giving processed treats, I turned simple green beans into a crispy, oven-baked snack using just oil and heat. The result is a low-calorie, high-fiber dog treat that supports weight control and adds a healthy crunch dogs love.
Save For Later

This recipe is simple, budget-friendly, and takes about 30–40 minutes total. I bake fresh or frozen green beans until crisp, cool them, and serve them as a guilt-free reward. It has now become one of my dog’s favorite homemade snacks because of the crunch and natural taste.
Key Takeaways
- I use only 2 simple ingredients: green beans and oil
- The recipe is low-calorie and high-fiber, good for weight control
- Baking at high heat (425°F / 218°C) helps remove moisture for crunch
- Proper drying and spacing are the most important steps for crisp texture
- Treats can be stored for up to 4 days at room temp or 2 months frozen
- I keep portions small to stay within 10% of daily calorie intake for dogs
Why I Make These Green Bean Chips for My Dog
I wanted a simple homemade treat that didn’t rely on artificial fillers or processed ingredients. When I saw how much my dog enjoyed crunchy textures, I tested green beans in the oven. With just a small amount of oil and proper baking time, they turned into a light, crispy snack.
From my experience, these treats work well for dogs who need low-calorie rewards, especially those on weight management plans. According to general veterinary guidance, green beans are safe for most dogs and are often used as a diet-friendly substitute for high-calorie treats.
Why I Prefer This Recipe
- It uses everyday ingredients already in my kitchen
- It takes less effort than baking complex dog biscuits
- It helps me control portion size and calories easily
- It gives my dog a crunchy snack without junk ingredients
Ingredients I Use for Green Bean Crunchies
I always keep it simple with just two ingredients.
| Ingredient | Purpose |
|---|---|
| 2 cups fresh or frozen green beans | Natural fiber, vitamins (C & K), and crunch |
| 1 tbsp olive oil or coconut oil | Helps with crisp texture and adds healthy fats |
Step-by-Step: How I Make Green Bean Crunchies
Step 1: Preheat the Oven
I preheat my oven to 425°F (218°C). This high heat is important because it quickly removes moisture, which is what creates crispiness. I line my baking tray with parchment paper so nothing sticks.
Step 2: Prepare the Green Beans
I wash fresh green beans thoroughly and dry them completely using a towel. I always trim the ends because they can be tough for dogs.
If I use frozen beans, I thaw them first and make sure they are fully dry before baking. From experience, even a small amount of moisture can stop them from getting crispy.
Step 3: Coat with Oil
I place the beans in a bowl and add 1 tablespoon of oil, then mix until everything is lightly coated. This step helps them brown evenly and improves texture.
Pro Tip: I always use just a light, even oil coating because too much oil makes the beans soggy instead of crispy.
Step 4: Arrange on Tray
I spread the beans in a single layer with space between each one. If they overlap, they steam instead of crisping, which ruins the texture.
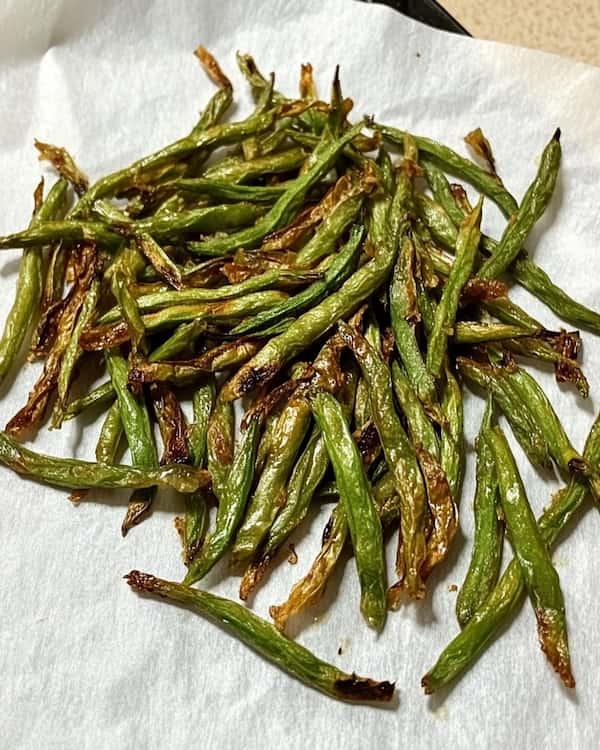
Step 5: Bake Until Crispy
I bake them for 20–25 minutes total, flipping once halfway through. I always watch closely near the end because thinner beans cook faster.
If needed, I reduce the temperature to 200°F (93°C) for extra drying time until they become fully crisp and slightly golden.
Step 6: Cool Before Serving
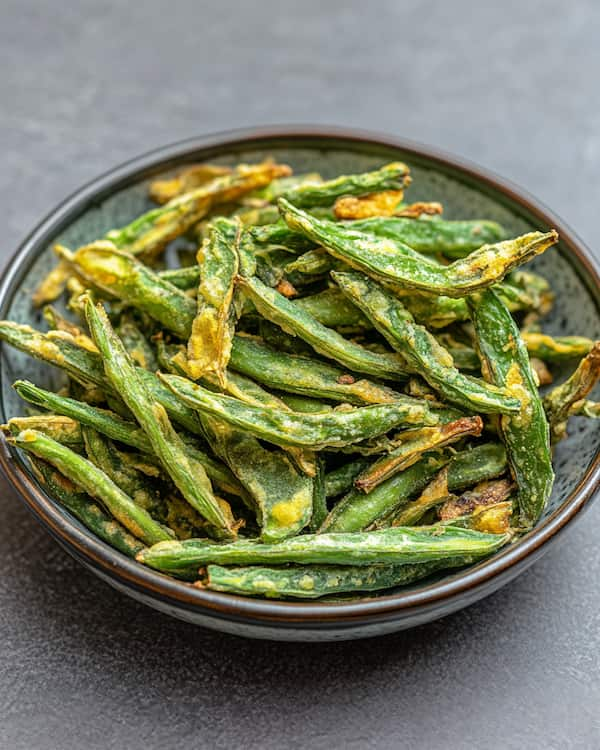
I let them cool for 15–20 minutes on the tray. They continue to harden as they cool, which improves crunch. I never serve them hot because dogs prefer the crisp texture after cooling.
Storage and Serving Guide
I store these in an airtight container to keep them fresh.
- Room temperature: up to 4 days
- Refrigerator: up to 10 days
- Freezer: up to 2 months
I usually give 1–2 pieces for small dogs and up to 5 for larger dogs. I keep treats within 10% of daily calorie intake as recommended in general pet nutrition guidelines.
Feeding Notes From My Experience
When I first introduced these, I started with just 1–2 pieces to check digestion. Some dogs may experience mild gas because of fiber, but most handle them well.
These treats are not a full meal replacement—they are a healthy reward.
Tips I Always Follow for Best Results
- I always dry beans completely before baking
- I avoid overcrowding the tray
- I flip them halfway for even crisping
- I check early because thinner beans cook faster
- I store them only after fully cooling
Variations I Have Tried
Herbed Version
I sometimes add a pinch of dried rosemary before baking for extra aroma.
Nutty Boost Version
I sprinkle a small amount of flaxseed for added omega-3 support.
Tangy Twist Version
A light touch of apple cider vinegar adds a mild tang that some dogs enjoy.
Health Benefits of Ingredients
From my understanding and experience:
- Green beans: Low-calorie, high-fiber vegetable with vitamins C and K
- Olive/coconut oil: Supports coat health and improves texture
FAQs
Are green beans safe for dogs?
Yes, I’ve found them safe when served plain, baked, or raw in moderation.
Why didn’t my beans get crispy?
In my experience, moisture or overcrowding is usually the cause.
Can I skip oil?
Yes, but I noticed they turn out less crispy without it.
Conclusion
These green bean crunchies have become one of my easiest homemade dog treats. I like how simple they are, and my dog clearly enjoys the crunch every time I make them. For me, it’s a small effort that turns an everyday vegetable into a healthy reward.
All content on this site is written and reviewed by our experienced team to ensure it is accurate, reliable, and helpful for our readers. Our Our Process page explains how we carefully research and create high-quality content, while our Team page introduces the professionals behind our work. We also provide clear guidelines for content or image concerns on our Image Removal page, so you can trust that we prioritize transparency, quality, and reader safety.