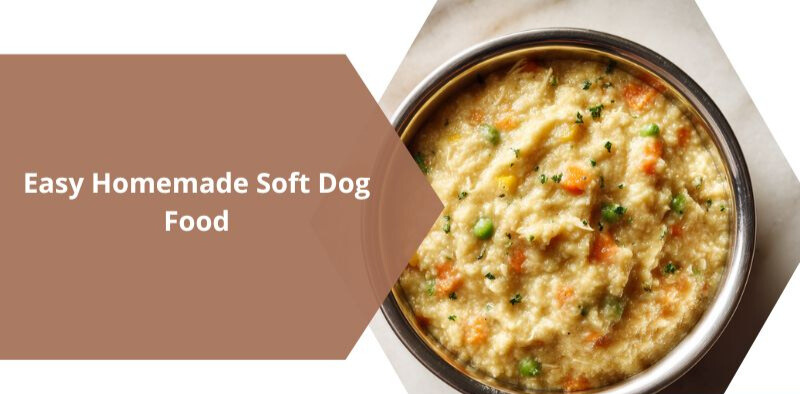
Easy Homemade Soft Dog Food Recipe
I’ve been making this soft dog food recipe for my own dogs for years now, and I can honestly say it’s one of the most useful things I’ve added to my dog care routine.
It’s simple, clean, and made with ingredients I can actually recognize. No fillers, no mystery proteins, no preservatives — just real food that dogs genuinely enjoy eating.
This recipe uses cooked chicken, brown rice, sweet potato, and mixed vegetables to create a soft, moist meal that’s easy on the stomach and even easier on the mouth. It makes roughly 5 to 6 cups per batch, takes under an hour from start to finish, and can be stored in the fridge for up to 3 days or frozen for up to 3 months.
I originally started making it when one of my dogs got older and stopped managing dry kibble well. That experience taught me a lot about what dogs actually need during those later years — and how much of a difference a simple texture change can make at mealtime.
Whether your dog is a senior, recovering from surgery, dealing with dental problems, or just a picky eater, this recipe is worth trying. I’ve seen it work firsthand, and I think you’ll be surprised by how well your dog responds to it.
Key Takeaways
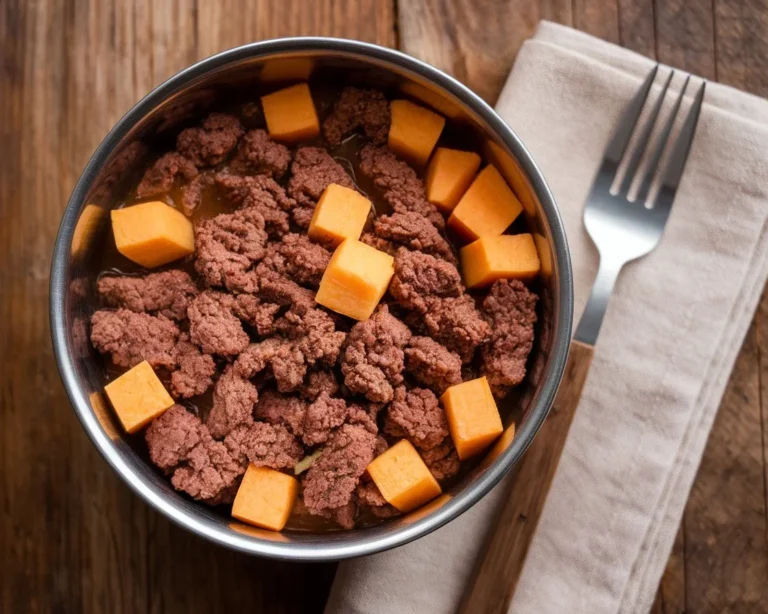
Soft homemade dog food is especially valuable for seniors, post-surgery dogs, and pups with dental issues. The base recipe uses chicken, brown rice, sweet potato, and dog-safe vegetables. One batch yields approximately 5 to 6 cups — portioned based on your dog’s weight.
You can refrigerate it for up to 3 days and freeze it for up to 3 months in sealed containers. Always skip salt, garlic, onions, and any seasoning — these are toxic to dogs. And if your dog has a health condition or you plan to feed this full-time, check with your vet first before making the switch.
Why Homemade Soft Dog Food Makes Sense
I started making this recipe out of real necessity, not because it was trending somewhere online. My dog was getting older, his teeth weren’t what they used to be, and he was clearly struggling with his regular kibble. I needed something gentle, nutritious, and easy to put together — and this recipe checked every box.
According to the American Kennel Club, senior dogs (generally 7 years and older) often benefit from softer, more digestible food because their chewing ability and digestion naturally slow down with age.
That tracks completely with what I saw with my own dog. The shift to soft food genuinely changed his relationship with mealtime.
What I also didn’t expect was how useful this recipe turned out to be for hydration. Homemade stew-style food can contain 70 to 80 percent moisture, compared to just around 10 percent in dry kibble.
For dogs that don’t drink enough water on their own, this is a meaningful nutritional benefit — one that most commercial food just can’t offer.
Here’s when I’d specifically recommend this recipe. Toothless or near-toothless dogs can lap it up with zero effort. Dogs recovering from dental surgery or illness get a texture that doesn’t stress sore mouths.
Dogs that drink too little water get extra hydration built right into their meal. And any dog that’s simply gone off their regular food often responds really well to something fresh and homemade.
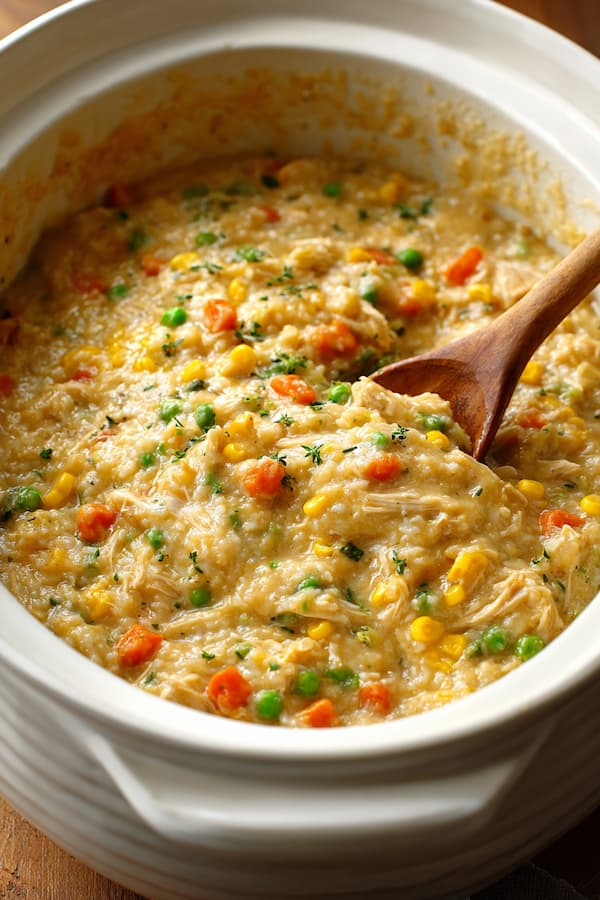
Homemade Soft Dog Food Recipe
This batch makes approximately 5 to 6 cups, which is enough for several meals depending on your dog’s size. I usually make a full batch, portion it out, and freeze what I won’t use within the first two days. It keeps the food fresh and makes weekday feeding much easier.
Ingredients
| Ingredient | Amount |
|---|---|
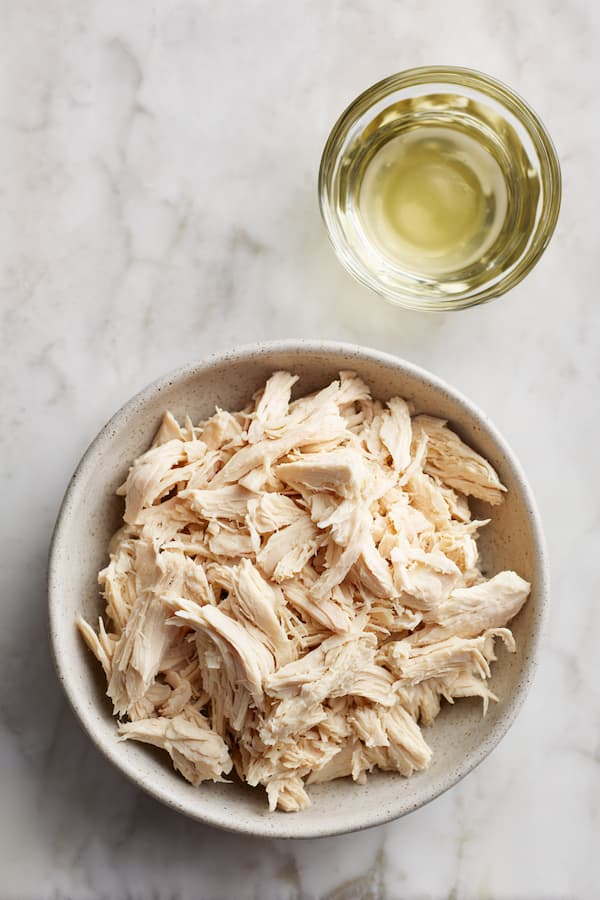
| Boneless, skinless chicken breasts or thighs | 2 cups (cooked and shredded) |
| Warm water | ½ to 1 cup (adjust for consistency) |
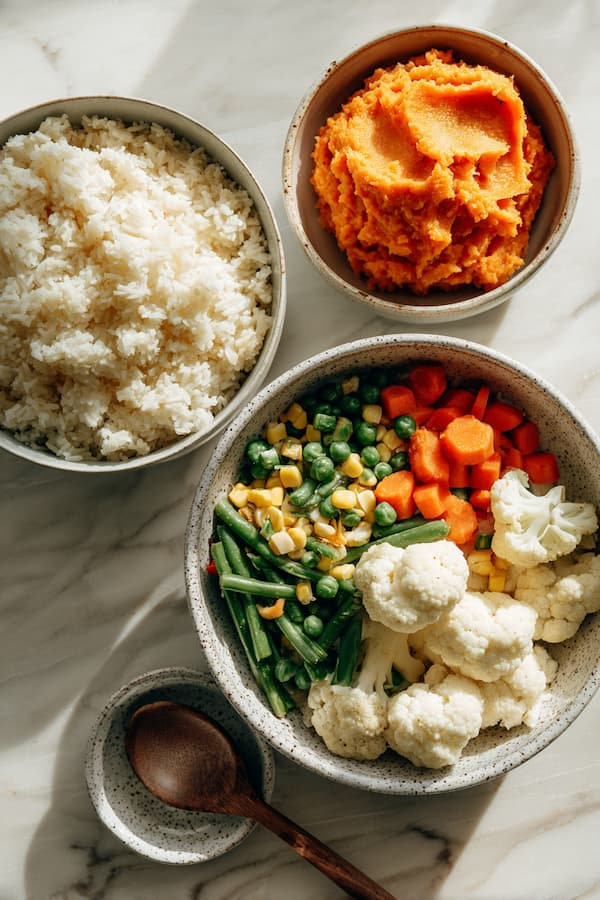
| Brown or white rice | ⅓ cup dry (yields 1 cup cooked) |
| Sweet potatoes | 1 medium (yields 1 cup mashed) |
| Mixed vegetables | 1 cup total |
Ingredient Notes
For the chicken, I’ve used both breast and thigh meat and both work well. Thighs have a slightly higher fat content which makes the flavor richer, while breasts are leaner if your dog needs to watch their weight. Always remove the skin and every bone before cooking — no exceptions here.
For the vegetables, I typically use a mix of peas, green beans, carrots, cauliflower, and corn. The variety matters because different vegetables bring different nutrients to the bowl. What you absolutely need to avoid are onions, garlic, grapes, raisins, and mushrooms — all of these are toxic to dogs, even in small amounts.
Step-by-Step Instructions
Step 1 — Prepare Your Workspace
Before I start cooking, I clear a good amount of counter space and gather everything I’ll need. That includes a large pot for boiling, a steamer basket, mixing bowls, a potato masher, and storage containers. Having everything out before I start keeps the process moving smoothly and cuts down on the back-and-forth.
Step 2 — Cook the Chicken
I fill a large pot with water, bring it to a boil, then add the chicken and reduce to a gentle simmer. I let it cook for 20 to 25 minutes until it reaches an internal temperature of 165°F throughout. After pulling it out, I let it cool for about 10 minutes before shredding it finely with two forks.
Pro tip: don’t throw out that cooking water. It’s packed with flavor and natural nutrients, and I use it later to adjust the consistency of the final mix. It adds far more depth than plain water would.
Step 3 — Cook the Rice
While the chicken is cooking, I get the rice going at the same time. I follow the package directions but deliberately use a bit more water than usual and cook it a few minutes longer than normal. The goal is a very tender, almost soft result — this makes it much easier for dogs to digest and gives the final dish a better overall texture.
Step 4 — Prepare the Sweet Potatoes
I peel one medium sweet potato and cut it into roughly one-inch chunks. I drop these into a pot of water, bring it to a boil, then simmer for 15 to 20 minutes until they’re completely fork-tender.
Once drained, I mash them thoroughly until mostly smooth. A few small lumps are fine — I’m not going for restaurant-quality presentation here, just something easy to eat.
Step 5 — Steam the Vegetables
If I’m using fresh vegetables, I wash and chop them into small, bite-sized pieces before steaming for 8 to 10 minutes. If I’m using frozen, I steam for 5 to 6 minutes until they’re soft and heated through. The goal is vegetables that are cooked enough to be easily digestible but still hold a little structure — not mushy.
Step 6 — Combine All Ingredients
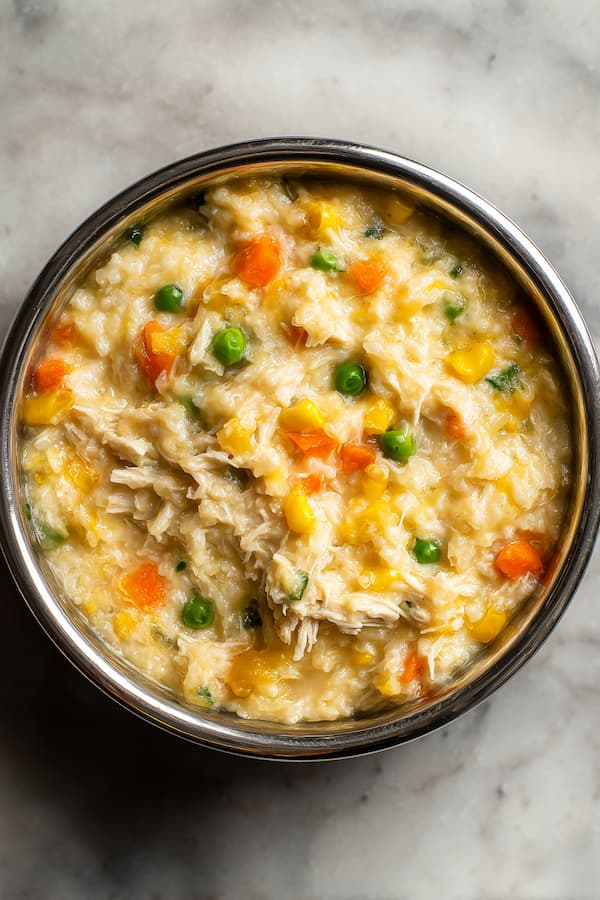
In a large mixing bowl, I add the shredded chicken, cooked rice, mashed sweet potatoes, and steamed vegetables. I mix everything together with a large spoon until it’s well combined and looking colorful.
At this stage the mixture already smells great, and honestly most dogs are already interested before it even hits the bowl.
Step 7 — Adjust the Consistency
This step is where I dial in the texture. I start by adding half a cup of warm water or the reserved chicken broth and mix it in thoroughly. The food should be moist and easy to scoop — not dry and clumped, but not watery either. I add more liquid a few tablespoons at a time until I hit the right consistency for my dog.
Step 8 — Final Texture Adjustment (Optional)
For senior dogs with more serious dental issues, I sometimes take this a step further. A few pulses in a food processor gives a chunkier, easier-to-chew texture. Longer processing gives a pâté-like smoothness. I never over-process it though — some texture is good for dogs, and it’s also more interesting for them to eat.
Step 9 — Cool and Portion
I always let the food cool completely to room temperature before serving or storing. Once it’s cooled, I portion it into individual serving sizes based on my dog’s daily needs. This makes mealtime faster and takes the guesswork out of portion control during busy days.
Storage Guidelines
When I store this in the fridge, I use airtight containers and aim to use it within 3 days. Before serving any refrigerated portion, I always give it a quick sniff and look — if anything seems off, I throw it out. There are no preservatives in this recipe, so freshness matters more than it would with commercial food.
For longer storage, I portion everything into freezer-safe containers or silicone molds right after it cools, then freeze immediately. I label each container with the date before it goes in the freezer.
When it’s time to serve, I either thaw overnight in the fridge or use the defrost setting on the microwave — making sure to stir well and check the temperature before it goes in the bowl.
My general rule is to make only what my dog will eat within one week and freeze the rest the same day I prepare it. Since there are no preservatives in this recipe, that approach keeps everything fresh, safe, and waste-free.
Serving Guidelines and Portions
How much to feed depends on your dog’s weight, age, and activity level. I use the table below as a starting point and then adjust based on how my dog looks and acts over the following week or two.
| Dog Weight | Daily Amount | Meals Per Day |
|---|---|---|
| 5–15 lbs | ¾ to 1½ cups | 2–3 meals |
| 16–30 lbs | 1½ to 2½ cups | 2 meals |
| 31–50 lbs | 2½ to 3½ cups | 2 meals |
| 51–70 lbs | 3½ to 4½ cups | 2 meals |
| 71+ lbs | 4½ to 6 cups | 2 meals |
I want to be clear that I’m not a dog nutritionist. These are general starting points, not medical feeding guidelines. If you’re ever unsure about how much to feed your specific dog, the right move is to ask your vet. They can factor in health conditions, current weight, and individual metabolism in a way that a general table simply can’t.
Nutritional Considerations and Supplements
This recipe provides solid everyday nutrition, but homemade food can have gaps when it’s used as a primary diet over the long term. I’ve had honest conversations with my vet about this, and these are the supplements that came up most often.
Calcium becomes important when dogs aren’t eating bones, since bones are a natural source of calcium in the wild. Many vets recommend a calcium supplement or finely ground eggshell powder to fill this gap.
Omega-3 fatty acids support coat health, joint function, and help manage inflammation — fish oil is the easiest and most common source for dogs. A quality canine multivitamin can also cover any remaining nutritional gaps, especially if this recipe is replacing commercial food entirely.
Again, I want to be upfront — I’m not a veterinary nutritionist. This recipe is meant to be a wholesome, real-food option, not a replacement for professional dietary guidance. If your dog has a specific health condition or you’re planning to feed homemade food exclusively, please involve your vet in that decision.
FAQs
Can I substitute turkey or beef for chicken?
Yes, absolutely. I’ve used ground turkey and lean ground beef (well-drained) as alternatives and both work well in this recipe. Fish is another great option, particularly for dogs with chicken sensitivities.
Whatever protein you choose, make sure it’s fully cooked and completely bone-free before it goes into the mix.
What if my dog has food sensitivities?
This is honestly one of the best things about making food at home — I have complete control over every ingredient. If my dog reacts to chicken, I can switch to turkey or fish without changing anything else.
If a certain vegetable causes issues, I swap it out for another from the safe list. Homemade food takes the guessing out of ingredient management in a way that commercial food rarely allows.
Should I add salt or seasonings?
No. Dogs don’t need added salt, and a lot of common seasonings — including garlic powder and onion powder — are actually toxic to them. The natural flavors from the chicken broth, sweet potato, and vegetables are genuinely enough. I’ve never had a dog turn this down because it wasn’t seasoned.
Final Thoughts
I’ve made this recipe across different dogs and different life stages, and it has consistently delivered. It started as a solution for a dog who couldn’t eat normally anymore, and it turned into a staple I return to whenever one of my dogs needs something gentler and more intentional than what comes out of a bag.
It doesn’t require any special skills or equipment — just a little time and the willingness to cook for your dog the way you might cook for yourself. And if your dog is anything like mine, the way they clean that bowl will tell you everything you need to know about whether it’s worth making again.
All content on this site is written and reviewed by our experienced team to ensure it is accurate, reliable, and helpful for our readers. Our Our Process page explains how we carefully research and create high-quality content, while our Team page introduces the professionals behind our work. We also provide clear guidelines for content or image concerns on our Image Removal page, so you can trust that we prioritize transparency, quality, and reader safety.