How To Clean Your Dishwasher So It Actually Cleans Better
We all want our dishes to come out clean, shiny, and ready to use, right? But sometimes, your dishwasher seems to have other ideas—leaving plates gritty, glasses cloudy, or even giving off a mysterious odor. If that’s happening, it’s usually a sign that your dishwasher is asking for a serious cleaning. The good news? You don’t need a toolbox or a degree in appliance repair to fix it. A little time, a few simple items from your pantry, and maybe some background tunes or a podcast can make the process easy and even kind of satisfying.
Why Your Dishwasher Needs a Spa Day
Think about it: every time you load dirty plates into your dishwasher, all kinds of mess go in too. Tiny bits of food, grease, soap scum, and even hard water minerals build up in places you can’t see. Over time, that gunk clogs the spray arms, filters, and drains, leaving your dishwasher less effective and sometimes noisier than it should be. Giving your dishwasher a proper cleaning regularly keeps it running smoothly, reduces unpleasant odors, and ensures your dishes come out sparkling every time. It’s basically dental hygiene for your plates and bowls, and it’s surprisingly satisfying once you see the results.
Quick Pre-Clean: What To Do Before You Scrub
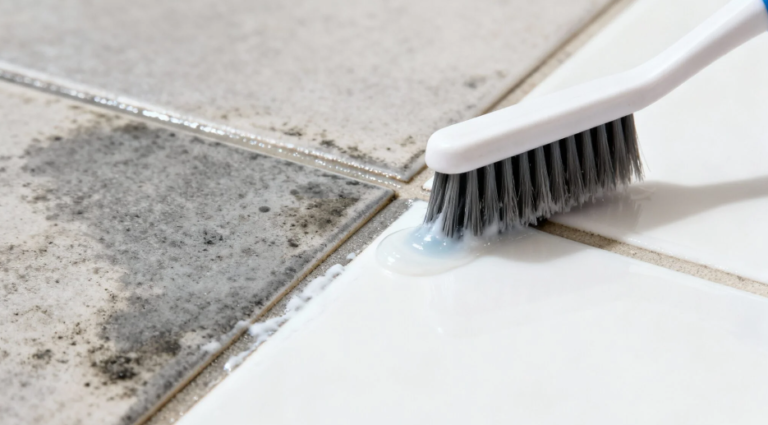
Before diving into a full cleaning, take a few minutes to do a fast check. Start by removing the bottom rack and scanning for obvious debris. That could be lemon seeds, pasta bits, or even the occasional sticker from a jar. Next, inspect the drain area—if it looks like a mini compost bin, it’s time to clean it out carefully. Don’t forget the door gasket, that rubber seal collects grime and slime over time. A damp cloth with a little dish soap usually does the trick. Taking these small steps first makes the deeper cleaning much easier and more effective, and you might be surprised at how much hidden dirt you uncover.
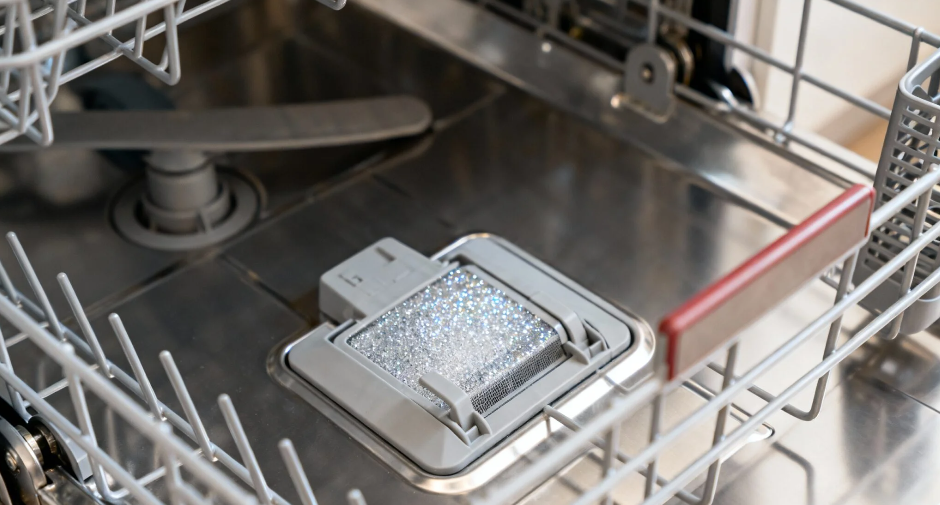
The Filter: The Unsung Hero You Probably Forgot Exists
Many modern dishwashers have a removable filter located under the bottom spray arm. Its job is to catch food particles so they don’t clog your pump. Over time, grease and sludge accumulate here, and a dirty filter can seriously impact cleaning performance.
To clean it:
- Twist and lift to remove the filter assembly. Most filters have two parts: a fine mesh and a coarse screen.
- Rinse under hot water and use an old toothbrush to scrub away stuck-on food. Be gentle with the mesh to avoid damage.
- Soak if needed in warm water with a splash of dish soap and a tablespoon of baking soda for 10–15 minutes.
- Reinstall properly, ensuring it locks into place. A loose filter can cause grinding noises and poor cleaning.
If you use your dishwasher daily, clean the filter monthly. If not, every 2–3 months works fine. This single step can drastically improve how your dishwasher performs.
Spray Arms: Where the Magic Usually Happens
Spray arms are where most of the cleaning actually happens. If they’re clogged or can’t spin freely, your dishes might still come out dirty, and nobody wants crunchy lasagna leftovers on their plate.
To keep them working:
- Remove the arms, either by unclipping or unscrewing. Check your manual if needed.
- Clear the holes with a toothpick or thin wire to remove mineral buildup and gunk.
- Flush with hot water to push out any remaining debris.
- Test the spin by hand before reinstalling—they should rotate freely without scraping or resistance.
If you live in a hard water area, this is worth doing every 2–3 months. Ten minutes now can prevent a lot of frustration later.
Deep-Clean Cycle: Vinegar First, Baking Soda Second
Now it’s time to give your dishwasher a true spa treatment. No harsh chemicals required—white vinegar and baking soda are your best friends.
Vinegar rinse for grease and soap scum:
- Place a dishwasher-safe cup filled with white vinegar on the top rack of an empty dishwasher.
- Run a hot cycle using the highest temperature. Skip the dry cycle if possible.
Baking soda refresh for odors and stains:
- Sprinkle about ½ cup of baking soda across the bottom of the dishwasher tub.
- Run a short, hot cycle. Baking soda helps brighten the interior and neutralize smells.
Never mix vinegar and baking soda in the same cycle—you’re cleaning, not creating a science experiment.
Attack the Hidden Grime: Seals, Racks, and the Utensil Basket
Some areas don’t get cleaned by the spray arms, so it’s time for some hands-on scrubbing.
- Door gasket: Wipe with warm soapy water, then give it a quick rinse with a vinegar-damp cloth. Focus on corners and folds where grime collects.
- Edges and tub lip: Open the door and clean the rim; gunk loves hiding here.
- Utensil basket: Remove and scrub in the sink to get rid of trapped food particles.
- Racks and tines: Check for chips or rust. A rack repair kit can prevent rust from spreading.
These spots are often the source of lingering odors even after a deep clean, so don’t skip them.
Hard Water Stains and Mineral Buildup: Choose Your Fighter
Hard water can leave chalky spots on dishes and clog dishwasher parts. There are several ways to tackle it:
- White vinegar: Excellent for general descaling of the tub and removable parts.
- Citrate-based dishwasher cleaners: Ideal for monthly use in very hard water areas.
- Rinse aid: Helps water sheet off dishes and reduces spots.
If your dishwasher has a built-in softener, keep it filled with salt as recommended. Cloudy glassware that doesn’t improve with vinegar may be etched from harsh water conditions. Prevention with rinse aid and proper detergent dosing is key.
Detergent and Loading: The Unsexy Stuff That Matters
Even if your dishwasher is clean, loading it poorly or using detergent incorrectly will ruin results.
Detergent tips:
- Use good-quality detergent—pods or powder, but don’t mix them.
- Measure properly; too much soap leaves a film, too little leaves grease.
- Store pods dry to prevent clumping.
Smart loading:
- Angle bowls and plates toward the center. Avoid stacking flat.
- Keep tall items like trays or cutting boards out of the spray path.
- Skip pre-rinsing; modern detergents need a little residue to work effectively.
- Use the right cycle for your mess—quick washes won’t handle baked-on food.
Following these steps ensures your dishes get the attention they deserve.
Monthly Maintenance Routine That You’ll Actually Do
Consistency is better than occasional marathon cleaning.
- Weekly: Wipe door edges and gasket, clear the drain area.
- Monthly: Clean the filter, run a vinegar rinse, then a baking soda refresh.
- Quarterly: Unclog spray arms and inspect racks and baskets.
- As needed: Use a descaler for mineral buildup.
Setting reminders makes this easy and prevents big cleaning jobs later.
FAQ
Can I use bleach in my dishwasher?
Only if the interior is plastic and your manual allows it. Never mix bleach with stainless steel or vinegar.
Why do dishes still smell after cleaning?
Odors usually hide in the filter, drain, and door gasket. Clean thoroughly and run a vinegar cycle. Leave the door slightly open after cycles to prevent moisture buildup.
Do I need to rinse dishes before loading?
No. Scrape big chunks, but leaving some residue actually helps modern detergents clean better.
Why are my glasses cloudy?
If a vinegar soak clears them, it’s mineral buildup. If not, it’s etching. Prevention with rinse aid, correct detergent, and moderate temperatures is key.
Is a dishwasher cleaner worth it if I already use vinegar?
Yes. Commercial cleaners with citric acid handle tough mineral buildup better. Alternating vinegar and cleaner monthly works well.
How do I prevent food from redepositing?
Clean the filter, unclog spray arms, load correctly, use enough detergent, run hot cycles, and always use rinse aid. Make sure water reaches at least 120°F (49°C).
Make It Shine, Make It Last
With a little regular TLC, your dishwasher can deliver consistently clean, sparkling dishes. Focus on the filter, spray arms, vinegar and baking soda cycles, and monthly upkeep. Pair that with smart loading and correct detergent use, and your kitchen will stay cleaner, your glassware brighter, and you’ll feel that little rush of satisfaction every time you open the door.