Human Grade Dog Food Recipes: 2 Fresh Meals Made With Real Grocery Store Ingredients
Last week, I was in my kitchen cooking a simple dinner—chicken, broccoli, and sweet potatoes—when my dog sat there watching me closely. That look made me stop and think. I checked his kibble bag, and honestly, I couldn’t recognize half the ingredients. That moment pushed me to rethink what I was feeding him.
Save For Later
I realized most commercial dog food contains processed ingredients that don’t match real food quality. So I switched to simple homemade meals using grocery-store ingredients. In this guide, I’m sharing two easy recipes I personally use, along with feeding tips, storage advice, and supplement guidance to keep meals balanced and safe.
Key Takeaways
- I use real, grocery-store ingredients for my dog’s meals
- Homemade food can cost the same as premium kibble ($7–$11 per batch)
- Each recipe lasts 3–5 days in the fridge or 3 months frozen
- Calcium supplements are necessary for long-term feeding
- Portion control matters—monitor your dog’s weight weekly
What “Human Grade” Actually Means
When I first saw “human-grade” on pet food labels, I thought it meant premium or organic. But in reality, it simply means the ingredients are safe enough for humans to eat.
From my experience, this means using the same chicken, rice, and vegetables I buy for myself. No mystery fillers or by-products. According to pet food standards, many kibble products use rendered ingredients that wouldn’t pass human inspection.
What I’ve learned is that cooking at home automatically meets this standard. If it comes from a regular grocery store, it’s human-grade. No special label needed.
Pro Tip: If you wouldn’t cook it for yourself, don’t serve it to your dog.
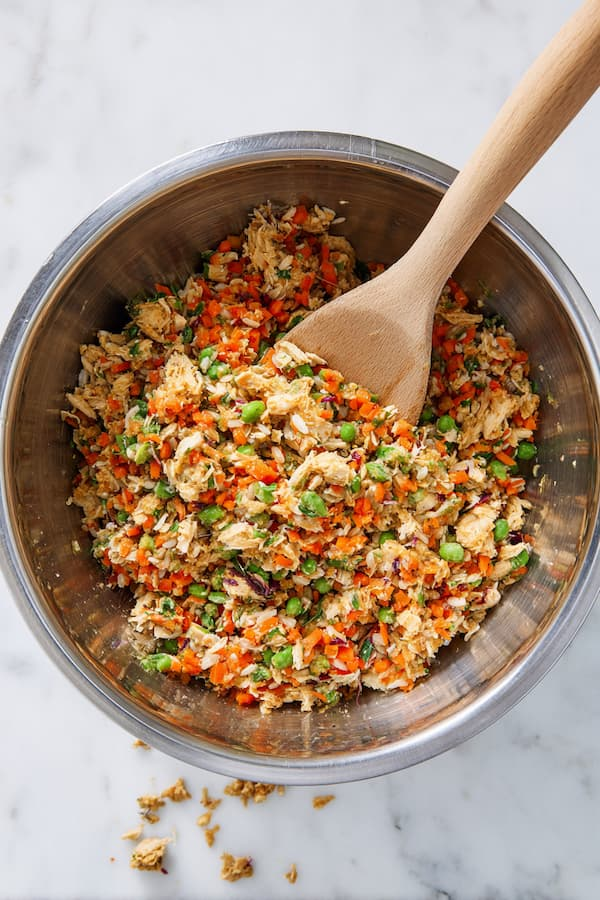
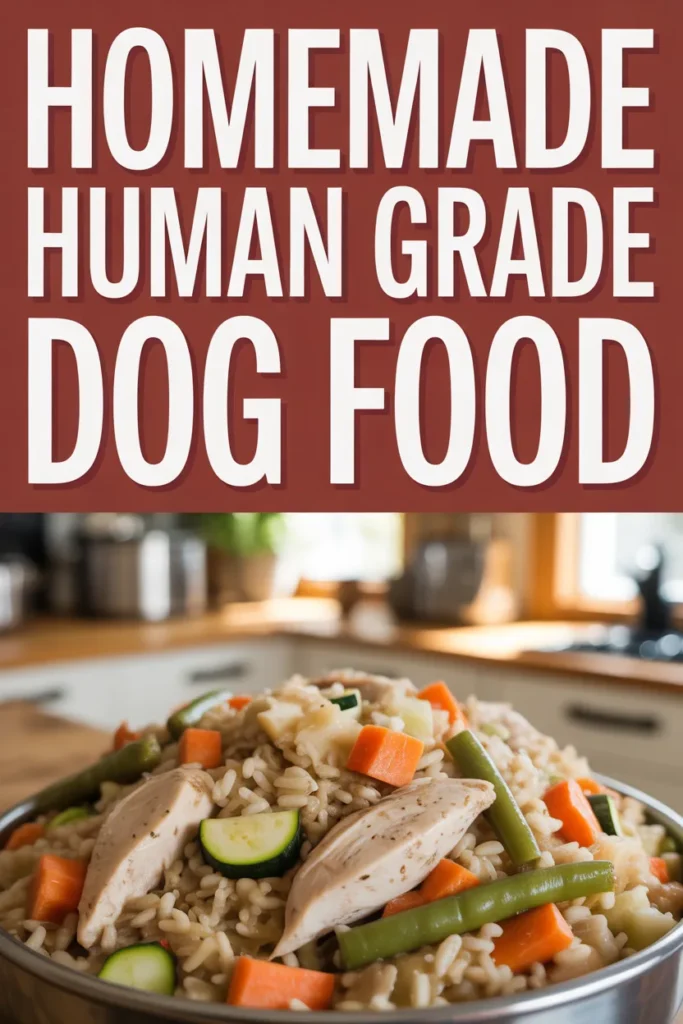
#1 Chicken, Brown Rice & Vegetable Skillet
This is my go-to recipe when I want something quick and reliable. I make a big batch, and it lasts several days.
Ingredients
- Boneless chicken thighs (1.5 lbs) – protein + healthy fat
- Brown rice (1 cup) – fiber and steady energy
- Zucchini (1) – easy digestion
- Carrots (2) – vitamin A + natural sweetness
- Green beans (1 cup) – low calorie, filling
- Coconut oil (1 tbsp) – supports skin and coat
- Calcium supplement – essential mineral support
- Water (2.5 cups)
Estimated Cost: $7–$9
Yield: ~8 cups
Step by Step Instructions
Step 1: Start the Brown Rice
I cook rice first because it takes the longest (about 25 minutes). Proper cooking matters since undercooked rice can upset digestion.
Step 2: Cook the Chicken
I chop chicken into small pieces and cook it in coconut oil. It takes about 8–10 minutes until fully cooked and slightly browned.
Step 3: Add the Carrots and Zucchini
I add carrots first since they take longer. After 5 minutes, I mix in zucchini and cook until soft but not mushy.
Step 4: Add the Green Beans
Green beans go in last and cook quickly. Frozen or fresh both work well.
Step 5: Combine With the Rice
Once rice is ready, I mix everything together. The texture becomes similar to a thick stir-fry.
Step 6: Cool and Portion
I always let it cool for at least 20 minutes before storing to avoid moisture buildup.
Storage
- Fridge: up to 5 days
- Freezer: up to 3 months
I usually store 3 days’ worth in the fridge and freeze the rest in portions.
Serving Guidelines
- 10 lbs: 1 cup daily
- 20 lbs: ~1.75 cups daily
- 30 lbs: ~2.25 cups daily
I always adjust portions based on weight changes.
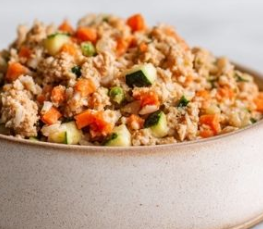
#2: Beef, Potato & Spinach Stew
When I want something richer, I switch to this recipe. It’s slightly more filling and great for rotation.
Ingredients
- Ground beef 90/10 (1.5 lbs) – protein + fat
- Yukon potatoes (2) – easy to digest carbs
- Spinach (2 cups) – iron + vitamins
- Carrots (2) – fiber
- Peas (¾ cup) – plant protein
- Olive oil (1 tbsp) – healthy fat
- Parsley (optional) – supports fresh breath
- Calcium supplement
- Water or broth (3 cups)
Estimated Cost: $9–$11
Yield: ~9 cups
Step by Step Instructions
Step 1: Brown the Ground Beef
I cook beef for about 7 minutes and break it into small pieces. I keep some fat for nutrition.
Step 2: Add Potatoes and Carrots
I simmer everything for 20 minutes until potatoes are soft.
Step 3: Mash Half the Potatoes
This is my favorite trick—it thickens the stew naturally without adding anything extra.
Step 4: Add Greens and Peas
Spinach cooks down quickly but still delivers nutrients. This step takes about 3–4 minutes.
Step 5: Finish With Olive Oil
I add oil at the end to preserve nutrients and improve taste.
Step 6: Cool Completely
I never seal hot food—this helps prevent spoilage and bacteria.
Storage
- Fridge: 5 days
- Freezer: 3 months
This recipe freezes especially well due to the potato base.
Serving Guidelines
- 10 lbs: 0.75 cups
- 20 lbs: 1.5 cups
- 30 lbs: 2 cups
This meal is calorie-dense, so I use slightly smaller portions.
Human Grade vs. Store-Bought: What You’re Actually Avoiding
From my experience, the biggest difference is ingredient transparency. Homemade meals use real foods like chicken, rice, and vegetables, while many kibble options rely on processed fillers.
Studies show that premium kibble can cost similar per serving compared to homemade meals when bought in bulk. So the cost difference isn’t as big as most people think.
Insight: Feeding real food reduces reliance on artificial preservatives and fillers.
The Supplement Question
This is something I didn’t understand at first—homemade meals still need supplements.
I personally use:
- Calcium powder (daily)
- Multivitamin (every other day)
This usually costs me around $15/month.
Important Fact: Calcium deficiency can lead to bone issues in dogs if meals aren’t balanced.
Pro Tip: Always ask your vet for dosage based on your dog’s weight.
FAQ
How do I know if an ingredient is human-grade?
If I can buy it from a grocery store and eat it myself, it qualifies.
Can I use ground turkey instead?
Yes, I swap it often depending on price. Use 85/15 or 90/10.
Is brown rice better than white rice?
Brown rice has more fiber, but white rice is easier to digest. I use both depending on my dog’s needs.
The Cutting Board Moment
That moment in my kitchen changed how I feed my dog. It wasn’t dramatic—I just realized I could do better with what I already had.
Now, I cook simple meals using the same ingredients I use for myself. Nothing complicated, just real food.
If you’re unsure about switching, start with one recipe. That’s exactly how I began.
Final Note
I’m not a vet or nutritionist, but I’ve learned a lot through experience and research. If you plan to feed homemade food long-term, it’s always smart to involve your vet.
All content on this site is written and reviewed by our experienced team to ensure it is accurate, reliable, and helpful for our readers. Our Our Process page explains how we carefully research and create high-quality content, while our Team page introduces the professionals behind our work. We also provide clear guidelines for content or image concerns on our Image Removal page, so you can trust that we prioritize transparency, quality, and reader safety.