Homemade Long-Lasting Dog Treats You Can Keep for Weeks
If you live with a dog who swallows treats like it’s a competitive sport, you already know the struggle. You hand over something you just bought, they crunch once, maybe twice, and it’s gone. Then they look at you like you’ve betrayed them. I’ve been there. I’ve wasted money on treats that promised “long-lasting” and barely survived 90 seconds.
That’s exactly why I started making my own. When you control the ingredients, the thickness, the baking time, and the texture, you can actually create something that slows your dog down. These recipes aren’t complicated, and they don’t require fancy equipment. What they do require is a little patience — and trust me, it’s worth it when you see your dog fully focused, chewing away instead of inhaling everything in sight.
Below are the recipes I rely on when I want something durable, safe, affordable, and genuinely satisfying for my dog.
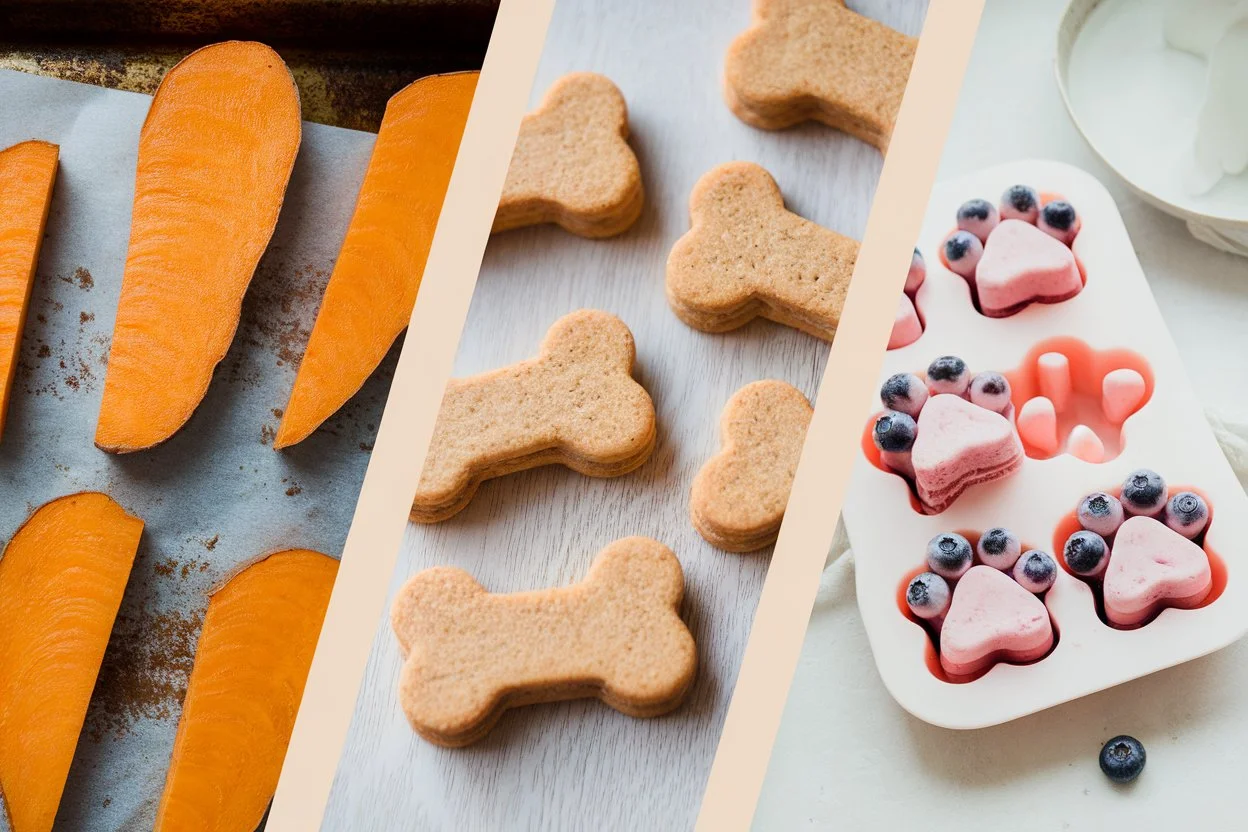
Baked Sweet Potato Chews
Why Sweet Potato Works So Well
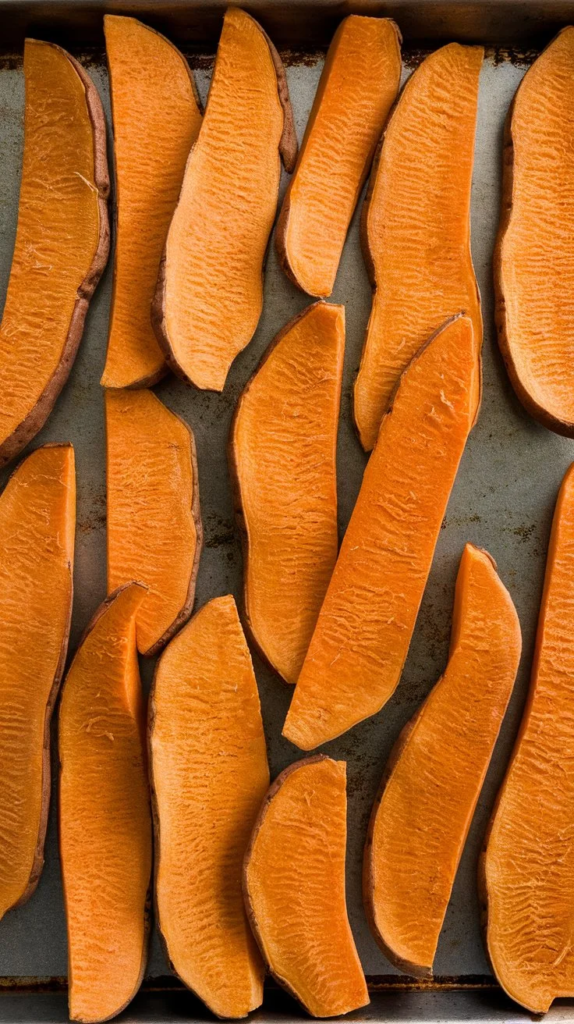
If I had to pick one go-to long-lasting treat, this would be it. Sweet potatoes are naturally dense, slightly fibrous, and when baked low and slow, they transform into chewy strips that can keep a dog occupied far longer than a regular biscuit.
They’re simple. No additives. No mystery ingredients. Just real food. And because you slice them yourself, you decide how tough they turn out. Thicker slices mean more chewing time. That’s something most store-bought treats don’t give you control over.
Ingredients
2–3 large sweet potatoes
How to Make Them Properly
Start by washing them thoroughly. I always leave the skin on because that extra fiber adds texture and helps with firmness. Slice them lengthwise into about ¼-inch thick slabs. If your dog is a heavy chewer, go a little thicker.
Lay them directly on a baking sheet. No oil. No seasoning. Bake at 250°F (120°C) for about 2.5 to 3 hours. Flip them halfway so both sides dry evenly.
When they come out, they’ll still feel slightly soft. That’s normal. As they cool, they firm up and become beautifully chewy. If you want them even tougher, you can leave them in the oven a little longer.
Once cooled, store them in an airtight container. They keep for weeks — unless your dog figures out where you hid them.
Peanut Butter Banana Biscuits
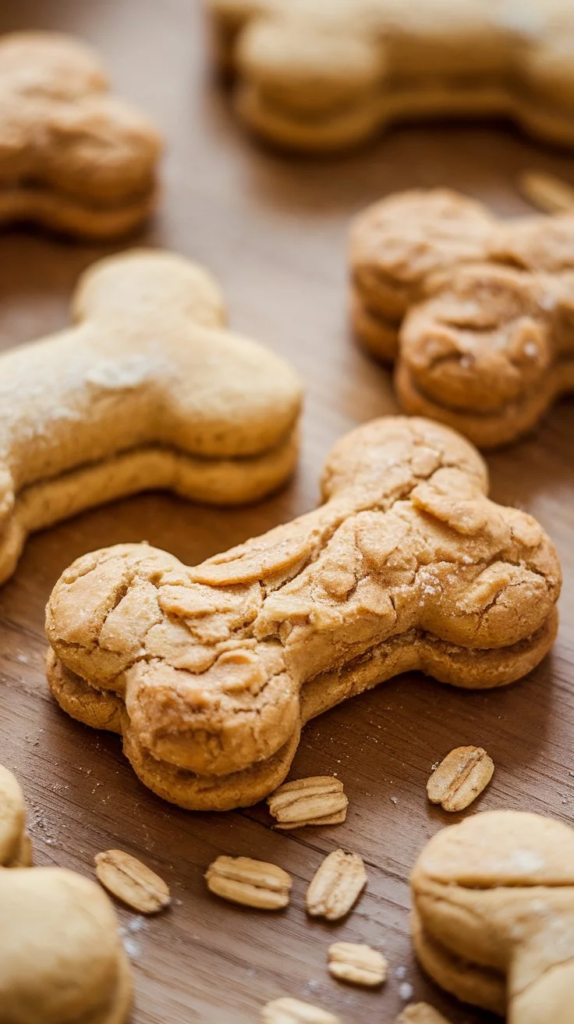
A Crunchy Classic That Dogs Go Crazy For
There’s something about peanut butter and banana that dogs absolutely love. The smell alone gets tails wagging. But what makes these special isn’t just the flavor — it’s the texture. When baked long enough, these biscuits turn hard and crunchy, which makes them ideal for dogs that tend to power through softer treats.
I’ve made these countless times, and the trick is letting them cool completely. That’s when they reach their full hardness.
Ingredients
1 ripe banana
½ cup natural peanut butter (make absolutely sure it contains no xylitol)
1½ cups whole wheat flour
¼ cup rolled oats
Optional: 1 egg
How to Get the Perfect Hard Texture
Mash the banana thoroughly. Mix in the peanut butter and the egg if you’re using it. Then gradually add the oats and flour until a dough forms. It should be thick and slightly firm, not sticky.
Roll it out and cut into chunky shapes. Thin biscuits won’t last — thicker ones will. Bake at 325°F (165°C) for 30 to 35 minutes until golden and firm.
After baking, let them cool completely on a rack. They harden significantly as they cool. If you want them even crunchier, you can leave them in the turned-off oven to dry a bit longer.
Store them in a paper bag or loosely sealed container to keep that crisp texture.
Dehydrated Chicken Jerky Strips
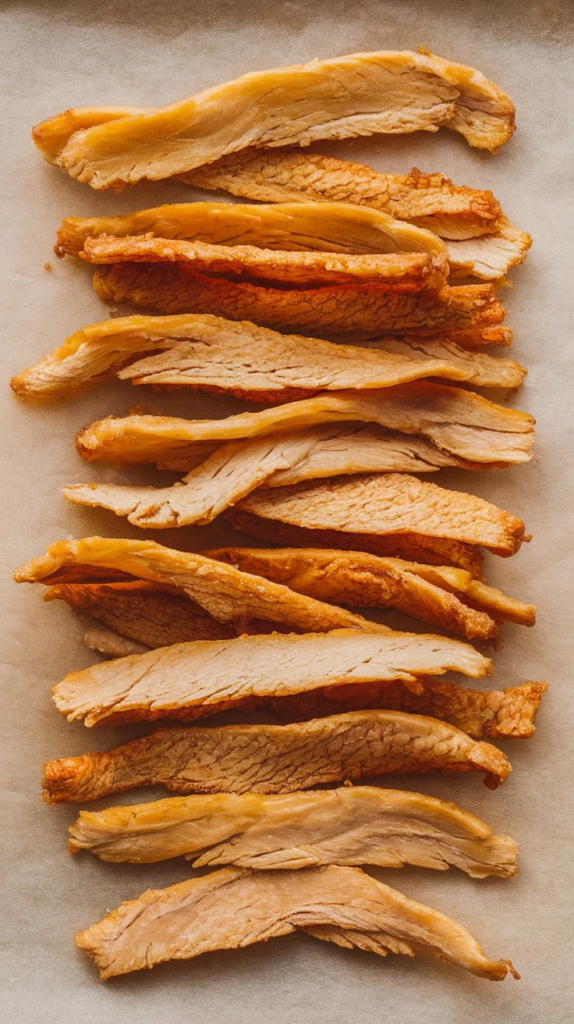
High-Value and Long-Lasting
If you want a treat that instantly grabs your dog’s attention, this is it. Jerky has that chewy resistance dogs love, and when sliced correctly and dried fully, it takes time to work through.
The key here is thickness and drying time. Too thin, and it becomes brittle. Too thick without enough drying, and it won’t store safely.
Ingredients
2–3 boneless, skinless chicken breasts
How to Dry It Safely and Properly
Slice the chicken into ¼-inch strips, cutting with the grain to increase chewiness. Lay them on a parchment-lined baking sheet.
Bake at 200°F (95°C) for 2 to 3 hours. Flip halfway through. You’re looking for a firm, rubbery texture with no moisture left inside.
Let them cool completely before storing. Always refrigerate jerky, and use within a couple of weeks. You can also freeze portions if you’ve made a big batch.
Your kitchen will smell strongly of chicken while these are drying, but the payoff is a treat that dogs find irresistible and genuinely satisfying to chew.
Pumpkin Molasses Hard Biscuits
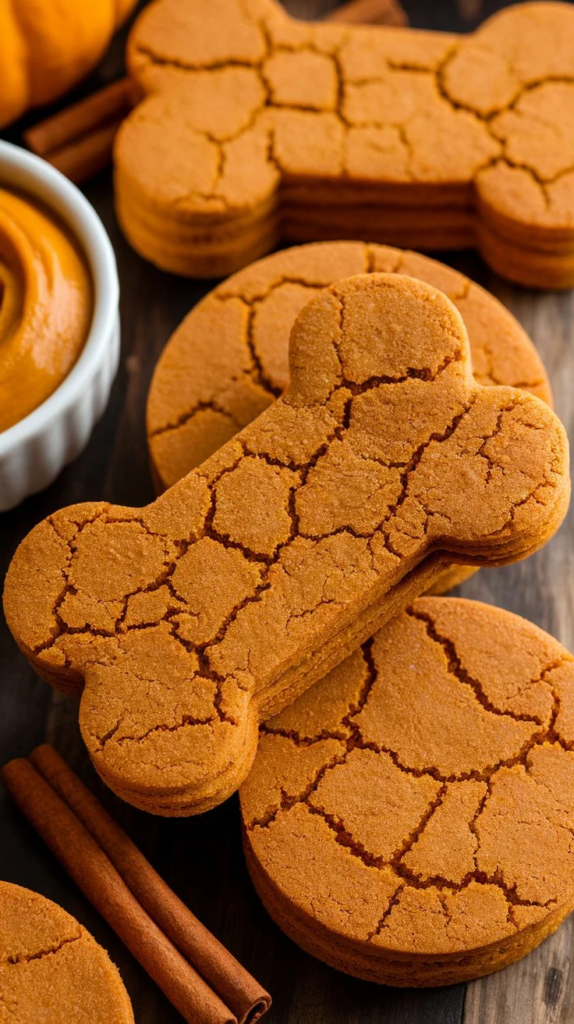
Dense, Crunchy, and Digestive-Friendly
Pumpkin isn’t just seasonal hype. It’s incredibly useful for supporting digestion, and when combined with molasses and flour, it creates thick, sturdy biscuits that hold their shape and provide solid crunch.
These are excellent if your dog needs something firm but not overly rich.
Ingredients
1 cup plain canned pumpkin
¼ cup unsulphured molasses
2½ cups whole wheat flour
½ tsp cinnamon (optional)
How to Make Them Extra Hard
Mix everything into a stiff dough. It should feel solid, not sticky. Roll it out and cut thick shapes — bones, logs, whatever you prefer.
Bake at 325°F (165°C) for 35 to 40 minutes. Once done, turn the oven off and leave the biscuits inside overnight. That slow cooling process removes extra moisture and makes them significantly harder.
They store well in your pantry and maintain their crunch for weeks when kept sealed properly.
Frozen Yogurt & Blueberry Chew Bites
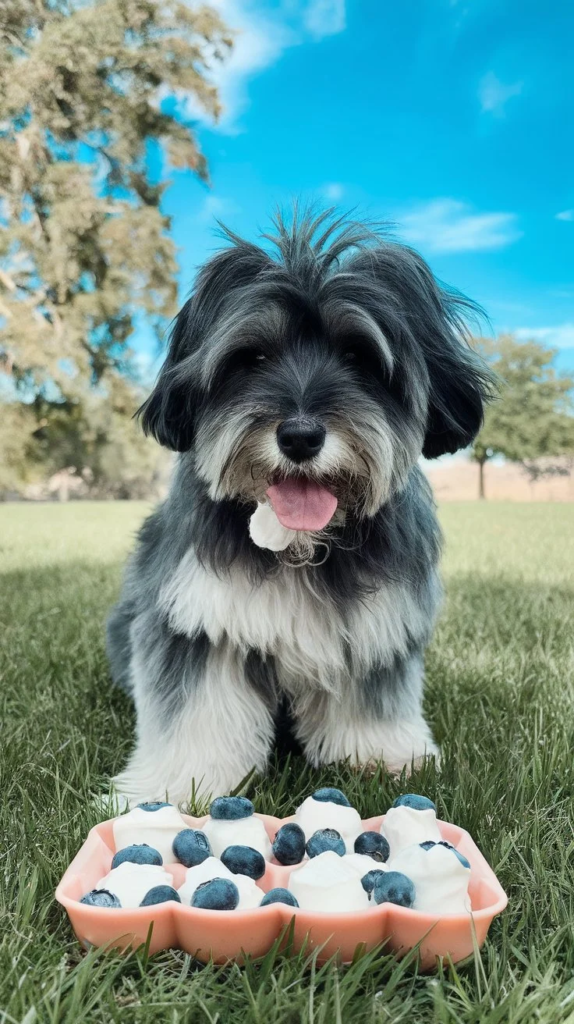
Slow-Down Treats for Warm Days
Not every long-lasting treat has to be dry and crunchy. Frozen treats can work beautifully, especially for puppies or dogs that tend to gulp down food too quickly. The cold temperature naturally slows them down.
Ingredients
1 cup plain Greek yogurt
½ cup blueberries
1 tbsp chia seeds (optional)
How to Freeze for Maximum Effect
Blend the yogurt and blueberries until smooth. Pour into silicone molds or small muffin tins. Add chia seeds if you want extra texture.
Freeze overnight until fully solid.
These are especially helpful during warmer months, but they’re also great when your dog needs something soothing for teething. Because they’re frozen solid, they require licking and gradual chewing instead of immediate swallowing.
How to Store Homemade Long-Lasting Dog Treats
Proper storage matters just as much as preparation.
Baked treats should be kept in an airtight container at room temperature for up to two weeks. Refrigeration extends freshness.
Jerky must always be stored in the fridge and can last up to three weeks. For longer storage, freeze it.
Frozen treats remain in the freezer until serving.
If you ever notice moisture buildup, mold, or unusual smells, discard them immediately.
Ingredient Substitutions and Adjustments
If your dog doesn’t tolerate whole wheat flour, you can use regular flour, oat flour, or rice flour instead. Always introduce new ingredients gradually, especially if your dog has sensitivities.
For peanut butter recipes, always check labels carefully. Xylitol is extremely dangerous for dogs and must never be used.
You can also adjust thickness in every recipe. Thicker treats generally last longer, but they should still be appropriate for your dog’s size and chewing strength.
What Makes a Treat Truly Long-Lasting
The real secret isn’t a special ingredient. It’s moisture control and density. The lower the moisture and the thicker the structure, the longer it takes your dog to break it down. Slow baking, proper dehydration, and post-bake drying are what transform ordinary recipes into durable chews.
No treat is indestructible. If your dog is extremely aggressive with chewing, nothing will last forever. But these recipes consistently outlast typical store-bought biscuits because you control how firm they become.
Final Thoughts of Long-Lasting Dog Treats
If you’re tired of spending money on treats that disappear in seconds, making your own changes everything. You know exactly what’s going into them. You can adjust the texture. You can batch-make and store properly.
I’ve seen firsthand how much longer these last compared to standard packaged snacks. More importantly, I’ve seen how focused and satisfied a dog can be when given something that actually challenges them to chew.
Start with one recipe. See how your dog responds. Then experiment with thickness and drying times until you find the perfect balance. Once you do, you won’t go back to buying expensive “long-lasting” treats that barely last at all.