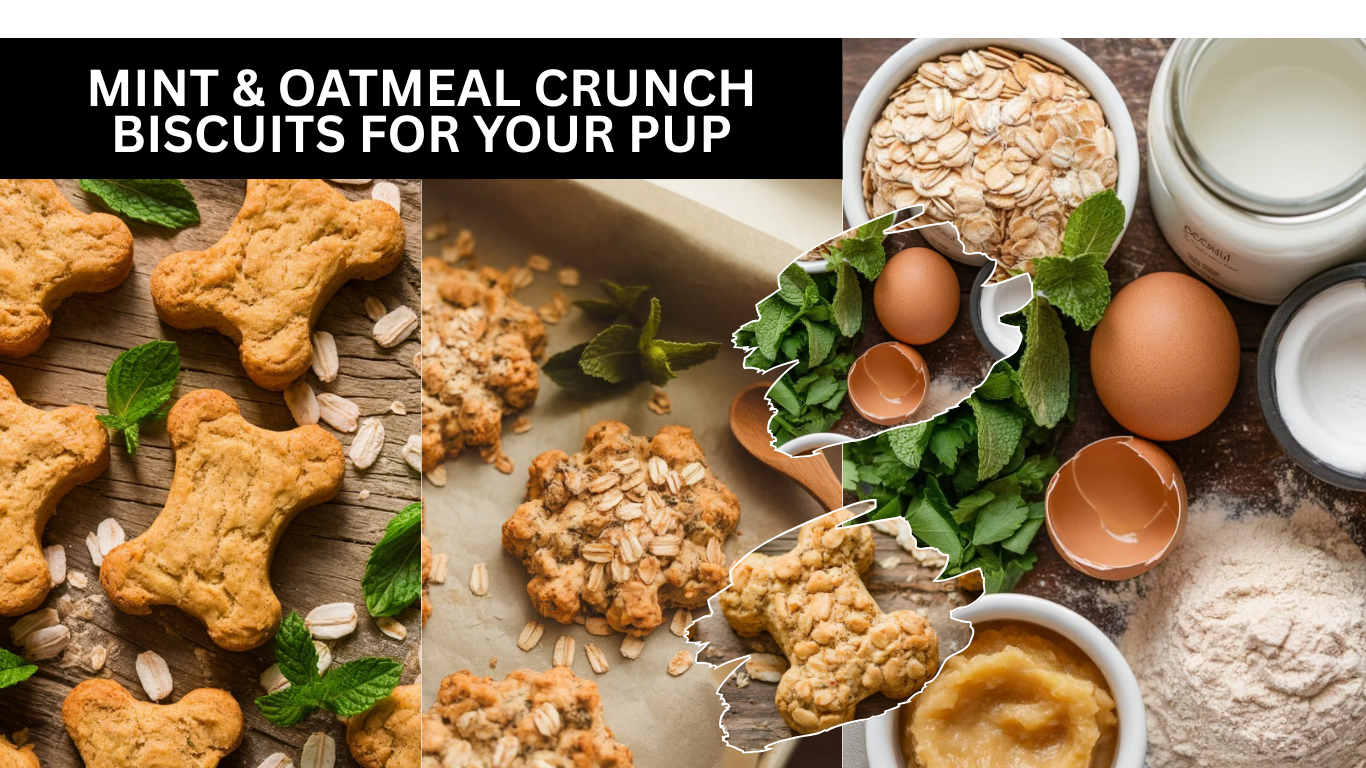
Mint & Oatmeal Crunch Biscuits for Your Pup
Ever get a whiff of your dog’s breath and instantly regret leaning in for a kiss? I know that feeling all too well. My own pup once had breath that could knock you out from across the room, and I was desperate for a solution. That’s when I decided to try making homemade dog treats — specifically, Mint & Oatmeal Crunch Biscuits. These treats are designed not just to be tasty, but to naturally freshen your dog’s breath while giving their teeth a gentle scrub. The best part? They’re easy to make, and you can actually control what goes into them, which is so much better than store-bought options full of mystery ingredients.
Why These Biscuits Rock

Let’s break down why these biscuits are a total game-changer. First, mint is amazing for freshening breath. No more dodging kisses like your dog is some kind of dragon! Mint also supports digestion, which is a nice bonus. Oatmeal is another hero ingredient here — it’s gentle on the stomach, making it perfect if your dog has a sensitive belly like mine does. The crunchiness of the biscuits is more than satisfying; it actually helps scrape plaque off teeth, which is basically giving your dog a mini dental clean with every bite. And unlike many commercial treats, these biscuits don’t hide any weird, unpronounceable ingredients. You know exactly what’s going in, and your dog will love the flavor.
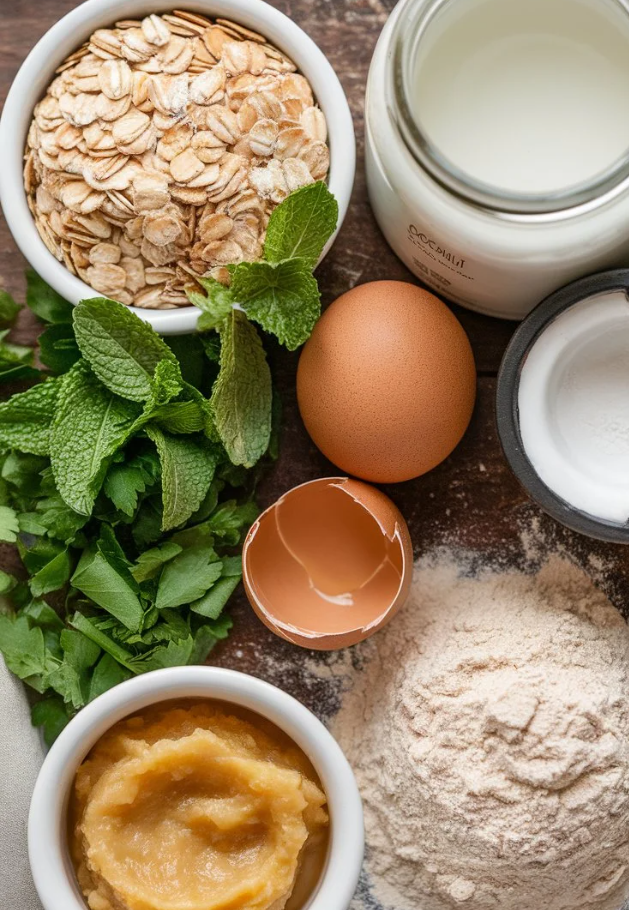
Ingredients
Here’s what you’ll need to make these treats:
- 2 cups rolled oats – fiber-rich and healthy for digestion.
- 1/2 cup fresh mint leaves, finely chopped – the ultimate natural breath freshener.
- 1/4 cup fresh parsley, finely chopped – another layer of breath-freshening goodness.
- 1 cup whole wheat flour (or oat flour for a gluten-free option) – gives structure to the dough.
- 1/2 cup unsweetened applesauce – adds a hint of natural sweetness your dog will love.
- 1 egg – helps bind everything together.
- 2 tbsp melted coconut oil – gives the biscuits a lovely shine and supports healthy skin and coat.
- 1/4 cup water – adjust as needed to make the dough workable.
Every ingredient here isn’t just filling — it actually benefits your dog’s health, from digestion to dental care, and even coat condition.
Instructions
Step 1: Preheat and Prep
Start by heating your oven to 325°F (163°C). Line a baking sheet with parchment paper. Trust me, cleaning burnt treats off a pan is nobody’s idea of fun.
Step 2: Blend the Oats
Put your rolled oats in a blender or food processor and blitz them until they resemble a coarse flour. This helps give the treats a better texture and makes them easier for your dog to chew without getting stuck in their teeth.
Step 3: Mix the Dough
In a large bowl, combine the blended oats, flour, chopped mint, and parsley. Then add applesauce, egg, and melted coconut oil. Mix everything until it starts forming a dough. If the dough feels too dry, add water slowly, one tablespoon at a time, until it comes together. You want a dough that’s firm enough to roll, but not sticky.
Step 4: Roll and Cut
Lightly flour your countertop and roll out the dough to about a quarter-inch thick. You can use a cookie cutter if you want fun shapes, like bones, or just cut it into squares. Your dog will happily eat whatever shape you make, so don’t stress about perfection.
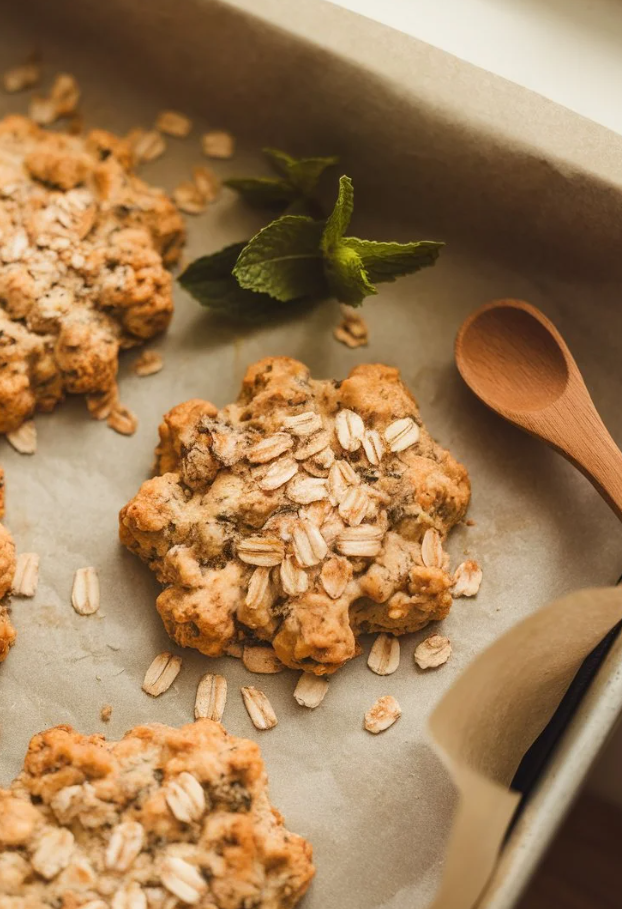
Step 5: Bake to Perfection
Arrange the treats on your lined baking sheet and bake for 25–30 minutes. They should turn a golden-brown color and feel crisp to the touch. Keep an eye on them so they don’t overbake — we want crunchy, not rock-hard.
Step 6: Cool and Serve
Once baked, let the treats cool completely. Hot biscuits can burn your dog’s mouth, and they may lose that perfect crunch if stored too soon. Once cooled, store them in an airtight container, and they should stay fresh for about two weeks — if they last that long!
Common Mistakes
Even with a simple recipe like this, a few mistakes can ruin the batch. Here’s what I’ve learned from experience:
- Too Much Mint – A little goes a long way. Dogs have super sensitive noses, and too much mint can make them refuse the treat altogether. Stick to the recipe amounts.
- Dough Too Dry or Wet – If the dough crumbles, add water a little at a time. Too sticky? Sprinkle in a bit more flour or oats. You want a nice, workable dough that rolls easily.
- Overbaking – These treats should be crunchy, not solid enough to break a tooth. Keep an eye on baking time and remove them when golden.
- Skipping Cooling – Don’t be tempted to feed your dog right away. Letting the treats cool preserves their crunch and avoids any burnt tongues.
- Storing While Warm – Moisture ruins the texture. Always wait until the biscuits are fully cooled before sealing them in a container.
Bonus Tips for the Best Biscuits

Want to take these treats to the next level? Leave them in the oven (turned off) for 10–15 minutes after baking for extra crunch. For tiny dogs, cut the dough into smaller pieces before baking. A little grated carrot can boost freshness and help scrub teeth. And if you make a big batch, these freeze really well — just thaw before serving.
Final Thoughts of Mint & Oatmeal Crunch Biscuits for Your Pup
Making your own dog treats is not only more affordable than buying them, but it’s healthier and more rewarding. You get full control over the ingredients, and your dog gets something that tastes amazing while supporting their teeth and digestion. Plus, there’s nothing better than seeing your pup happily munch on a treat you made with your own hands — and getting a sweet, fresh-breath kiss in return. Grab your ingredients, roll up your sleeves, and start baking. Your dog (and your nose) will thank you!