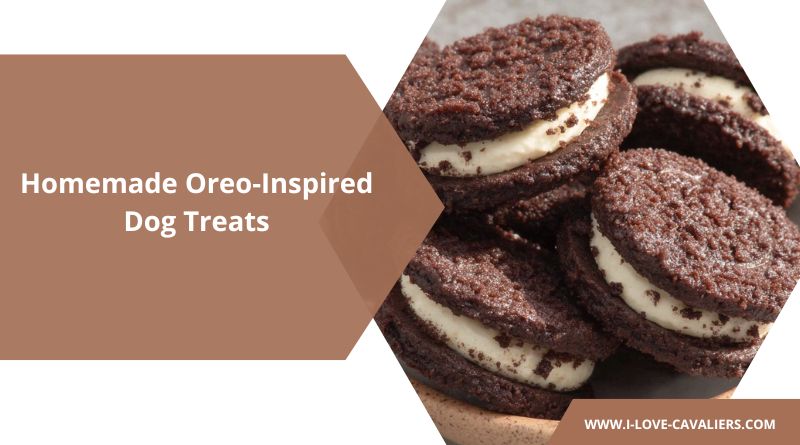
Oreo-Inspired Dog Treats (Carob Sandwich Cookies)
I still remember sitting on the couch enjoying my snack when my dog gave me that “why aren’t you sharing?” look. It made me pause because I knew chocolate is dangerous for dogs.
That moment pushed me to create a safe alternative something that looked fun like sandwich cookies but was completely dog-friendly.
After testing a few batches, these carob sandwich cookies quickly became one of my dog’s favorite special treats.
Key Takeaways
- Chocolate is toxic to dogs, but carob is a safe alternative
- These sandwich cookies combine crunchy texture with a creamy filling
- Made with simple, dog-safe ingredients like flour, eggs, and yogurt
- Ideal for special occasions rather than everyday treats
- Treats should not exceed 10% of your dog’s daily calories
- Homemade treats help avoid harmful additives and preservatives
Why These Cookies Are Worth Making
The Fun of Sandwich Cookies
From my experience, dogs enjoy treats that are a little different. These sandwich cookies add a fun twist with two layers and a soft filling, making treat time more exciting.
Safe Chocolate Alternative
Carob powder gives that rich, chocolate-like appearance without the risk. Unlike chocolate, carob contains no theobromine, which is toxic to dogs. According to veterinary data, even small amounts of chocolate can cause serious issues in dogs, so I always stick with carob.
Interactive Treat Experience
These treats take a bit longer for dogs to eat, which actually helps with mental stimulation. I’ve noticed my dog spends more time enjoying these compared to regular biscuits.
Oreo Sandwich Cookies for Dogs Recipe
Ingredients
- 1 cup whole wheat flour
- ½ cup carob powder
- 2 medium eggs
- ¼ cup coconut oil
- ¼ cup water (adjust as needed)
- ½ cup plain Greek yogurt (unsweetened)
Carob vs. Chocolate: I always remind fellow dog owners—never substitute chocolate for carob. Carob is naturally safe, while chocolate can be toxic even in small quantities.
Step-by-Step Cookie Instructions
Step 1: Prepare Your Baking Station
Preheat your oven to 350°F (175°C). Line a baking tray with parchment paper and gather your tools.
Step 2: Mix the Dry Ingredients
Combine flour and carob powder in a bowl. Mix thoroughly to ensure even distribution.
Step 3: Add Eggs and Coconut Oil
Add eggs and melted coconut oil. Mix until the ingredients begin to combine.
Step 4: Create the Cookie Dough
Gradually add water until a dough forms. The texture should be firm but not sticky. I usually adjust water slowly to get it just right.
Step 5: Roll and Cut Your Cookies
Roll the dough to about ¼ inch thickness. Cut into round shapes—remember, you’ll need pairs for sandwich cookies.
Step 6: Prepare for Baking
Place cookies on the tray with slight spacing. Optional: chill for 10 minutes to help shapes hold better.
Step 7: Bake Until Firm
Bake for 15–20 minutes until firm. Let them cool completely before adding filling.
Step 8: Assemble the Sandwich Cookies
Spread Greek yogurt on one cookie and top with another. Press gently to form a sandwich.
Storage Guidelines
Refrigerator Storage (3–5 Days):
Store assembled cookies in an airtight container in the fridge.
Freezer Storage (Up to 2 Months):
You can freeze them, though I prefer freezing cookies separately and adding fresh filling later.
Make-Ahead Strategy:
Bake cookies in advance and assemble when needed for better texture.
Serving Recommendations by Dog Size
- Under 15 lbs: ½ cookie
- 15–30 lbs: 1 cookie
- 30–50 lbs: 1–2 cookies
- 50+ lbs: 2–3 cookies
Important Tip: Studies show overfeeding treats contributes to obesity in dogs. I always stick to moderation—treats should be under 10% of daily calorie intake.
Common Questions About Cookies
Can I use a different flour?
Yes, oat flour works well and is easier to digest. I’ve used it multiple times with great results.
Can I add peanut butter to the filling?
Absolutely—but always make sure it’s xylitol-free. I sometimes mix peanut butter with yogurt for extra flavor.
Can I use regular yogurt instead of Greek?
Yes, but strain it first to remove excess liquid so the filling stays thick.
Final Thoughts
These Oreo-inspired dog treats started as a simple idea but turned into one of my go-to recipes for special occasions. I love how they look fun, feel special, and most importantly—are completely safe.
Seeing my dog enjoy something that feels like a “treat version” of what I’m eating always makes the effort worth it. And honestly, that little excitement they show is what makes homemade treats so rewarding.