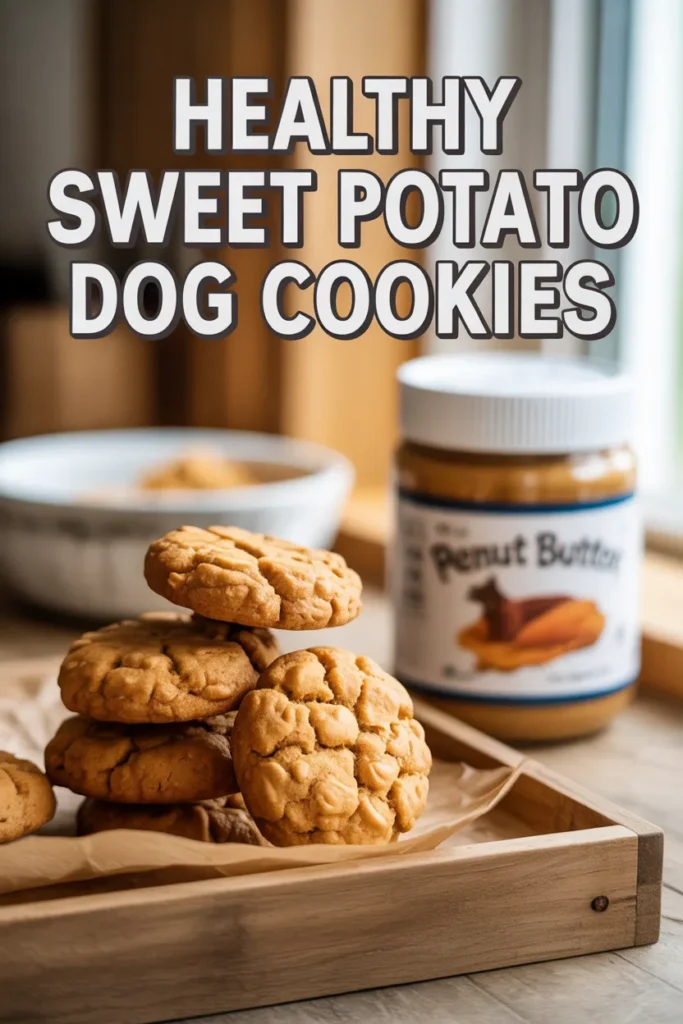
3-Ingredient Sweet Potato Dog Cookies: Easy Homemade Treats Your Pup Will Love
The first time I made these sweet potato dog cookies, it was honestly just a quick kitchen experiment. I had one leftover sweet potato, some oats, and peanut butter—and my dog watching every move I made. I wasn’t planning content, just trying something simple.
Save For Later
What surprised me was how well they turned out. In under 20 minutes, I had homemade dog treats that smelled fresh, used only 3 ingredients, and cost me less than store-bought options. Since then, this recipe has become part of my routine because it’s quick, affordable, and actually healthy.
Save For Later
From my experience, these cookies work great for training, are easy to store, and give dogs real nutritional value—fiber, healthy fats, and vitamins—without fillers or preservatives.
Key Takeaways
- I make these with just 3 simple ingredients I already have at home
- Each batch costs under $2 and lasts for days or even weeks
- Texture is perfect for training—no crumbs in pockets
- Each cookie has around 25–35 calories, easy to portion
- Packed with fiber, beta-carotene, and healthy fats
Why These Sweet Potato Cookies Are Worth Making
Simple Ingredients
I like that I know exactly what goes into these cookies. There are no hidden preservatives or artificial stuff—just real food. Compared to many commercial treats that contain fillers, this feels like a safer choice for daily use.
Budget-Friendly
From my own calculation, one batch costs me less than $2. When I compare that to store treats that can cost 5–10x more, this recipe saves money without cutting quality.
Perfect Training Texture
I’ve used these during walks and training sessions, and they hold up really well. They don’t crumble in my pocket, which makes them practical. That alone makes a big difference when you’re training consistently.
3-Ingredient Sweet Potato Dog Cookies Recipe
I stick to this exact ratio because it gives me a dough that’s easy to handle and bakes evenly every time.
Ingredients
| Ingredient | Amount |
|---|---|
| Sweet potato (cooked, mashed) | ½ cup |
| Natural peanut butter | ¼ cup |
| Oat flour | 1 cup |
Essential Equipment
I don’t use anything fancy here—just basic kitchen tools:
- Mixing bowl
- Fork or masher
- Rolling pin
- Cookie cutters or knife
- Baking tray
- Parchment paper
- Blender/processor (if making oat flour)
Step-by-Step Instructions

Step 1: Oven Preparation
I preheat my oven to 400°F and line the tray. This temperature works well for getting a slightly crisp outside without drying the inside too much.
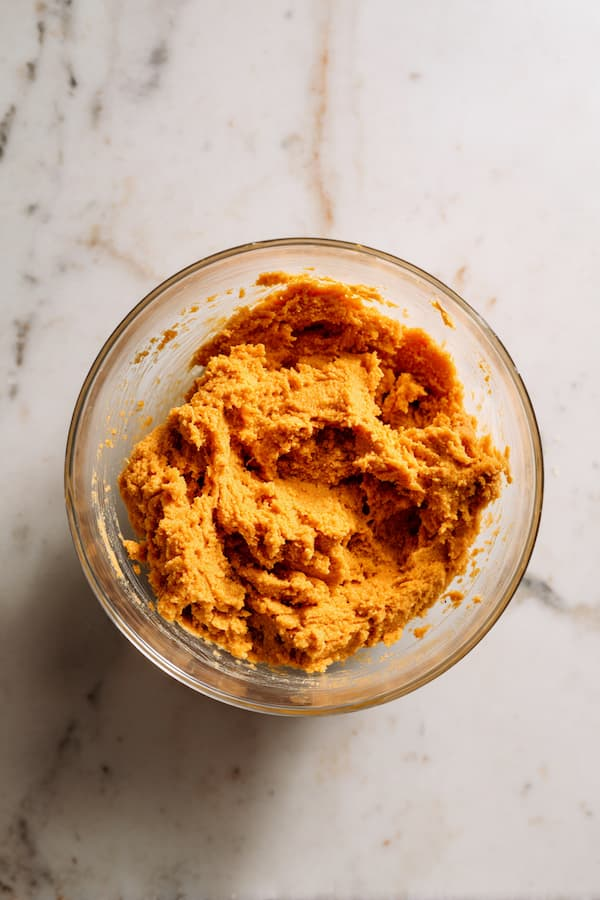
Step 2: Create Your Sweet Potato Base
I cook the sweet potato until soft enough to mash easily. From experience, smooth texture matters—lumps can cause cookies to crack while baking.
Step 3: Mix the Wet Ingredients
I mix the mashed sweet potato with peanut butter until it’s fully combined. I always double-check the peanut butter label—xylitol is toxic to dogs, so I never take risks here.
Step 4: Prepare Your Oat Flour
Sometimes I just blend oats at home instead of buying oat flour. It saves money and works just as well.
Step 5: Form the Dough
I slowly add oat flour until the dough comes together. If it feels sticky, I add more flour. If it’s dry, a little water fixes it. After making this multiple times, I’ve learned the texture should be soft but not sticky.
Step 6: Roll and Shape
I roll the dough to about ¼–½ inch thick. Since these cookies don’t rise, thickness now is what you’ll get after baking. I usually go for simple shapes to save time.
Step 7: Bake to Perfection
I bake for 12–15 minutes depending on texture. Shorter time gives softer treats, which I prefer for older dogs. Longer baking makes them crunchy.
Step 8: Cool Completely
I always let them cool fully before storing. They firm up as they cool, so I don’t rush this step.
Storage Tips
Short-Term Storage (Daily Use)
I keep them in an airtight container in the fridge for up to a week. This helps maintain freshness and prevents spoilage.
Long-Term Storage (Batch Prep)
I freeze extra batches for up to 2 months. From experience, frozen treats can also be great in hot weather.
Recipe Variations You Can Try
- I sometimes swap oat flour with coconut flour (use less since it absorbs more moisture)
- Adding a bit of plain Greek yogurt gives a softer texture
- A pinch of cinnamon adds flavor (and has mild antioxidant benefits)
Pro Tip: When testing variations, I always try small batches first to avoid waste.
Size and Serving Guidelines
I don’t follow strict rules, but I use general guidelines based on weight:
- Small dogs (under 25 lbs): 1–2 cookies
- Medium dogs (25–60 lbs): 2–3 cookies
- Large dogs (60+ lbs): 3–4 cookies
I always keep treats under 10% of daily calories to avoid weight gain.
Nutritional Benefits Your Dog Receives
From what I’ve seen and researched, these ingredients actually offer real benefits:
- Sweet potato provides beta-carotene, which supports immunity
- Peanut butter gives healthy fats for skin and coat
- Oats add fiber for digestion
- Carbs provide steady energy
- Small protein boost helps muscle maintenance
Each cookie has about 25–35 calories, which makes portion control manageable.
FAQs
Can I use regular flour instead of oat flour?
Yes, I’ve tried whole wheat flour and it works fine if your dog tolerates it.
How do I know when cookies are done?
I check for slightly golden edges and a firm surface. They shouldn’t feel soft when pressed.
Can puppies have these cookies?
I only give these to puppies over 12 weeks and start with small amounts to see how they react.
Final Thoughts
What keeps me coming back to this recipe is how simple it is. I don’t need special ingredients or extra time. It’s just quick, affordable, and something my dog genuinely enjoys.
I’ve made these many times now, and the reaction is always the same—instant excitement. That’s how I know this recipe works.
All content on this site is written and reviewed by our experienced team to ensure it is accurate, reliable, and helpful for our readers. Our Our Process page explains how we carefully research and create high-quality content, while our Team page introduces the professionals behind our work. We also provide clear guidelines for content or image concerns on our Image Removal page, so you can trust that we prioritize transparency, quality, and reader safety.