Seven 4-Ingredient Dog Treat Ideas
When I started making 4-ingredient dog treats, it was mainly because my dog kept rejecting store-bought options. I tried different brands, but nothing seemed to impress him. After years of being around dogs, I knew they can be surprisingly picky when it comes to taste.
So I decided to keep things simple and make treats at home. What I found was that dogs don’t need complicated recipes to enjoy their food. With just a few basic ingredients, I was able to create snacks my dog actually loved, and I felt better knowing exactly what he was eating.
Save For later

Why 4-Ingredient Dog Treats Actually Matter
From my experience, simple recipes make a big difference when it comes to consistency and quality. Using fewer ingredients means there’s less chance of adding unnecessary fillers or things your dog doesn’t need.
It also makes preparation easier. I can quickly put together a batch without spending too much time in the kitchen. Plus, these treats work well for different types of dogs, whether they’re young, older, or a bit selective with food.
Key Takeaways
- 4-ingredient dog treats are simple and easy to make
- Fewer ingredients mean better control over quality
- Homemade treats avoid preservatives and fillers
- Suitable for picky eaters and sensitive dogs
- Can support digestion and overall energy
- Many recipes can be stored for later use
Pro Tip
What worked best for me was sticking to ingredients my dog was already used to. I avoided introducing too many new foods at once, which helped prevent any stomach issues. I also made small batches at first to see how my dog responded before scaling up. When baking, I kept portions consistent so I didn’t accidentally overfeed. I stored treats in airtight containers and froze extras to keep them fresh longer. Watching how my dog reacted to each recipe helped me fine-tune what worked best over time.
Related Posts
- Easy Homemade 3 Ingredient Tortillas Recipe for Beginners
- Beef and Turkey Liver Cat Food Recipe for Balanced Nutrition
- Beef Liver and Rabbit Cat Food Recipe for Healthy Pets
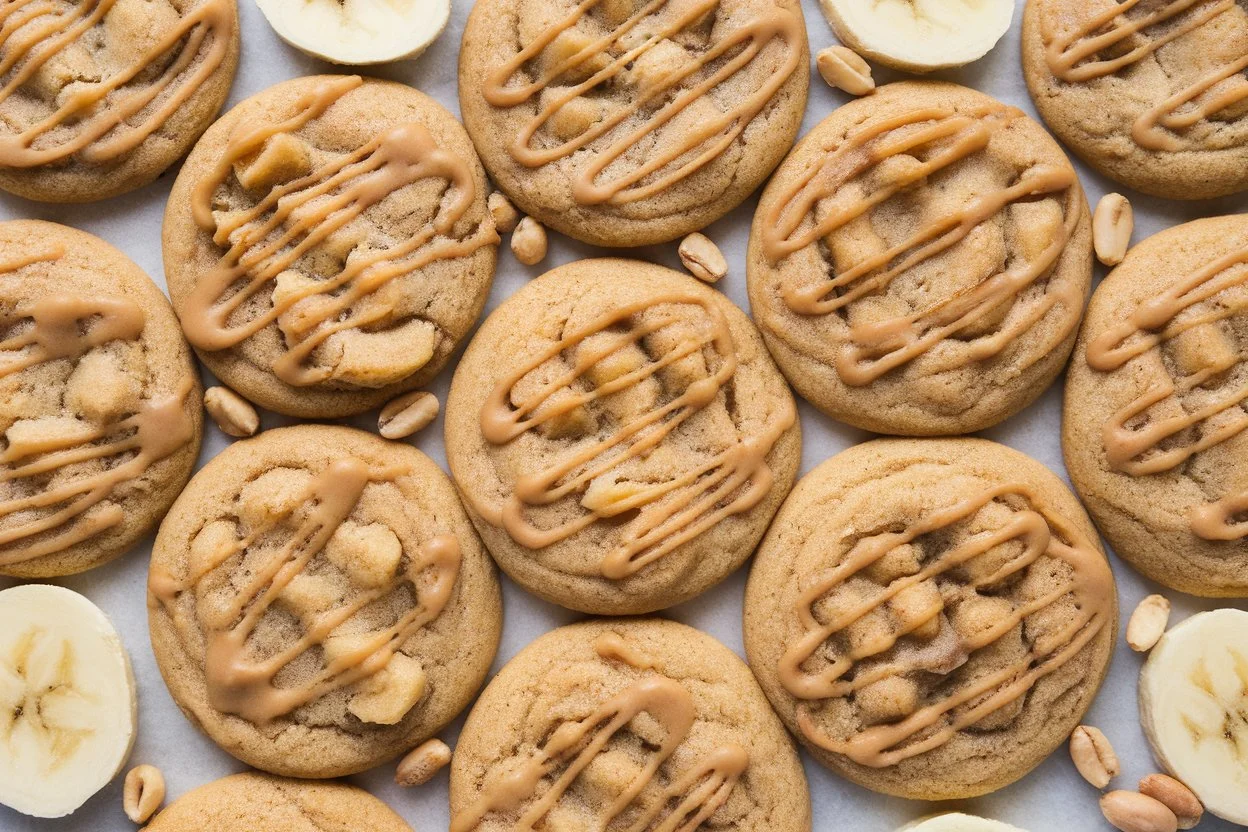
1. Peanut Butter Pupcakes
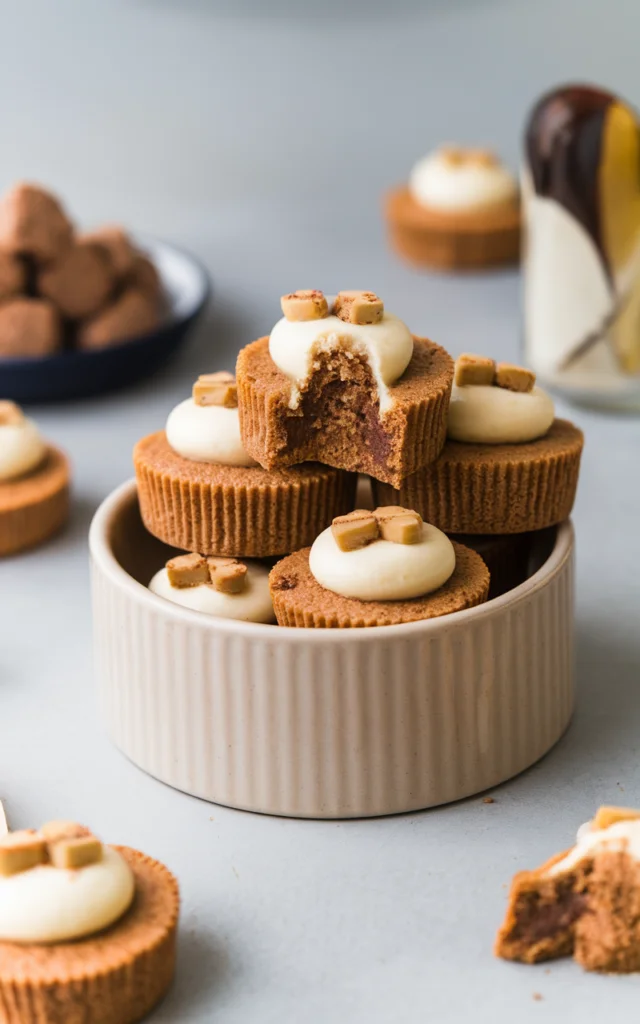
Who says dogs can’t celebrate life’s little moments? I’ve made these pupcakes for birthdays, adoption anniversaries, and yes—even random Tuesdays. Every dog I’ve served them to has reacted the same way: instant tail wag.
Peanut butter is a favorite for a reason. It’s rich in healthy fats and protein, but always make sure it’s xylitol-free, as xylitol is toxic to dogs.
Ingredients
1 cup whole wheat flour
1/2 cup unsweetened applesauce
1/4 cup natural peanut butter (no xylitol)
1 egg
Instructions
Preheat your oven to 350°F (175°C) and line a muffin tin with cupcake liners.
Mix all ingredients until smooth.
Fill each cup halfway.
Bake for 15–20 minutes until a toothpick comes out clean.
Cool completely before serving.
Pro Tip: I like adding a thin peanut butter swirl on top once cooled. It turns an ordinary treat into a celebration snack without overdoing calories.
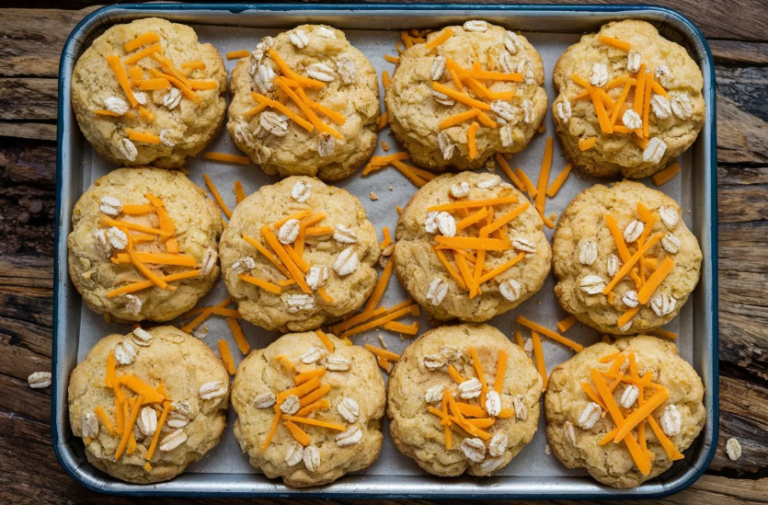
2. Cheesy Sweet Potato Bites
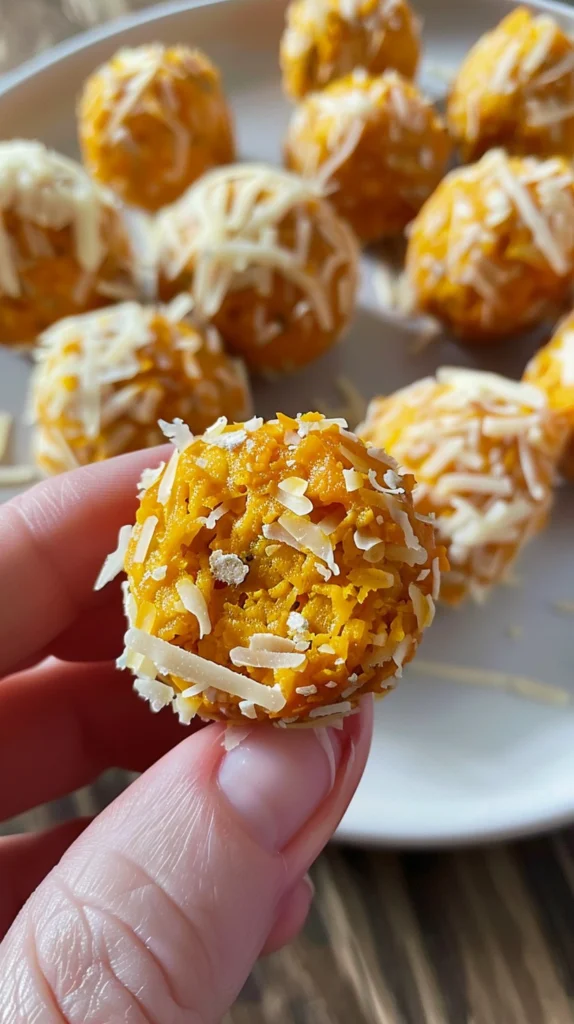
Sweet potatoes are one of my go-to ingredients. They’re packed with fiber, beta-carotene, and vitamin B6, which supports digestion and immune health. According to veterinary nutrition data, sweet potatoes are especially helpful for dogs with mild digestive issues.
Ingredients
1 cup mashed sweet potato
1/2 cup shredded cheddar cheese
1/2 cup oat flour
1 egg
Instructions
Preheat oven to 350°F (175°C). Line a baking sheet.
Mix all ingredients thoroughly.
Roll into small balls and flatten slightly.
Bake 20–25 minutes until golden.
Cool before serving.
Pro Tip: I always freeze half the batch. Frozen treats can last up to 3 months and are perfect for hot days or teething puppies.
3. Banana Oat Cookies

I’ve cared for many senior dogs over the years, and these are one of my favorites for older pups. Bananas provide potassium and natural sweetness, while oats are gentle on aging teeth and sensitive stomachs.
Ingredients
1 ripe banana, mashed
1 cup rolled oats
1/4 cup peanut butter
1 egg
Instructions
Preheat oven to 350°F (175°C).
Mix all ingredients well.
Drop spoonfuls onto a lined baking sheet and flatten.
Bake 12–15 minutes until edges are golden.
Cool completely.
Pro Tip: For dogs with dental issues, slightly underbake to keep them softer.
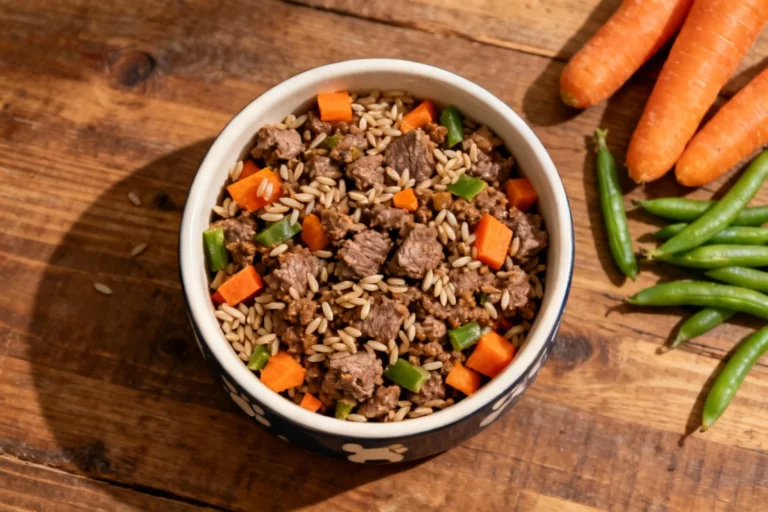
4. Chicken and Rice Balls
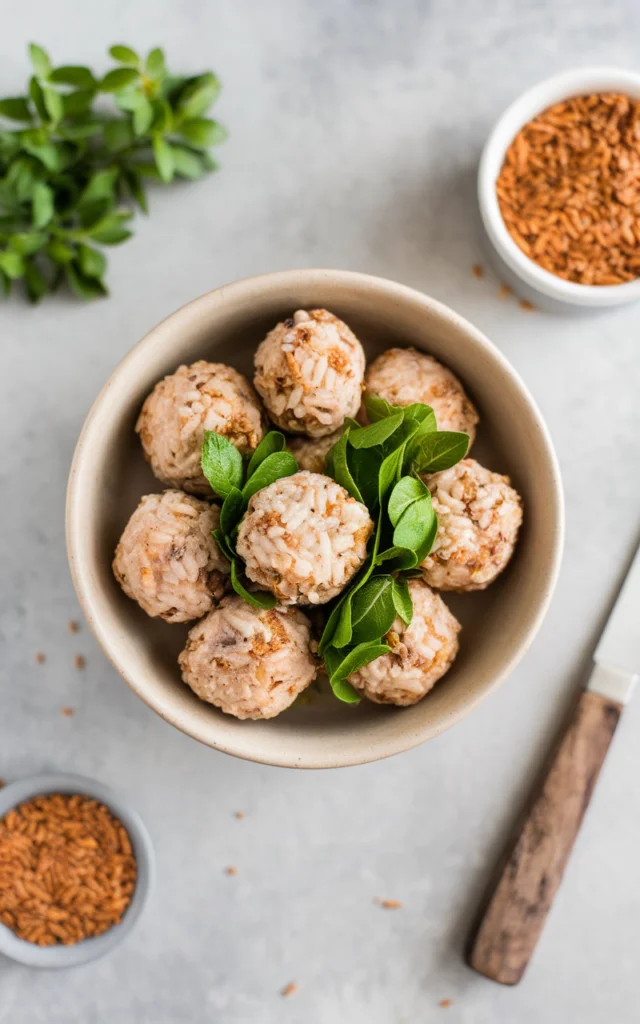
This recipe comes straight from my experience working with dogs recovering from stomach upsets. Chicken and rice are commonly recommended by vets as a bland, easy-to-digest combo.
Ingredients
1 cup cooked chicken, shredded
1 cup cooked brown rice
1/4 cup grated carrot
1 egg
Instructions
Preheat oven to 350°F (175°C).
Mix all ingredients.
Roll into small balls and place on baking sheet.
Bake 15–20 minutes until firm.
Cool before serving.
Pro Tip: Keep these small. Training treats should be bite-sized to avoid overfeeding.
5. Pumpkin Spice Pup Bites
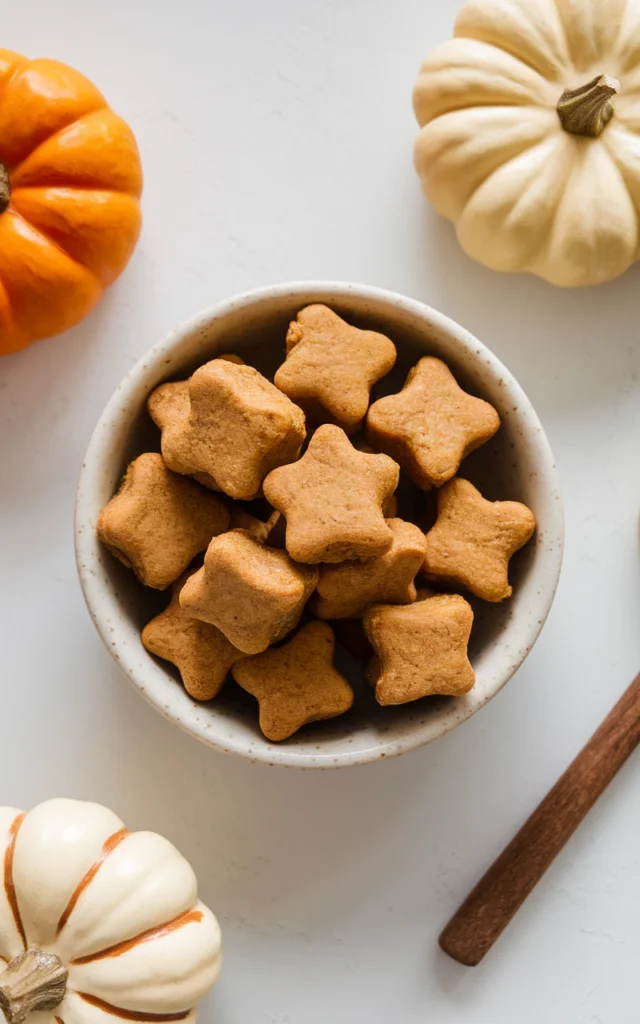
Pumpkin is one of the best natural digestive aids for dogs. I’ve personally used it for dogs with both constipation and loose stools—it works because it’s high in soluble fiber.
Ingredients
1/2 cup canned pumpkin (pure pumpkin only)
1 cup oat flour
1/4 cup peanut butter
1 egg
Instructions
Preheat oven to 350°F (175°C).
Mix until combined.
Roll into balls and flatten.
Bake 15–20 minutes.
Cool completely.
Pro Tip: A pinch of cinnamon is safe in small amounts and adds aroma dogs love.
6. Tuna Fudge
This one surprises people, but dogs absolutely love it. Tuna is rich in omega-3 fatty acids, which support joint health, skin, and coat—something I’ve seen firsthand in older dogs.
Ingredients
1 can tuna in water, drained
1 cup whole wheat flour
1 egg
1/4 cup grated Parmesan cheese
Instructions
Preheat oven to 350°F (175°C).
Mix ingredients.
Spread evenly on a baking sheet.
Bake 20–25 minutes until firm.
Cool and cut into small squares.
Pro Tip: Store in the fridge in an airtight container. Yes, it smells—but dogs don’t complain.
7. Apple Cinnamon Crunchies
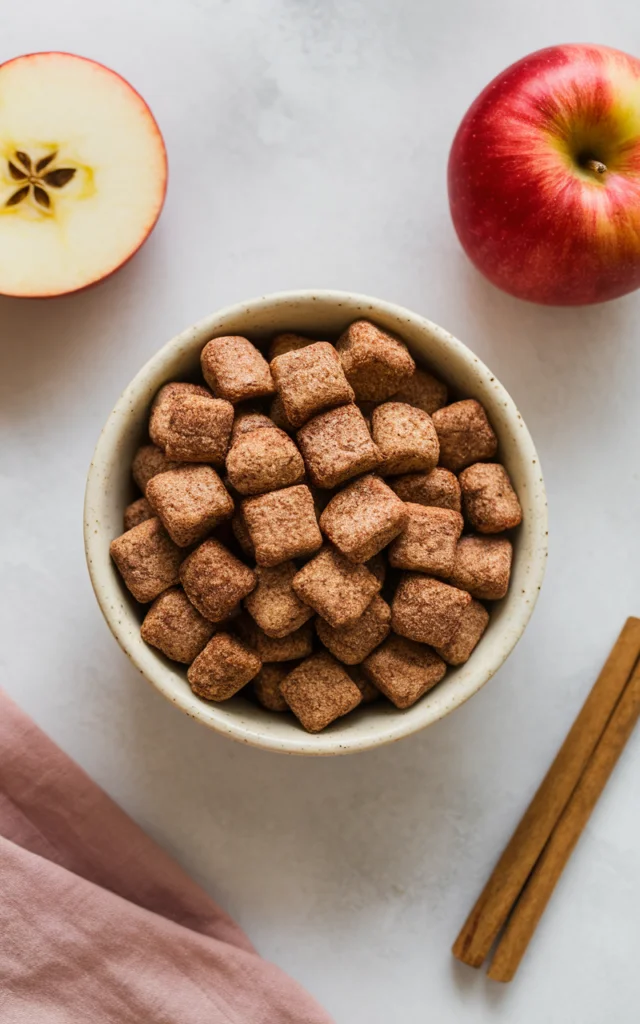
Apples provide vitamin C and fiber, while cinnamon adds flavor without sugar. I’ve used these for years with dogs who prefer crunchy textures.
Ingredients
1 cup grated apple (peeled and cored)
1 cup oat flour
1/4 cup peanut butter
1/2 tsp cinnamon
Instructions
Preheat oven to 350°F (175°C).
Mix ingredients.
Roll into balls and flatten.
Bake 15–20 minutes until crispy.
Cool before serving.
Pro Tip: Crunchier treats last longer and help reduce plaque buildup.
FAQs
- Can I substitute ingredients in these recipes?
Yes, as long as substitutes are dog-safe. Always avoid xylitol, grapes, raisins, and chocolate. - How long do these treats last?
Up to 7 days at room temperature, 2 weeks refrigerated, or 3 months frozen. - Can I use regular flour instead of oat or whole wheat?
Yes, but oat flour is easier on digestion, especially for sensitive dogs. - Are these treats suitable for all dogs?
Most dogs can enjoy them, but consult your vet if your dog has allergies or medical conditions. - Can I make these treats without an oven?
Some recipes can be dehydrated or frozen as no-bake alternatives.
Final Thoughts
After two decades of caring for dogs, I’ve learned that simple is better. Homemade treats don’t need fancy ingredients—just real food, care, and portion control. When you make treats yourself, you’re not just feeding your dog—you’re investing in their long-term health, happiness, and trust. And believe me, they know the difference.
All content on this site is written and reviewed by our experienced team to ensure it is accurate, reliable, and helpful for our readers. Our Our Process page explains how we carefully research and create high-quality content, while our Team page introduces the professionals behind our work. We also provide clear guidelines for content or image concerns on our Image Removal page, so you can trust that we prioritize transparency, quality, and reader safety.