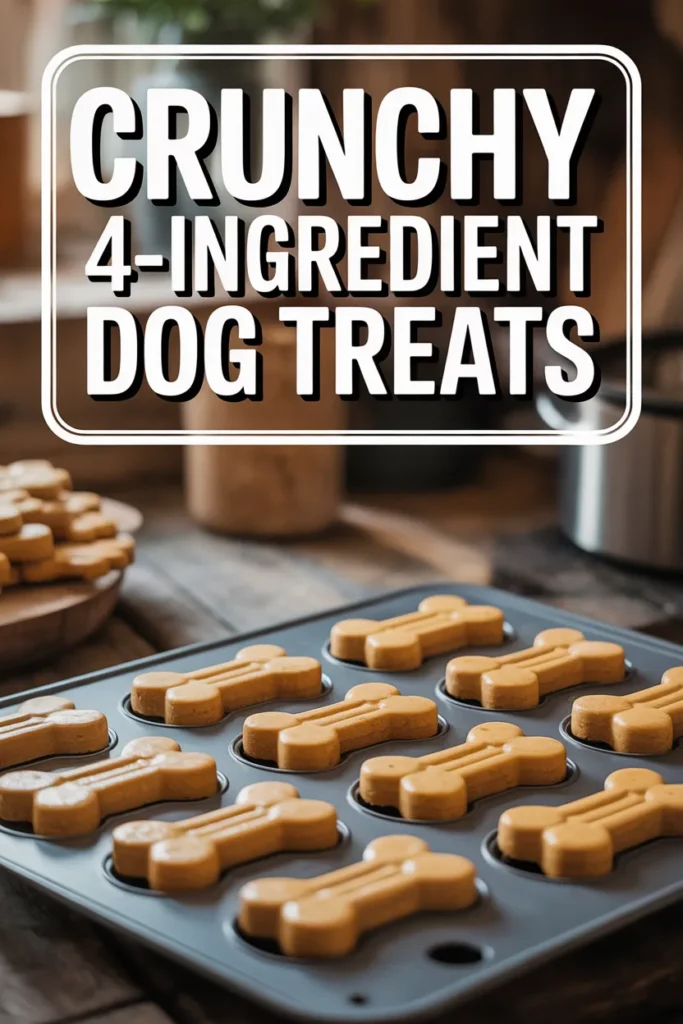
Crunchy 4-Ingredient Baked Dog Treats in Silicone Molds
I started making these homemade dog treats after realizing my dog was ignoring store-bought snacks filled with ingredients I couldn’t even recognize. This simple 4-ingredient recipe changed everything for me.
In this article, I share how I make crunchy pumpkin dog treats using pantry staples like pumpkin puree, peanut butter, eggs, and oat flour. They’re budget-friendly, healthy, and take about 30 minutes to bake.
Save For later
These treats are not just cheaper than store-bought options—they’re also fresher, safer, and more satisfying for my dog. I also include storage tips, portion sizes, safety warnings, and step-by-step instructions so you can easily make them at home.
Key Takeaways
- Only 4 simple pantry ingredients needed
- Around $0.30 per batch compared to $8–$12 store treats
- Supports digestion, skin health, and energy
- Easy to bake, store, and freeze
- Safer when you control every ingredient
Why Your Dog (and You) Will Love These Treats
I noticed my dog loses interest in many commercial treats, and that pushed me to try homemade options. Once I switched, I saw a big change in his excitement during treat time.
What I like most is the control—I know exactly what goes into every bite. No fillers, no mystery ingredients, just real food I trust.
From my experience, dogs respond better to fresh-smelling, soft-crunch treats made at home. It also gives me peace of mind as a pet owner.
Simple Ingredients, Maximum Impact
I keep this recipe intentionally simple with just four ingredients. That simplicity is what makes it reliable and repeatable in my kitchen.
- Pumpkin puree
- Natural peanut butter
- Eggs
- Oat flour
Each ingredient serves a purpose—pumpkin supports digestion, eggs add protein, and oats give steady energy. I’ve found this balance works well even for picky eaters.
Budget-Friendly Tail-Wagging
One thing that surprised me was the cost. When I calculated it, each batch costs me roughly $0.30, depending on ingredient prices.
Before this, I was spending $8–$12 on premium dog treats that didn’t last long. Now I make a full batch in under an hour at a fraction of the cost.
For me, this is one of the biggest benefits—quality food without overspending.
Perfectly Crunchy Texture
I wanted a texture that my dog would actually enjoy, not soft or crumbly treats that fall apart.
After baking, these turn into a firm, crunchy snack that helps with chewing. I’ve noticed it even helps keep my dog occupied for a bit longer.
From testing, the crunch also makes them feel more “reward-like,” which works great for training sessions.
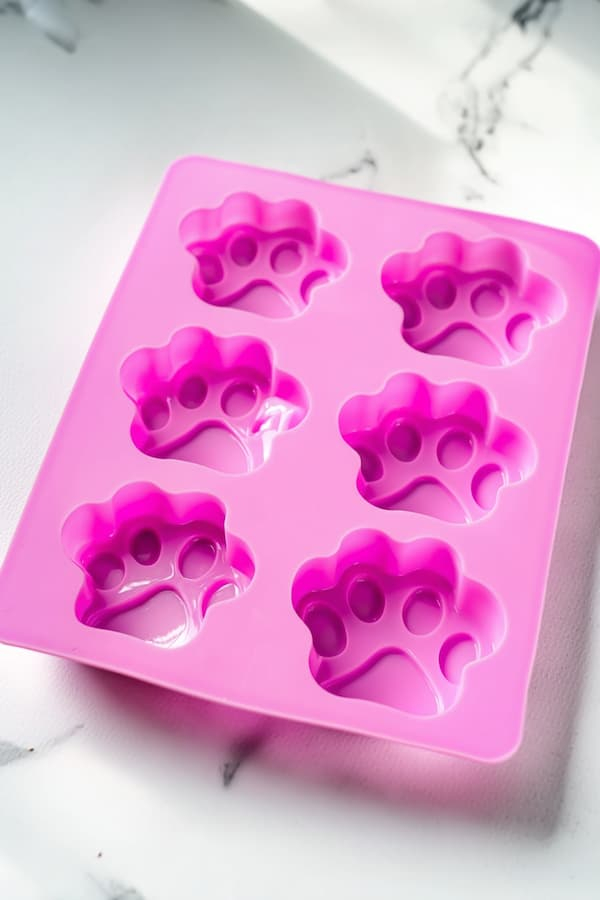
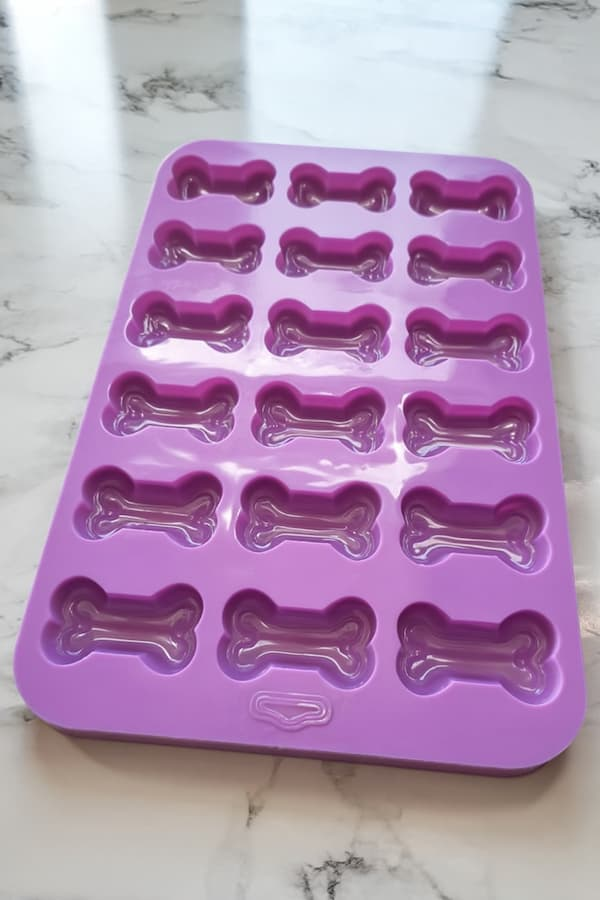
Baked Dog Treats in Silicone Molds
I use silicone molds because they make shaping so much easier. The treats come out uniform and look fun without extra effort.
I’ve tried baking them without molds, and while it works, the molds make cleanup and consistency much better.
Pro tip: I once bought cheap silicone molds from a local store, and they worked just as well as expensive ones.
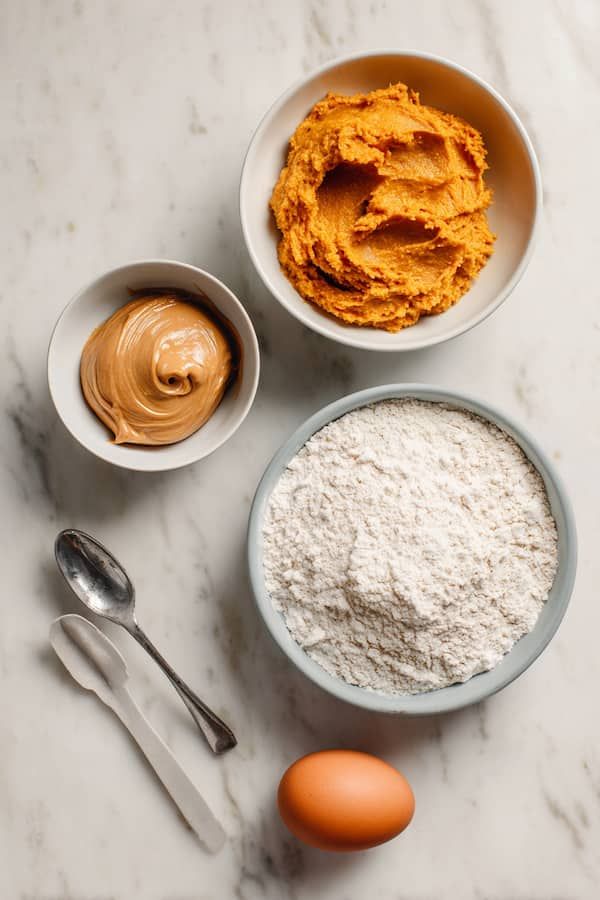
Ingredient Breakdown
| Ingredient | Amount |
|---|---|
| Pumpkin puree | ½ cup |
| Natural peanut butter | 3 tbsp |
| Eggs | 2 medium |
| Oat flour | 1⅔ cups |
I like using pumpkin because it’s gentle on digestion and widely recommended for dogs with stomach issues. Peanut butter adds flavor, while oats make the structure stable.
The Critical Safety Note About Peanut Butter
This is something I always check first: peanut butter must be xylitol-free.
From my experience researching pet safety, xylitol is extremely toxic to dogs and can cause a dangerous drop in blood sugar.
I only use natural peanut butter with no sweeteners or additives. This is a non-negotiable rule in my kitchen.
Pro tip: Always double-check peanut butter labels for xylitol—it’s highly toxic to dogs, so I only use natural, unsweetened peanut butter with no additives.
Essential Tools for Treat-Making Success
I don’t use anything fancy, just basic kitchen tools:
- Silicone treat molds
- Mixing bowl
- Wooden spoon
- Small scoop
- Baking sheet
- Cooling rack
I’ve found that having everything ready before starting makes the process much smoother. It also helps avoid sticky dough messes.
Step-by-Step Instructions
Step 1: Get Your Kitchen Ready
I preheat my oven to 350°F and line up my silicone molds on a baking sheet. This helps me move everything safely in and out of the oven.
Step 2: Create Your Base Mixture
I mix pumpkin, peanut butter, and eggs in a bowl until smooth. I usually use a spoon, but sometimes I mix by hand for better texture control.
This step creates a thick but creamy base that smells great even before baking.
Step 3: The Flour Integration
I add oat flour slowly, about half a cup at a time. This helps me control texture better.
The dough should be soft but not sticky. If it feels too wet, I add more flour; if too dry, I add a little water.
Step 4: Shape and Fill Those Molds
I roll small dough balls and press them into molds. I keep them level, not overfilled, to maintain shape.
From experience, overfilling causes uneven baking and messy edges.
Step 5: Bake
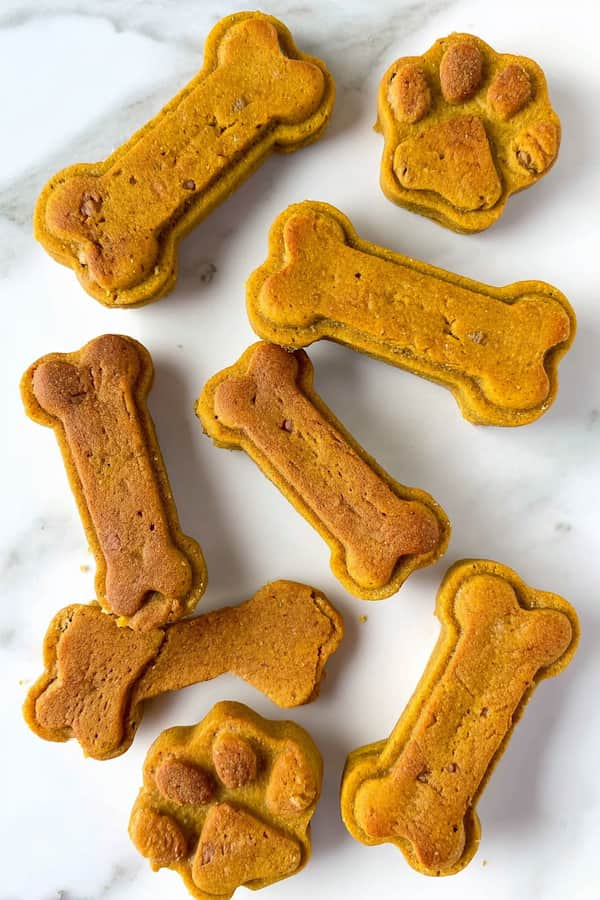
I bake them for about 30 minutes until golden and firm. The smell usually brings my dog into the kitchen instantly.
I let them cool fully so they get that perfect crunch.
Storage Secrets for Maximum Freshness
I store these treats in an airtight container, and they stay fresh for about a week at room temperature.
For longer storage, I refrigerate them for up to a month or freeze them for up to 3 months.
I personally freeze some batches because my dog actually enjoys them chilled in summer.
Nutritional Benefits: Why These Treats Are Actually Good for Your Dog
From my experience making these regularly, I’ve seen clear benefits in digestion and coat health.
- Pumpkin supports digestion and gut balance
- Peanut butter provides healthy fats for coat shine
- Eggs offer protein for muscle strength
- Oats give slow energy release
- Pumpkin antioxidants support eye health
These treats avoid artificial preservatives, excess salt, and unnecessary fillers.
What Your Dog Doesn’t Get:
I feel confident feeding these because they avoid:
- Artificial preservatives
- Unknown meat by-products
- Excess sugar or salt
- Artificial coloring
- Low-quality fillers
For me, this is the biggest reason I keep making them.
Size Matters: Portioning Guidelines
I always adjust portion size based on my dog’s weight.
- Small dogs: 1–2 small treats per day
- Medium dogs: 2–3 treats per day
- Large dogs: 3–4 treats per day
I also follow the 10% rule—treats should not exceed 10% of daily calories.
Frequently Asked Questions
Can puppies eat these treats?
Yes, I’ve given them to puppies over 8 weeks old, but I always break them into smaller pieces for safety.
Can I make these without special molds?
Yes, I’ve done this many times. I simply roll them into small balls and bake them on parchment paper.
Can I freeze the dough for later?
Yes, I often freeze raw dough balls and bake them later. I just add a few extra minutes to baking time.
Are these treats suitable for sensitive stomachs?
In my experience, pumpkin makes them gentle on digestion. However, I always recommend checking with a vet for dogs with severe allergies.
All content on this site is written and reviewed by our experienced team to ensure it is accurate, reliable, and helpful for our readers. Our Our Process page explains how we carefully research and create high-quality content, while our Team page introduces the professionals behind our work. We also provide clear guidelines for content or image concerns on our Image Removal page, so you can trust that we prioritize transparency, quality, and reader safety.