5 DIY Natural Dog Treats Recipes to Try
When it comes to keeping our furry friends happy and healthy, nothing compares to homemade dog treats made with real, natural ingredients. I started making DIY dog treats after noticing how many store-bought options contained preservatives, fillers, artificial flavors, and unnecessary sugars.
Once I switched to homemade recipes, I saw a noticeable difference in my dogs’ digestion, coat quality, and energy levels. These natural dog treat recipes are simple to prepare, budget-friendly, and packed with nutrients dogs truly benefit from.
Key Takeaways
- Homemade dog treats give you complete control over ingredients and quality.
- Natural recipes help avoid artificial preservatives, colors, and fillers.
- Peanut butter, pumpkin, oats, sweet potatoes, carrots, and apples are nutrient-rich dog-safe ingredients.
- Most recipes can be frozen for up to 3 months for convenient meal prep.
- Treats should make up no more than 10% of a dog’s daily calorie intake.
- Always avoid toxic ingredients like xylitol, chocolate, onions, grapes, raisins, and excessive salt.
- Homemade treats can support digestion, dental health, skin health, and training routines.
According to veterinary nutrition experts, dogs thrive best on balanced diets with high-quality proteins, healthy fats, and fiber-rich ingredients. Homemade treats allow pet owners to avoid hidden additives while tailoring snacks to their dog’s dietary needs, allergies, and sensitivities.
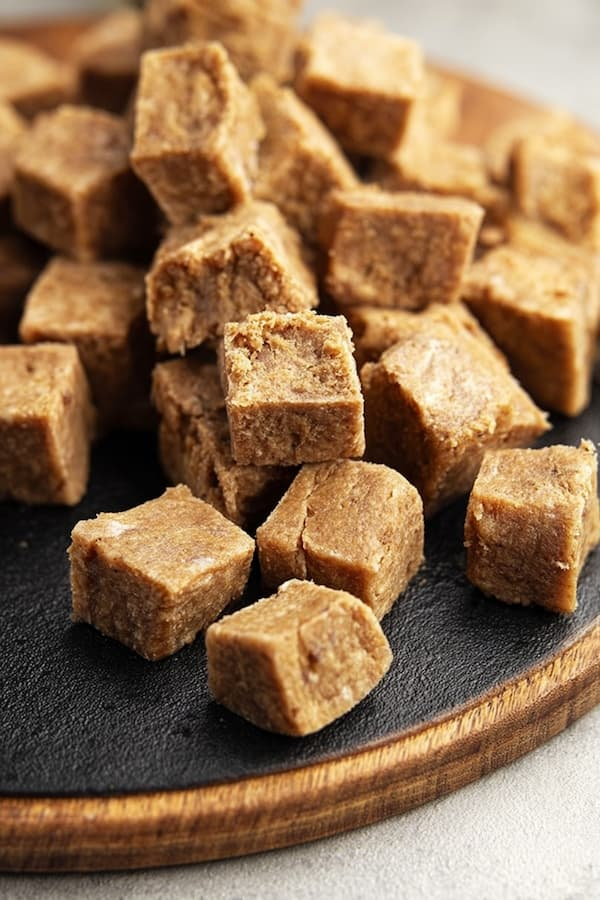
Peanut Butter and Banana Dog Biscuits

One of the first homemade treats I ever made for my dogs was this peanut butter and banana biscuit recipe. My Labrador instantly became obsessed with the smell coming from the oven, and since then, these biscuits have stayed in my weekly treat rotation. The combination of banana and peanut butter creates a naturally sweet flavor dogs absolutely love, while oats or whole wheat flour provide a satisfying crunchy texture.
These biscuits are especially useful as training treats because they can easily be cut into smaller bite-sized portions. I also like making larger bone-shaped versions for special rewards after long walks or vet visits.
Type of Treat:
These biscuits work perfectly as:
- Training treats
- Crunchy snacks
- Reward biscuits
- Light dental chews
Total Yield:
This recipe makes approximately 30 medium-sized biscuits depending on cutter size.
Dietary Categories:
- Limited ingredient
- Optional grain-free recipe
- No artificial preservatives
- Naturally sweetened
Suitable For:
These treats are suitable for:
- Puppies over 12 weeks
- Adult dogs
- Senior dogs
- Dogs with mild food sensitivities
Time Requirements:
- Prep Time: 10 minutes
- Bake Time: 20 minutes
- Total Time: 30 minutes
Storage Life:
- Room Temperature: 5-7 days
- Refrigerator: 2 weeks
- Freezer: Up to 3 months
Nutritional & Health Information:
Each biscuit contains roughly 35-40 calories depending on size.
Health benefits include:
- Bananas provide potassium and vitamin B6
- Peanut butter offers healthy fats and protein
- Oats support digestion with soluble fiber
- Crunchy texture may help reduce plaque buildup
I’ve personally noticed that fiber-rich treats like these help maintain more consistent digestion in active dogs.
Equipment Required:
- Mixing bowl
- Fork or potato masher
- Measuring cups
- Rolling pin
- Baking sheet
- Parchment paper
- Cookie cutters (optional)
Ingredients Main Components:
- 1 cup whole wheat flour or oat flour
- 1 ripe banana
- ½ cup natural peanut butter
- ¼ cup water

Ingredient Safety Notes:
Always use xylitol-free peanut butter because xylitol is highly toxic to dogs even in small amounts.
Optional Add-ins/Variations:
You can customize these treats by adding:
- Ground flaxseed
- Chia seeds
- Unsweetened pumpkin puree
- Cinnamon in tiny amounts
- Unsweetened applesauce
Instructions:

Instructions of Peanut Butter and Banana Dog Biscuits
- Preheat your oven to 350°F (175°C).
- Mash the banana in a mixing bowl until smooth.
- Add peanut butter and water, stirring until combined.
- Gradually mix in flour until a dough forms.
- Roll the dough to about ¼-inch thickness.
- Cut shapes using cookie cutters or slice into squares.
- Place on a parchment-lined baking sheet.
- Bake for 18-20 minutes until golden brown.
- Allow treats to cool fully before serving.
Expert Tips and Variations:
I sometimes freeze mashed banana portions beforehand so baking becomes even quicker. If your dough feels sticky, lightly dust the surface with oat flour instead of overworking the dough.
For softer treats suitable for senior dogs, reduce baking time by 3-4 minutes.
Safety Considerations:
- Avoid peanut butter with added sugars or xylitol
- Break treats into smaller pieces for toy breeds
- Introduce slowly for dogs with sensitive stomachs
Additional Features:
Homemade biscuits like these often cost significantly less than premium natural dog treats sold in stores. Making larger batches can save money while ensuring better ingredient quality.
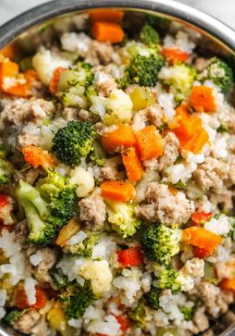
Chicken and Sweet Potato Dog Biscuits

These chicken and sweet potato dog biscuits are one of my favorite protein-rich homemade recipes for active dogs. I originally made them for my Border Collie after long hiking days because she needed a more filling reward treat with extra protein and nutrients.
Sweet potatoes are considered one of the best dog-safe vegetables because they’re packed with fiber, antioxidants, vitamin A, and slow-digesting carbohydrates that support sustained energy.
Type of Treat:
These biscuits are excellent for:
- Training rewards
- Post-exercise snacks
- High-protein treats
- Soft crunchy chews
Total Yield:
Approximately 25 biscuits depending on size.
Dietary Categories:
- Grain-free option available
- High-protein recipe
- Limited ingredient
- Preservative-free
Suitable For:
Ideal for:
- Puppies
- Athletic dogs
- Adult dogs
- Senior dogs with softer chewing needs
Time Requirements:
- Prep Time: 15 minutes
- Bake Time: 25 minutes
- Total Time: 40 minutes
Storage Life:
- Room Temperature: 1 week
- Freezer: 3 months
Nutritional & Health Information:
Each biscuit contains roughly 30-35 calories.
Health benefits include:
- Lean chicken supports muscle maintenance
- Sweet potatoes contain beta-carotene for eye health
- Fiber supports digestive regularity
- Protein helps maintain healthy body condition
Veterinary nutritionists often recommend sweet potatoes for dogs with digestive sensitivities because they are easy to digest and nutrient-dense.
Warnings or Contraindications:
- Fully cook chicken before use
- Never include cooked chicken bones
- Avoid seasoning ingredients with garlic or onions
Equipment Required:
- Mixing bowl
- Measuring tools
- Baking sheet
- Parchment paper
- Food processor (optional)
Ingredients Main Components:

- 1 cup cooked chicken breast
- 1 cup mashed sweet potato
- 1 cup oat flour
- 1 egg
- ¼ cup water
Optional Add-ins/Variations:
You can add:
- Parsley for fresher breath
- Turmeric for joint support
- Ground flaxseed for omega-3 fatty acids
Instructions:

Instructions of Chicken and Sweet Potato Dog Biscuits
- Preheat oven to 350°F (175°C).
- Combine shredded chicken and mashed sweet potato in a bowl.
- Add oat flour and egg.
- Mix thoroughly until dough forms.
- Add water gradually if dough feels dry.
- Roll dough and cut into shapes.
- Arrange on lined baking tray.
- Bake for 25 minutes until firm.
- Cool completely before serving.
Expert Tips and Variations:
I often prepare double batches and freeze half the dough before baking. This makes fresh treat preparation much faster during busy weeks.
If your dog struggles with crunchy biscuits, bake for slightly less time to create a softer texture.
Safety Considerations:
- Monitor dogs for food allergies
- Adjust biscuit size according to breed size
- Introduce new proteins gradually
Chicken and Carrot Dog Biscuits

Chicken and carrots are one of the healthiest combinations you can use for homemade dog treats. I started making these when my senior dog needed lower-fat treats that still tasted rewarding and exciting.
Carrots are naturally low in calories yet high in fiber and beta-carotene, which supports immune health and vision.
Type of Treat:
These biscuits are perfect for:
- Training rewards
- Everyday snacks
- Dental chews
- Low-fat treats
Total Yield:
Makes approximately 25 small-to-medium biscuits.
Dietary Categories:
- Limited ingredient
- Optional grain-free
- High-fiber recipe
Suitable For:
- Puppies
- Adult dogs
- Seniors
- Weight-management diets
Time Requirements:

- Prep Time: 15 minutes
- Bake Time: 25 minutes
- Total Time: 40 minutes
Storage Life:
- Airtight container: 1 week
- Refrigerator: 2 weeks
- Freezer: 3 months
Nutritional & Health Information:
Each biscuit contains approximately 30 calories.
Benefits include:
- Carrots support eye health
- Chicken provides lean protein
- Fiber promotes healthy digestion
- Crunchy texture helps reduce tartar buildup
Studies show that crunchy chewing activities can help reduce plaque accumulation in dogs when combined with regular dental care.
Instructions:

Instructions
- Preheat oven to 350°F (175°C).
- Mix shredded cooked chicken and mashed carrots together.
- Add oat flour and egg.
- Stir until dough becomes workable.
- Roll dough on lightly floured surface.
- Cut into desired shapes.
- Bake for 25 minutes until golden brown.
- Cool before serving.
Equipment Required:
- Mixing bowl
- Measuring cups
- Baking sheet
- Rolling pin
- Parchment paper
Ingredients Main Components:
- 1 cup cooked chicken breast
- 1 cup cooked mashed carrots
- 1 cup oat flour
- 1 egg
- ¼ cup water
Optional Add-ins/Variations:
Try adding:
- Pumpkin puree
- Chia seeds
- Flaxseed
- Parsley
Expert Tips and Variations:
I recommend steaming carrots instead of boiling because steaming helps preserve more nutrients.
If your dough feels overly wet, add small amounts of flour gradually instead of adding too much at once.
Safety Considerations:
- Fully cook all chicken
- Avoid added salt and butter
- Supervise smaller dogs while chewing
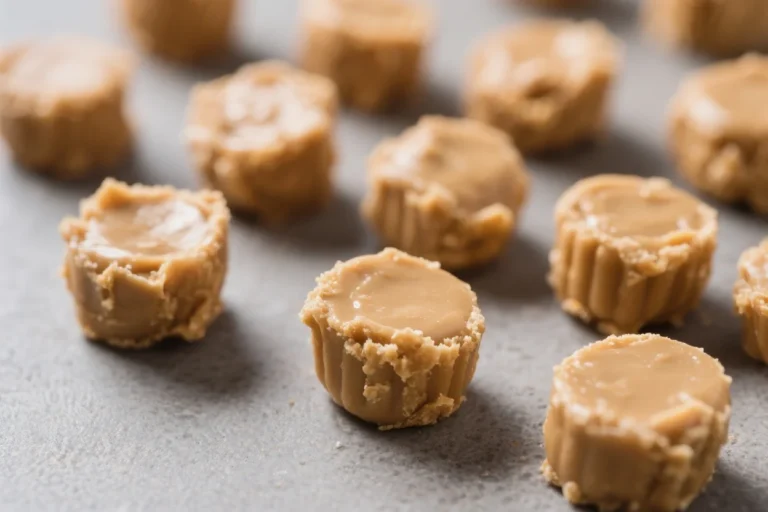
Peanut Butter Pumpkin Dog Cookies

Pumpkin is one of the best ingredients I keep stocked year-round for homemade dog treats. It’s gentle on digestion, naturally flavorful, and dogs usually love it instantly. Combined with peanut butter, these cookies become incredibly aromatic and irresistible.
I often make these during fall because the smell of pumpkin and cinnamon filling the kitchen feels comforting for both humans and pets.
Type of Treat:
Great for:
- Daily rewards
- Digestive support treats
- Crunchy snacks
- Training rewards
Total Yield:
Approximately 30-40 cookies.
Dietary Categories:
- Limited ingredient
- High-fiber
- Grain-free adaptable
Suitable For:
- Puppies
- Adult dogs
- Seniors
- Dogs with sensitive digestion
Time Requirements:
- Prep Time: 10 minutes
- Bake Time: 20-25 minutes
- Total Time: 35 minutes
Shelf Life:
- Room temperature: 2 weeks
- Refrigerator: 3 weeks
- Freezer: 3 months

Nutritional & Health Information:
Each cookie contains around 35-40 calories.
Health benefits:
- Pumpkin supports digestive regularity
- Peanut butter offers healthy fats
- Cinnamon may provide antioxidants
- Fiber can help maintain stool consistency
Pumpkin is commonly recommended by veterinarians for dogs experiencing mild digestive upset because of its soluble fiber content.
Equipment Required:
- Mixing bowl
- Rolling pin
- Baking sheet
- Cookie cutters
- Parchment paper
Ingredients
Main Components:
- 1 cup pumpkin puree
- ½ cup natural peanut butter
- 2 eggs
- 2½ cups whole wheat flour
- ½ teaspoon cinnamon
Safety Notes:
Never use pumpkin pie filling because it often contains sugars and spices unsafe for dogs.
Optional Add-ins/Variations:
- Ground flaxseed
- Chia seeds
- Shredded carrots
- Oat flour substitution
Instructions:

Instructions
- Preheat oven to 350°F (175°C).
- Mix pumpkin puree, peanut butter, and eggs.
- Add flour and cinnamon.
- Stir until smooth dough forms.
- Roll dough to ¼-inch thickness.
- Cut into shapes.
- Place on baking sheet.
- Bake 20-25 minutes until crisp.
- Cool fully before serving.
Expert Tips and Variations:
I like refrigerating the dough for 15 minutes before rolling because it becomes easier to handle.
For extra crunchy treats, leave biscuits in the turned-off oven for another 15 minutes after baking.
Additional Features:
Making homemade pumpkin treats can be significantly cheaper than premium digestive-support dog treats sold commercially.
Oat and Apple Pretzel Dog Treats

These oat and apple pretzel treats are one of the most fun recipes I’ve made for my dogs. The pretzel shape creates a crunchy texture dogs really enjoy chewing, while applesauce and oats provide natural fiber and nutrients.
My dogs especially love these after outdoor play sessions because the crunchy texture keeps them occupied longer than soft treats.
Time Requirements
- Prep Time: 10 minutes
- Bake Time: 20-30 minutes
- Total Time: 30-40 minutes
Shelf Life
- Refrigerator: 2 weeks
- Freezer: 3 months
Nutritional & Health Information
Each pretzel contains roughly 50 calories.
Benefits include:
- Oats provide soluble fiber
- Apples contain antioxidants
- Crunchy texture may support dental health
- Lower fat than many commercial biscuits
Equipment Required
- Mixing bowls
- Baking sheet
- Parchment paper
- Whisk
Ingredients
- 1 egg
- 1 cup unsweetened applesauce
- 2 cups oat flour
- ¾ cup rolled oats

Ingredient Notes
Always use unsweetened applesauce without xylitol or artificial sweeteners.
Optional Add-ins
- Cinnamon
- Flaxseed
- Pumpkin puree
- Banana puree
Instructions

Instructions
- Preheat oven to 350°F (175°C).
- Combine oat flour and rolled oats.
- Add applesauce and mix thoroughly.
- Form dough into manageable portions.
- Roll each portion into long ropes.
- Twist into pretzel shapes.
- Brush lightly with beaten egg.
- Bake 25-30 minutes until lightly browned.
- Cool completely before serving.
Expert Tips and Variations
I’ve found that chilling the dough briefly helps maintain the pretzel shapes better during baking.
If your dog prefers softer treats, shorten the baking time slightly.
Storage Considerations
Store in airtight containers to prevent moisture buildup. If freezing, separate layers with parchment paper to avoid sticking.
Final Thoughts
Making natural homemade dog treats has completely changed how I approach rewarding my dogs. Not only do I feel more confident knowing exactly what ingredients they’re eating, but I’ve also noticed improved digestion, healthier coats, and more excitement at treat time.
These recipes are simple enough for beginners yet flexible enough for experienced dog owners who want to customize treats around allergies, sensitivities, or nutritional goals. Homemade treats also create a wonderful bonding experience because dogs genuinely recognize the effort and excitement that comes from fresh baking.
All content on this site is written and reviewed by our experienced team to ensure it is accurate, reliable, and helpful for our readers. Our Our Process page explains how we carefully research and create high-quality content, while our Team page introduces the professionals behind our work. We also provide clear guidelines for content or image concerns on our Image Removal page, so you can trust that we prioritize transparency, quality, and reader safety.