5 Travel-Friendly Dog Treats (Non-Messy, Portable)
Traveling with dogs is one of my favorite things, but I quickly learned that not every dog treat belongs in the car, backpack, or travel bag. I’ve dealt with greasy treats melting into seat covers, crumbly biscuits covering the floor, and sticky snacks turning into a mess during long road trips.
That’s why I started making homemade travel-friendly dog treats that are portable, non-greasy, easy to store, and packed with healthy ingredients dogs genuinely enjoy. These recipes are designed to stay fresh longer, avoid messy cleanup, and support your dog’s health while you’re on the go.
Key Takeaways
- Homemade travel dog treats help avoid greasy messes and crumbling snacks.
- Crunchy treats often last longer and travel better than soft commercial options.
- Pumpkin supports digestion and can help dogs during stressful travel.
- Sweet potatoes provide complex carbohydrates and natural fiber for energy.
- Oats are gentle on sensitive stomachs and work well for portable treats.
- Homemade treats let you avoid artificial preservatives and fillers.
- Most veterinarians recommend treats make up less than 10% of a dog’s daily calories.
- Proper storage extends shelf life and keeps treats fresh during trips.
- Freezing homemade treats can help preserve texture and nutrients for months.
- Xylitol-free peanut butter is essential because xylitol is toxic to dogs.
According to veterinary nutrition experts, pumpkin and oats are among the most digestion-friendly ingredients for dogs, especially during travel when stress can upset the stomach. I’ve personally noticed my dogs tolerate these homemade treats much better than heavily processed store-bought options during road trips and hikes.
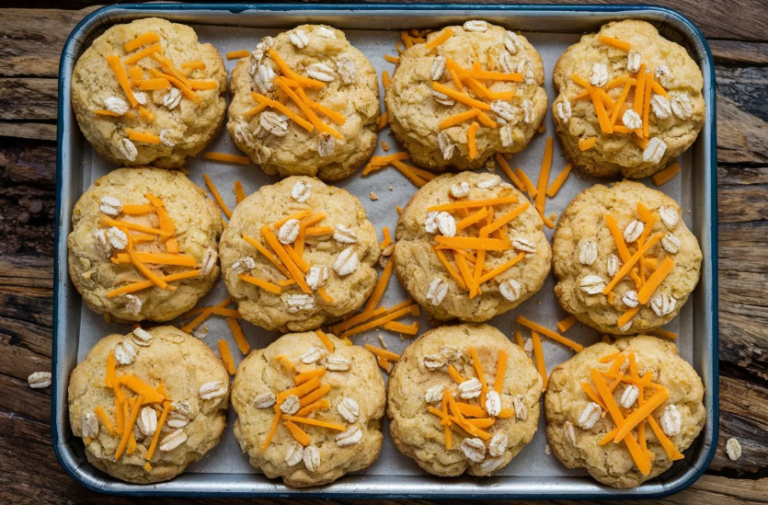
#1. Homemade Peanut Butter and Pumpkin Dog Treats: A Travel-Friendly Snack
 3")
There’s something rewarding about making treats at home and seeing your dog instantly recognize the smell coming from the oven. I originally made these Peanut Butter and Pumpkin Dog Treats after struggling to find portable snacks that didn’t crumble or leave oily stains in my travel bag.
These treats became one of my go-to travel snacks because they stay firm, store easily, and don’t create a mess in the car. The crunchy texture also helps reduce plaque buildup, which is an added bonus for dogs that snack frequently during trips.
Pumpkin is especially useful for dogs during travel because its fiber content can help support healthy digestion and stool consistency. I often bring these treats on long drives because they’re lightweight, compact, and easy to portion.
Why These Peanut Butter and Pumpkin Dog Treats Are Special
Many store-bought treats contain preservatives, artificial flavors, and fillers that aren’t ideal for daily snacking. Homemade treats allow complete control over ingredients and freshness.
Pumpkin provides fiber, vitamin A, and antioxidants, while natural peanut butter contributes healthy fats and protein. Whole wheat flour adds structure and nutrients, though oat flour works perfectly for dogs with sensitivities.
The crunchy texture makes these treats durable enough for travel while helping maintain dental health.
Why You’ll Love This Recipe
- Budget-friendly compared to premium store-bought treats
- Easy to store and transport
- Helps support digestion
- Great for training rewards
- Easy to customize for different dog sizes
- Long shelf life for road trips
- Non-greasy and travel-safe
- Batch-friendly for multi-dog households
Essential Information
- Prep Time: 5 minutes
- Cook Time: 25 minutes
- Total Time: 30 minutes
- Yield: Approximately 48 treats
- Shelf Life:
- Room Temperature: 2 weeks
- Refrigerated: 1 month
- Frozen: 6 months
Equipment Needed
- Mixing bowl
- Measuring cups
- Rolling pin
- Baking sheet
- Parchment paper
- Cookie cutters or knife
- Cooling rack
Ingredients
 4")
Main Components
- 1 cup pumpkin puree
- 2 large eggs
- 1/3 cup natural peanut butter (xylitol-free)
- 2 cups whole wheat flour
- Optional: 1/2 teaspoon cinnamon
Ingredient Benefits
Pumpkin contains soluble fiber that may help dogs experiencing mild digestive upset during travel. Peanut butter offers healthy fats and protein, while cinnamon can provide antioxidants in small dog-safe amounts.
Expert Tips Before You Start
- Always verify peanut butter is xylitol-free.
- Add extra flour if the dough feels sticky.
- Bake longer for crunchier treats.
- Let treats cool completely before storing.
- Store in airtight containers during trips to preserve crunch.
Instructions
 5")
- Preheat oven to 350°F (175°C).
- Mix pumpkin puree, eggs, and peanut butter until smooth.
- Gradually stir in flour and cinnamon.
- Roll dough to 1/4-inch thickness.
- Cut into shapes.
- Bake for 20–40 minutes depending on desired crunchiness.
- Cool completely before storing.
Storage & Shelf Life
Store in airtight containers away from humidity. For camping or road trips, I prefer vacuum-sealed travel pouches because they keep the treats crisp for days.
Common Questions
Can I make these softer for senior dogs?
Yes. Reduce baking time by 5–7 minutes.
Are these safe for puppies?
Yes, but serve smaller portions.
Can I freeze them?
Absolutely. Freeze in sealed bags for up to 6 months.
#2. Easy Homemade Dog Treats: The Perfect Non-Messy, Travel-Friendly Snack
 6")
I created these treats after getting tired of crumbly biscuits falling apart in my jacket pocket during hikes. These simple oat and banana treats hold together beautifully and travel incredibly well.
The texture is firm enough for travel but soft enough for older dogs to enjoy comfortably. Since they use minimal ingredients, they’re also ideal for dogs with ingredient sensitivities.
Bananas provide potassium and natural sweetness, while oats are easy on digestion and contain beneficial fiber.
What Makes These Treats Special?
These treats use only three main ingredients and don’t require preservatives or artificial flavoring. They remain compact and portable without becoming greasy.
I also love how easy they are to break apart for training sessions during road trips or outdoor adventures.
Why You’ll Love This Recipe
- Minimal ingredients
- Budget-friendly
- Excellent for training
- Easy to make in bulk
- Portable and durable
- Gentle on sensitive stomachs
- Naturally sweetened
Essential Recipe Information
- Prep Time: 15 minutes
- Cook Time: 25–30 minutes
- Total Time: 45 minutes
- Yield: Around 40 treats
Shelf Life
- Room Temperature: 1 week
- Refrigerated: 2 weeks
- Frozen: 3 months
Equipment Needed
- Mixing bowl
- Food processor or blender
- Rolling pin
- Baking sheet
- Cookie cutters
Ingredients
- 2 cups old-fashioned oats
- 2 ripe bananas
- 1/2 cup natural peanut butter
 7")
Expert Tips for Perfect Treats
- Use ripe bananas for better sweetness.
- Bake slightly longer for extra crunch.
- Roll thinner for smaller training treats.
- Chill dough briefly if too sticky.
Step-by-Step Instructions
- Preheat oven to 300°F (150°C).
- Blend oats into flour consistency.
- Mash bananas and combine with peanut butter.
- Add oat flour gradually.
- Roll dough to 1/4-inch thickness.
- Cut into desired shapes.
- Bake for 25–30 minutes.
- Cool fully before storage.
Variations and Substitutions
- Replace bananas with pumpkin puree.
- Add chia seeds for omega-3 support.
- Use sunflower seed butter for peanut allergies.
 8")
Serving Guidelines
Small dogs may benefit from mini-sized treats, while larger dogs can enjoy full portions.
Storage and Freshness Tips
I often store these in reusable silicone travel bags because they prevent crushing during hikes and road trips.
Common Questions & Troubleshooting
Can I use quick oats?
Yes, though the texture may differ slightly.
What if the dough is sticky?
Add extra oat flour gradually.
Can senior dogs eat these?
Yes, especially if baked for slightly less time.
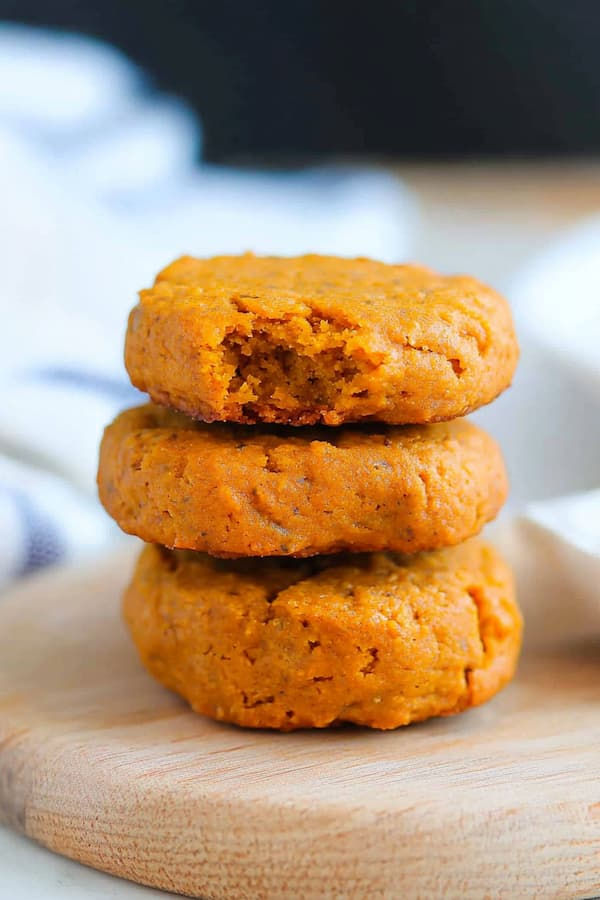
#3. Crunchy Pumpkin and Carrot Dog Treats: The Perfect Travel Companion for Your Pup
 9")
These crunchy pumpkin and carrot treats became one of my favorite recipes after several camping trips with my dogs. They stay intact inside treat pouches, don’t create crumbs everywhere, and hold their texture remarkably well.
Carrots naturally contain beta-carotene, which supports eye health and immune function. Combined with pumpkin, these treats provide excellent nutritional value in a travel-friendly form.
Why These Treats Are a Must-Try?
These treats are crunchy enough to survive backpacks and travel containers without turning into powder. They also contain wholesome ingredients that support digestion and overall wellness.
Dogs love the naturally sweet flavor from carrots, and I’ve found picky eaters usually respond well to this recipe.
Why You’ll Love This Recipe
- Crunchy and durable
- Great for road trips
- Supports digestion
- Affordable homemade option
- Long shelf life
- Easy batch preparation
Essential Recipe Information
- Prep Time: 15 minutes
- Cook Time: 30–35 minutes
- Total Time: 50 minutes
- Yield: 30–40 treats
Shelf Life
- Room Temperature: 2 weeks
- Refrigerated: 3 weeks
- Frozen: 3 months
Equipment Needed
- Mixing bowl
- Fine grater
- Rolling pin
- Cookie cutters
- Baking sheet
Ingredients
 10")
- 1 cup canned pumpkin
- 1 finely grated carrot
- 2 1/2 cups whole wheat flour
- 1 egg
- 1/4 cup water
- Optional cinnamon
Expert Tips for the Best Results
- Grate carrots finely for better consistency.
- Bake longer for extra crunch.
- Keep dough thickness even.
- Let treats cool fully before sealing containers.
Step-by-Step Instructions
 11")
- Preheat oven to 325°F (163°C).
- Mix pumpkin, carrot, and egg.
- Add flour gradually.
- Add water if needed.
- Roll dough to 1/4-inch thickness.
- Cut into shapes.
- Bake 30–35 minutes.
- Cool completely.
Variations and Substitutions
- Use oat flour for grain-free needs.
- Replace egg with applesauce if necessary.
- Add flaxseed for extra fiber.
Serving Guidelines
These are excellent for medium and large dogs but can easily be broken into smaller pieces.
Storage and Freshness Tips
For long trips, I recommend storing them with a small food-safe moisture absorber packet to maintain crunchiness.
Common Questions & Troubleshooting
Can I use fresh pumpkin?
Yes, as long as it’s fully cooked and pureed.
How do I extend shelf life?
Bake slightly longer at lower temperatures.
Are these puppy-safe?
Yes, in smaller portions.
#4. Chewy Apple and Oat Dog Treats: The Ultimate Travel Companion for Your Pup
 12")
Chewy Apple and Oat Dog Treats: The Ultimate Travel Companion for Your Pup
Not every dog likes crunchy treats during travel. One of my dogs prefers softer snacks, especially during long drives, which inspired these chewy apple and oat treats.
They’re soft enough to chew comfortably but firm enough not to crumble in pockets or travel bags. Apples add natural sweetness without refined sugar, and oats support healthy digestion.
Why These Treats Are Perfect for Travel?
These treats maintain their structure extremely well while staying soft inside. Unlike brittle biscuits, they won’t create crumbs across your car seats or backpack.
The chewy texture also makes them useful for calming excited dogs because they take longer to chew.
Why You’ll Love This Recipe
- Soft and portable
- Gentle on digestion
- Great for puppies and seniors
- Naturally sweetened
- Budget-friendly
- Easy to customize
Essential Recipe Information
- Prep Time: 10 minutes
- Cook Time: 20–25 minutes
- Total Time: 35 minutes
- Yield: 25–30 treats
Shelf Life
- Room Temperature: 2 weeks
- Refrigerated: 3 weeks
- Frozen: 3 months
Equipment Needed
- Mixing bowl
- Blender or food processor
- Baking sheet
- Cookie cutters
 13")
Ingredients
- 1 cup unsweetened applesauce
- 2 1/2 cups oat flour
- 1 egg
- 1 tablespoon coconut oil
- Optional cinnamon
Expert Tips for the Best Results
- Avoid overbaking to preserve chewiness.
- Use unsweetened applesauce only.
- Chill dough briefly if it feels sticky.
- Store in airtight containers immediately after cooling.
Step-by-Step Instructions
- Preheat oven to 325°F (163°C).
- Combine applesauce, coconut oil, and egg.
- Gradually add oat flour.
- Roll dough to 1/4-inch thickness.
- Cut into shapes.
- Bake 20–25 minutes.
- Cool before storing.
Variations and Substitutions
 14")
- Use grated fresh apple instead of applesauce.
- Replace egg with flaxseed mixture.
- Add chia seeds for omega-3 support.
Serving Guidelines
Break into smaller pieces for tiny breeds or puppies.
Storage and Freshness Tips
I like storing these in reusable snack containers during road trips because they retain their chewy texture better than plastic bags.
Common Questions & Troubleshooting
Can I use fresh apples?
Yes, finely grated fresh apples work well.
How do I make them crunchier?
Bake a few minutes longer.
Can I use quick oats?
Yes, though texture changes slightly.
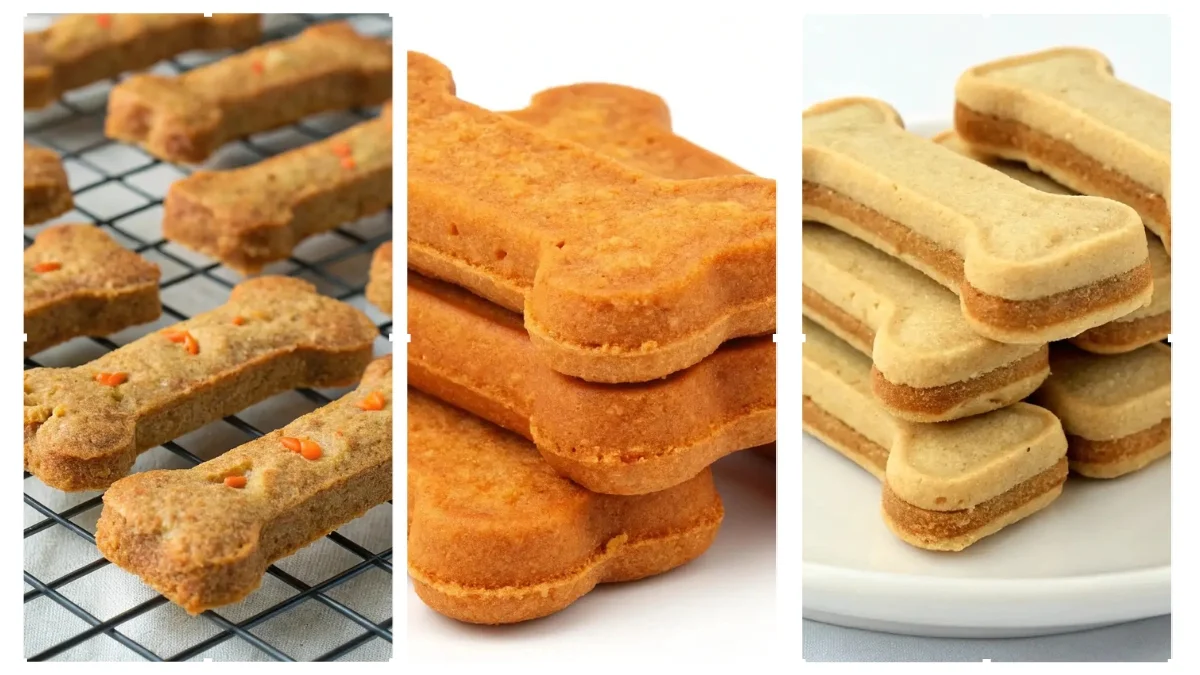
#5. Peanut Butter and Sweet Potato Dog Treats: The Ultimate On-the-Go Snack
 15")
Sweet potatoes are one of my favorite ingredients for homemade dog treats because they provide natural energy without unnecessary fillers. These treats became my go-to hiking snack for dogs because they stay firm without becoming dry or crumbly.
The combination of sweet potato and peanut butter creates a flavor most dogs absolutely love. They’re chewy enough for easy eating but sturdy enough for travel.
Why These Treats Are Perfect for Travel?
These treats maintain their shape beautifully inside backpacks, pockets, and travel containers. Sweet potatoes naturally retain moisture, which keeps the treats enjoyable without becoming greasy.
They’re also freezer-friendly, making them ideal for meal prepping before long trips.
Why You’ll Love This Recipe
- Portable and non-messy
- Naturally nutritious
- Great energy source
- Easy to prepare
- Budget-friendly
- Ideal for all life stages
Essential Recipe Information
- Prep Time: 10 minutes
- Cook Time: 25–30 minutes
- Total Time: 40 minutes
- Yield: About 30 treats
Shelf Life
- Room Temperature: 2 weeks
- Refrigerated: 3 weeks
- Frozen: 3 months
Equipment Needed
- Mixing bowl
- Rolling pin
- Baking sheet
- Food processor or masher
Ingredients
 16")
- 1 cup mashed sweet potato
- 1/2 cup natural peanut butter
- 2 cups oat flour
- 1 egg
- Optional cinnamon
Expert Tips for the Best Results
- Cool sweet potatoes fully before mixing.
- Bake longer for firmer treats.
- Use silicone molds for uniform shapes.
- Store with parchment layers to avoid sticking.
Step-by-Step Instructions
 17")
- Preheat oven to 325°F (163°C).
- Mash sweet potato until smooth.
- Mix in peanut butter and egg.
- Add oat flour gradually.
- Roll dough to 1/4-inch thickness.
- Cut into shapes.
- Bake 25–30 minutes.
- Cool fully before storing.
Variations and Substitutions
- Use sunflower butter instead of peanut butter.
- Replace oat flour with coconut flour if needed.
- Add flaxseed for extra nutrients.
Serving Guidelines
Smaller dogs may need smaller treat sizes, while larger breeds can enjoy full servings.
Storage and Freshness Tips
I often freeze portions in small travel bags so I can thaw only what I need during longer adventures.
Common Questions & Troubleshooting
Can I use canned sweet potato?
Yes, as long as it’s unsweetened and unseasoned.
How do I make these softer?
Reduce baking time slightly.
Are they suitable for puppies?
Yes, when broken into smaller pieces.
Final Thoughts
Traveling with dogs becomes so much easier when you have treats that are clean, portable, and nutritious. After years of dealing with greasy commercial snacks and crumb-covered bags, homemade travel-friendly treats completely changed the experience for me.
These recipes are simple to prepare, budget-friendly, and far healthier than many processed alternatives. Whether you’re planning road trips, hikes, beach days, or everyday outings, having reliable homemade dog treats ready to go can make adventures with your dog far more enjoyable.
All content on this site is written and reviewed by our experienced team to ensure it is accurate, reliable, and helpful for our readers. Our Our Process page explains how we carefully research and create high-quality content, while our Team page introduces the professionals behind our work. We also provide clear guidelines for content or image concerns on our Image Removal page, so you can trust that we prioritize transparency, quality, and reader safety.