5 Freezer-Friendly Cat Food Recipes to Save Time & Money
I used to spend a lot on cat food every month, and honestly, I wasn’t even sure if it was healthy. Labels looked good, but when I checked ingredients closely, I noticed fillers and low-quality meat. That didn’t sit right with me.
So I started testing homemade cat food in my own kitchen. At first, it felt overwhelming—figuring out nutrients, storage, and what my cat would actually eat. But once I figured out freezer-friendly recipes, everything became easier.
Now I batch cook once, freeze portions, and I’m set for weeks. It saves me time, cuts costs, and gives me full control over what my cat eats.
Key Takeaways
- I reduced cat food costs by nearly 40% using bulk prep
- Freezer storage keeps food fresh for up to 2–3 months
- Taurine and supplements are essential in homemade diets
- Batch cooking saves hours every week
- Portion control helps maintain healthy weight
1. A Freezer-Friendly Cat Food Recipe to Save Time and Money

I started this recipe out of frustration. My cat refused expensive canned food, and I was tired of wasting money. That pushed me to experiment with homemade meals.
After a few failed batches (too dry, too mushy, wrong balance), I finally found a version that worked. This recipe is now my go-to because it’s simple, balanced, and easy to freeze.
Recipe Overview
From my experience, this recipe works as a complete daily meal. It includes protein, fats, and essential nutrients cats need to stay healthy.
The texture is soft and slightly moist, which makes it easier for picky eaters. My cat accepted this faster than any store-bought option I tried.
I usually prepare a large batch once and store it in small portions. That way, I don’t have to cook daily.
Why You’ll Love This Recipe (Pet Parent Perspective)
- I save money compared to premium brands
- I know exactly what ingredients are used
- I only cook once every few weeks
- It works well for multiple cats
- Portion sizes are easy to control
Essential Information Block
Prep Time: About 1 hour
Cook Time: 15–20 minutes
Total Time: Around 2 hours
Yield: 12–15 servings
Portion Size: 1–2 tablespoons per serving
Shelf Life: Up to 3 months frozen
Storage: Airtight freezer-safe containers or ice cube trays
Equipment Needed
I use a baking tray for cooking the chicken, a grinder or food processor for texture, and mixing bowls for combining everything.
If you don’t have a grinder, a food processor works fine. Just avoid over-blending because it turns into paste, which some cats don’t like.
Ingredients Section: Main Components

I use 3 pounds of chicken thighs because they contain both protein and fat, which cats need. Skin and bones add extra nutrients, especially calcium.
I add 1 cup of water to keep the mixture moist. Without it, the texture becomes too dry after freezing.
Eggs are optional, but I include 2 cooked eggs for extra protein and vitamins. I always cook them fully to avoid bacteria.
Fish oil is important for omega-3 fatty acids. I usually add around 5000–10000 mg, which helps with coat health.
Taurine is the most important supplement. Cats cannot produce it naturally, so I always add around 2000 mg.
I also include:
- Vitamin E for antioxidants
- Vitamin B-complex for metabolism
- A multivitamin for balance
- Lite salt with iodine for minerals
- Chicken liver for added nutrients
From my experience, skipping supplements leads to nutritional gaps, so I never leave them out.
Expert Tips (Before Instructions)
- I always partially cook the chicken to reduce bacteria risk
- I measure supplements carefully—too much or too little can cause issues
- I mix thoroughly to avoid uneven nutrition
- Slight warming after thawing improves acceptance
- I use ice cube trays for easy portioning
Instructions

Preparation
I preheat the oven to 350°F and place the chicken thighs on a tray. I cook them for about 15–20 minutes until they are partially done.
Grinding
After cooling, I grind the chicken. I aim for a soft but slightly chunky texture.
Mixing Supplements
In a separate bowl, I mix water, eggs, fish oil, taurine, vitamins, and salt until smooth.
Combining
I mix everything together thoroughly. I usually use my hands to make sure it’s evenly blended.
Portioning and Storage
I divide the mixture into small portions and freeze them. I leave some space in containers because food expands when frozen.
Variations and Substitutions
Sometimes I adjust the recipe depending on my cat’s needs.
- I replace chicken with rabbit for a leaner option
- I skip eggs if my cat shows sensitivity
- I add broth for picky eaters
- I blend it more for older cats
These small changes help adapt the recipe without losing balance.
Pro Tips and Success Secrets
Buying meat in bulk saves the most money. I also prepare large batches—usually enough for 8–12 weeks.
I double-seal containers to prevent freezer burn. I learned this after a batch lost quality.
Breaking portions into smaller sizes also helps avoid waste.
Serving Guidelines
I follow a simple rule: feed about 2–3% of body weight daily.
For example, if my cat weighs 4.5 kg, I give around 90–120 grams per day, split into two meals.
Safety Considerations
I never use raw ground meat because it can contain bacteria.
I always cook eggs fully and monitor for allergies. Some cats react to fish oil or certain ingredients.
If a cat has kidney issues, I always check with a vet before using this recipe.
#2. A Freezer-Friendly Tuna Twist Cat Food Recipe
When I first noticed my cat refusing his regular food, I realized something had to change. Like many pet owners, I was spending more money on store options, yet still not getting results. That pushed me to try homemade meals, and after testing a few ideas, this tuna-based recipe turned out to be the one my cat actually enjoys and finishes every time. It’s simple, affordable, and easy to store, which makes it practical for everyday use.

Recipe Overview
From my experience, this recipe works best as a complete meal rather than just a treat. Tuna is naturally rich in protein and contains essential amino acids that support muscle and tissue repair. I noticed improved energy levels and a shinier coat after switching to homemade meals like this.
What I like most is how practical it is. I usually prepare a large batch once a week and freeze portions. This saves me daily effort and ensures my cat always has fresh food ready. Studies show that consistent feeding routines improve digestion and reduce stress in pets, and this method helps me maintain that easily.
Making food at home also gives me full control over ingredients. I avoid fillers and preservatives that are common in commercial food. For me, this balance of control, cost, and convenience makes this recipe a long-term solution.
Why You’ll Love This Recipe (Pet Parent Perspective)
I’ve found this recipe useful in many ways:
- Cost-effective: Tuna in bulk reduces feeding costs significantly
- Full control: I decide exactly what goes into my cat’s diet
- Easy storage: Freezing makes meal planning simple
- Portion control: Helps manage weight and avoid overfeeding
- Works for multiple cats: Easy to scale the recipe
- Saves time: One prep session lasts for weeks
Essential Information Block
Prep Time: About 45 minutes
Cook Time: No cooking required except egg
Total Time: Around 1 hour
Yield: 10–12 servings
Portion Size: 1–2 tablespoons per serving
Shelf Life: Months in freezer, 48 hours refrigerated
Storage: Airtight freezer-safe containers
Equipment Needed:
I use a mixing bowl, fork for mashing, and freezer containers. A blender can help if your cat prefers smoother texture. Clean tools properly because fish smell tends to stay.
Ingredients Section: Main Components

This recipe is built around simple but effective ingredients.
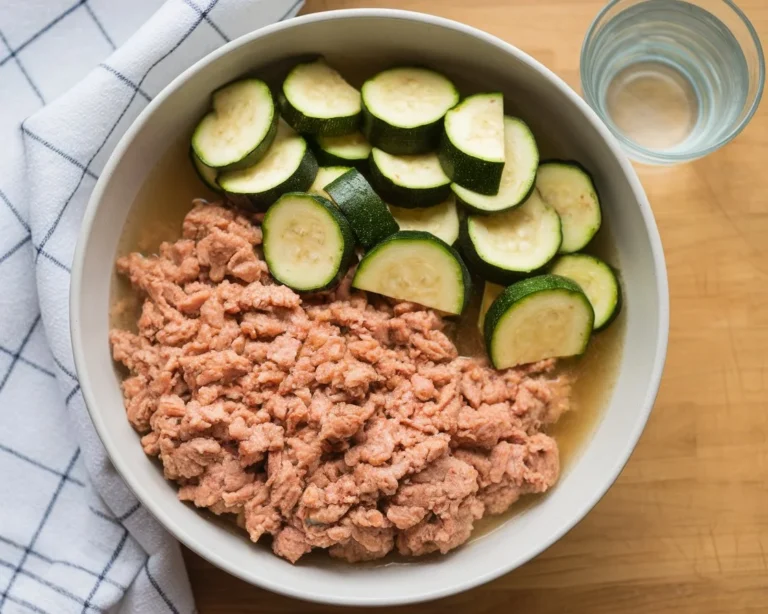
I use 2 pounds of canned tuna in water because it’s high in protein and widely available. Adding 3/4 cup water keeps the mixture moist, which helps with hydration. Cats naturally have low thirst drive, so moisture in food is important.
One fully cooked egg adds extra nutrients like protein and vitamins. Fish oil capsules provide omega-3 fatty acids, which improve coat health and reduce inflammation. Research shows omega-3 can support skin health and reduce shedding.
For balance, I include vitamin E, vitamin B-complex, and a multivitamin. Taurine is critical because cats cannot produce enough of it on their own. Lack of taurine can lead to serious heart and vision problems.
I also add a small amount of cooked sweet potato for fiber. This helps digestion and supports gut health, especially for indoor cats.
Expert Tips (Before Instructions)
From my experience, a few things make a big difference:
- Always drain tuna properly to avoid watery texture
- Measure supplements carefully to maintain balance
- Keep texture slightly flaky, not paste-like
- Warm food slightly before serving to improve acceptance
- Use small portions for better digestion
Instructions

Preparation:
I start by draining the tuna and breaking it into small flakes using a fork. It should stay slightly chunky.
Egg Prep:
I boil the egg fully, let it cool, and mash it well before mixing.
Supplement Mix:
In a separate bowl, I mix water, fish oil, vitamins, taurine, and salt until smooth.
Combining:
I add the mixture into tuna and egg, then mix thoroughly. This ensures even distribution of nutrients.
Portioning and Storage:
I divide the mixture into small portions, place them in containers, and freeze. I thaw portions overnight in the fridge before feeding.
Variations and Substitutions
I sometimes adjust the recipe based on availability or my cat’s needs.
I can replace tuna with salmon for variety. If my cat has digestion issues, I switch sweet potato with pumpkin. For older cats, I add more water to soften the texture.
Adding a small amount of low-sodium broth improves taste without affecting health. If there are medical concerns like kidney issues, I always consult a vet before modifying ingredients.
Pro Tips and Success Secrets
Here are a few things I learned over time:
- Always use tuna in water, not oil
- Freeze food in thin layers for faster thawing
- Store supplements in cool, dark places
- Prepare larger batches to save time
- Adjust portion size based on age and weight
Serving Guidelines
I follow a simple rule: feed around 2–3% of body weight daily.
For example, a 4 kg cat needs roughly 80–120 grams of food per day. I divide meals into two servings. This helps maintain stable energy levels and prevents overeating.
I also check weight regularly. Obesity affects over half of pet cats, so portion control is very important.
Safety Considerations
Food safety is something I take seriously.
I only use cooked or canned fish because raw fish can carry parasites. I always cook eggs fully to avoid bacteria risks. Small portions prevent choking and improve digestion.
I monitor my cat for allergies like itching or stomach upset. Tuna should not be overused daily due to mercury levels, so I rotate recipes when possible.
If a cat has kidney or heart issues, I always recommend checking with a veterinarian before feeding homemade diets.
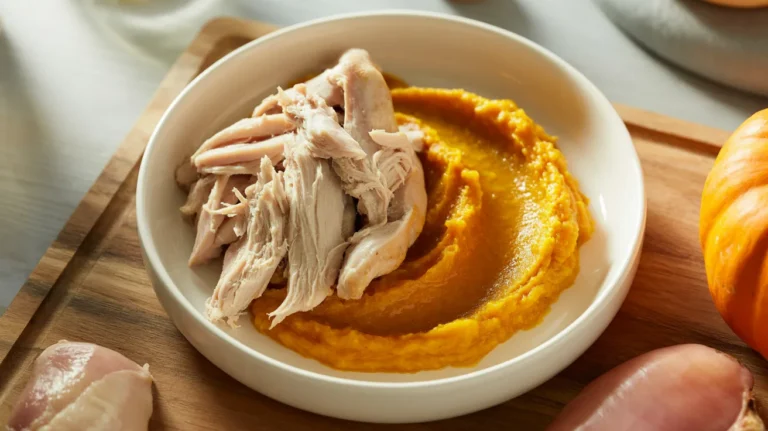
#3. A Freezer-Friendly Chicken & Pumpkin Cat Food Recipe

I still remember the moment I realized store-bought cat food wasn’t working anymore. My cat lost interest, and I started questioning both cost and quality. That’s when I tested this chicken and pumpkin recipe at home, focusing on nutrition, storage, and ease.
This recipe solves three real problems I faced: high pet food costs, unclear ingredients, and daily feeding hassle. It’s a balanced homemade option with protein, fiber, and essential nutrients like taurine. I batch-prepare it, freeze portions, and use it throughout the week.
From my experience, homemade cat meals can cut food costs by 20–40% compared to premium brands while giving full control over ingredients. This recipe is simple, practical, and works well even for picky cats.
Recipe Overview
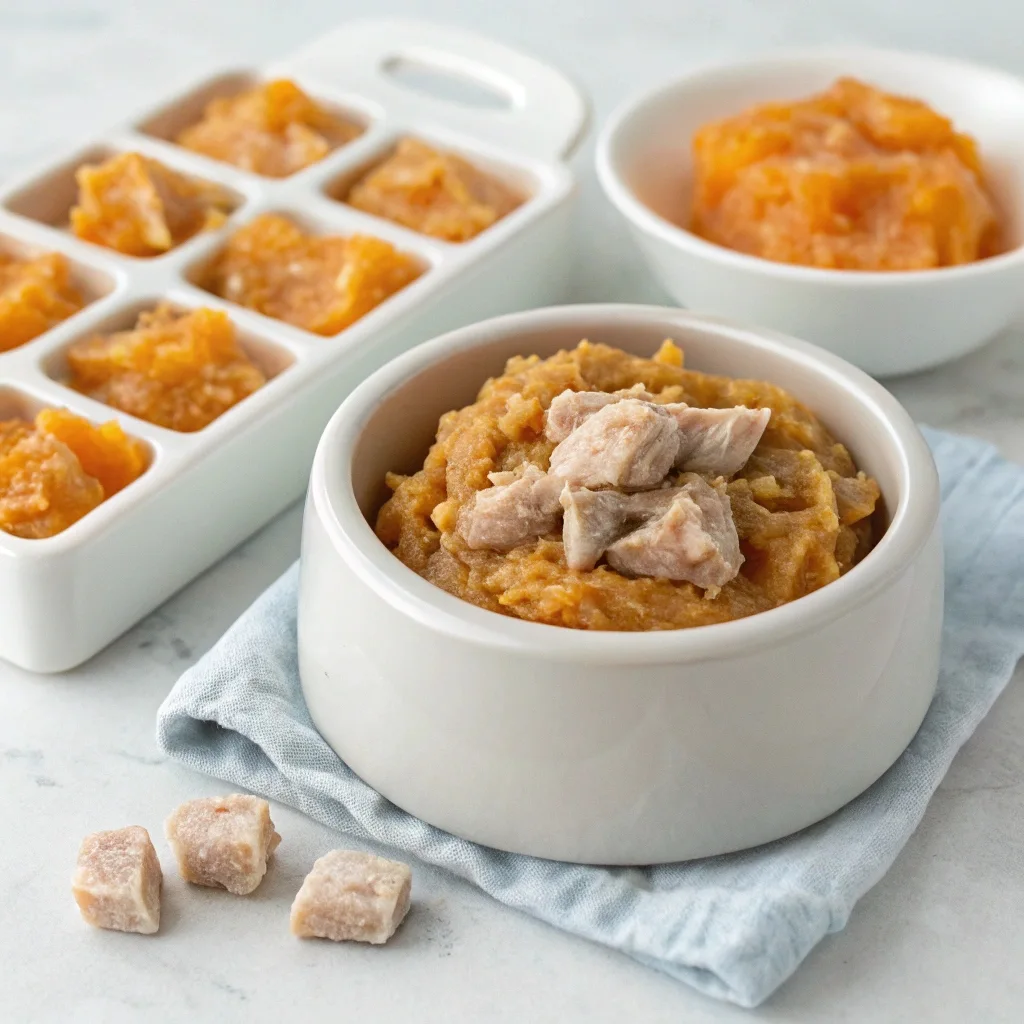
I treat this recipe as a complete meal, not just a treat. It combines cooked chicken with pumpkin to create a soft texture most cats accept easily. In my experience, texture matters just as much as taste for picky eaters.
What works best for me is the freezer-friendly setup. I prepare a large batch once and store it in portions. This reduces daily effort and keeps feeding consistent, which is important for a cat’s routine.
I also noticed that cats respond better to slightly warm food. After thawing, I warm it a bit, and it improves acceptance significantly.
Why You’ll Love This Recipe (Pet Parent Perspective)
- Cost-Effective: I spend less compared to buying premium canned food
- Ingredient Control: I know exactly what my cat is eating
- Easy Storage: Freezing makes feeding simple and stress-free
- Custom Portions: I adjust serving size based on weight
- Great for Multiple Cats: Easy to scale for more pets
- Time-Saving: One prep session lasts for weeks
Essential Information Block
- Prep Time: About 1 hour
- Cook Time: 20–25 minutes
- Total Time: Around 2 hours
- Yield: 12–14 servings
- Portion Size: 1–2 tablespoons
- Shelf Life: Months frozen, 48–72 hours refrigerated
- Storage: Airtight freezer-safe containers
Equipment Needed
I usually keep it simple. A baking tray, mixing bowl, and fork are enough. Sometimes I use a blender for smoother texture, but it’s optional.
One thing I learned the hard way—clean everything properly after handling chicken. It helps avoid contamination and keeps your kitchen safe.
Ingredients Section: Main Components
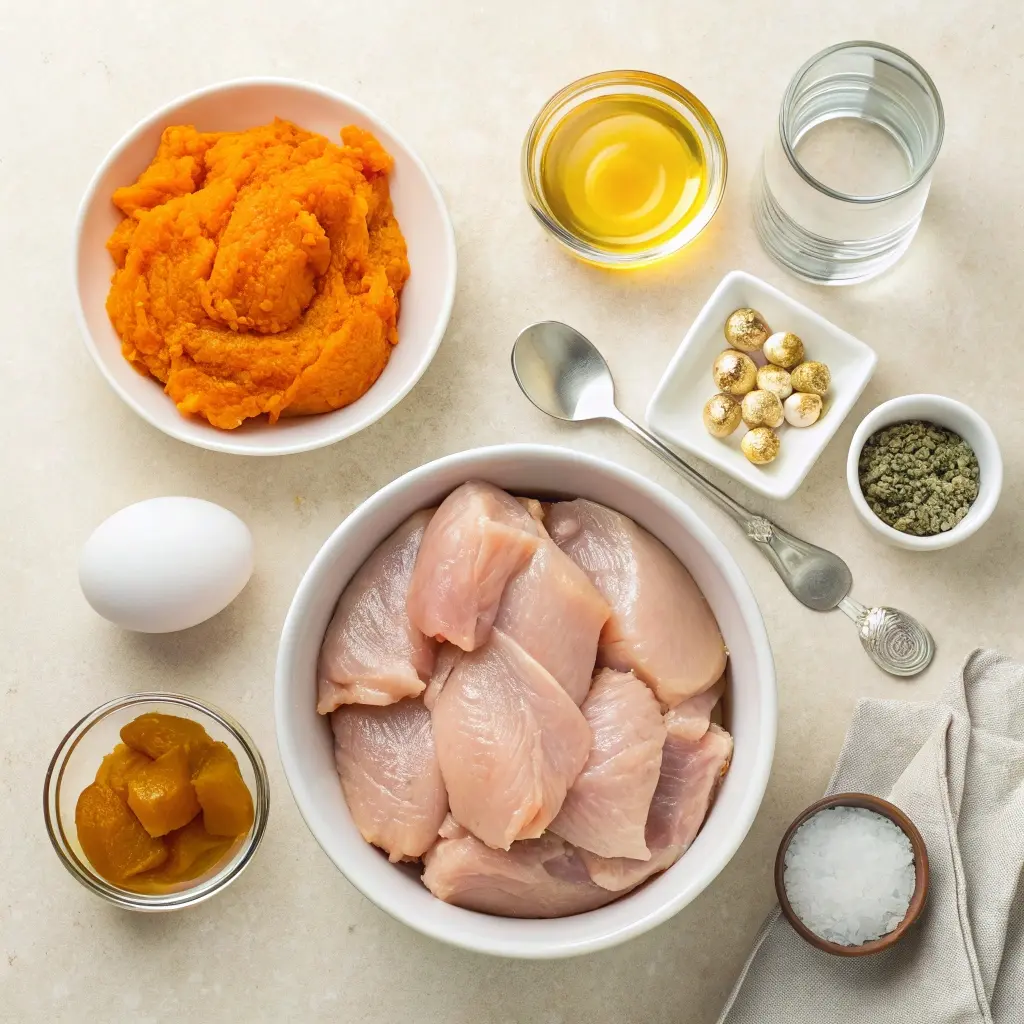
I always focus on balance when choosing ingredients.
- 2.5 pounds chicken thighs (protein source)
- 1 cup water (hydration support)
- 1 cooked egg (extra nutrients)
- Fish oil capsules (omega-3 for skin and coat)
- Vitamin E and B-complex (support metabolism)
- Multivitamin (overall nutritional coverage)
- Taurine (critical for heart and vision)
- Lite salt with iodine (mineral balance)
- 1/4 cup pumpkin puree (digestive support)
From my research, taurine deficiency can lead to serious health issues in cats, so I never skip it.
Expert Tips (Before Instructions)
I’ve made mistakes here, so these tips matter.
Cook the chicken just enough—fully raw is unsafe, but overcooked meat becomes dry and less appealing. I aim for soft and slightly juicy texture.
Always measure supplements carefully. Too much or too little can affect your cat’s health over time.
If your cat is picky, warming the food slightly improves smell and acceptance. I’ve seen a clear difference with this trick.
Instructions

Preparation
I preheat the oven to 350°F and bake the chicken for about 20–25 minutes. I keep it slightly undercooked inside to retain moisture.
Shredding
Once cooled, I shred the chicken into small, soft pieces. Texture matters, so I avoid turning it into paste.
Supplement Blend
I mix water, egg, fish oil, vitamins, taurine, and salt in a bowl until smooth. This ensures even nutrient distribution.
Combining
I mix everything together with pumpkin puree. I prefer using my hands because it blends more evenly.
Portioning and Storage
I divide the mixture into small containers, label them, and freeze. I thaw portions overnight before feeding.
Variations and Substitutions
I adjust this recipe depending on my cat’s needs.
Sometimes I replace chicken with turkey for variety. If I skip egg, I slightly increase healthy fats.
For sensitive digestion, I reduce pumpkin quantity. In older cats, I add more water for softer texture.
Small changes like these help customize the meal without affecting nutrition.
Pro Tips and Success Secrets
I always use fresh ingredients because quality directly impacts health.
Batch preparation is a big win—I usually prepare enough for several weeks. Freezing in small portions makes daily feeding easier.
Flat freezing works better than storing in large chunks. It speeds up thawing and avoids waste.
Serving Guidelines
I follow a simple rule: feed about 2–3% of body weight daily.
For example, an 11-pound cat needs roughly 3–4 tablespoons per day, split into two meals.
I avoid overfeeding because even small calorie excess can lead to weight gain over time.
Safety Considerations
I never serve raw chicken due to bacterial risks. Proper cooking is important for safety.
I also monitor portion size to prevent choking, especially for smaller cats.
Pumpkin is generally safe, but I still watch for digestive changes. Every cat reacts differently.
If a cat has kidney or medical issues, I always recommend checking with a vet before switching to homemade meals.
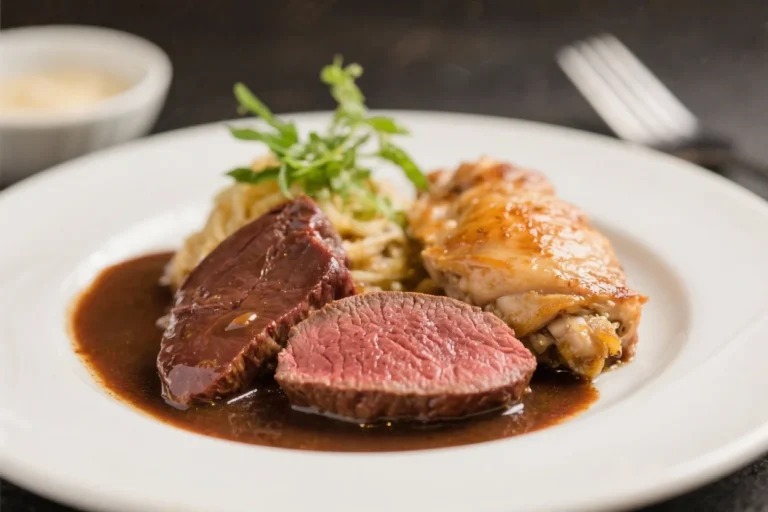
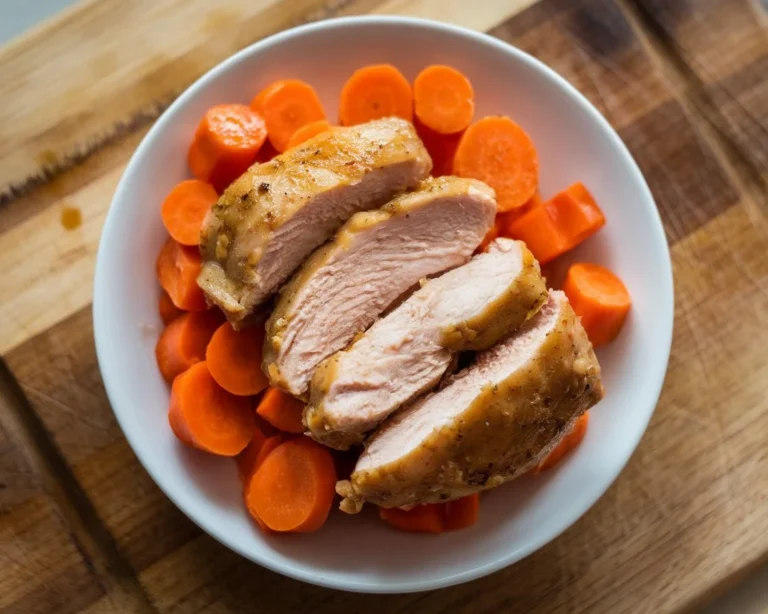
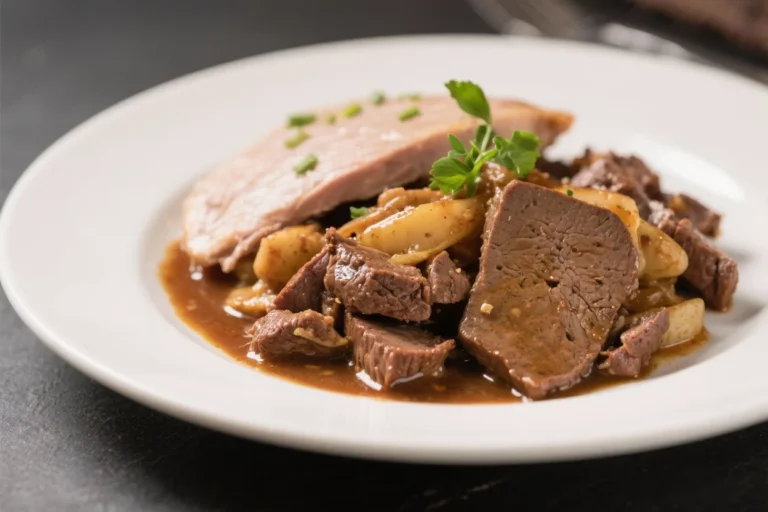
#4. A Freezer-Friendly Beef & Carrot Cat Food Recipe
I started making this recipe when my cat stopped enjoying store-bought food and my monthly pet budget kept rising. I needed something simple, affordable, and reliable that I could prepare at home without daily effort.
This beef and carrot recipe solves that problem. It’s a balanced homemade meal with protein, healthy fats, and added nutrients like taurine. I prepare it in bulk, freeze portions, and use it throughout the week without stress.
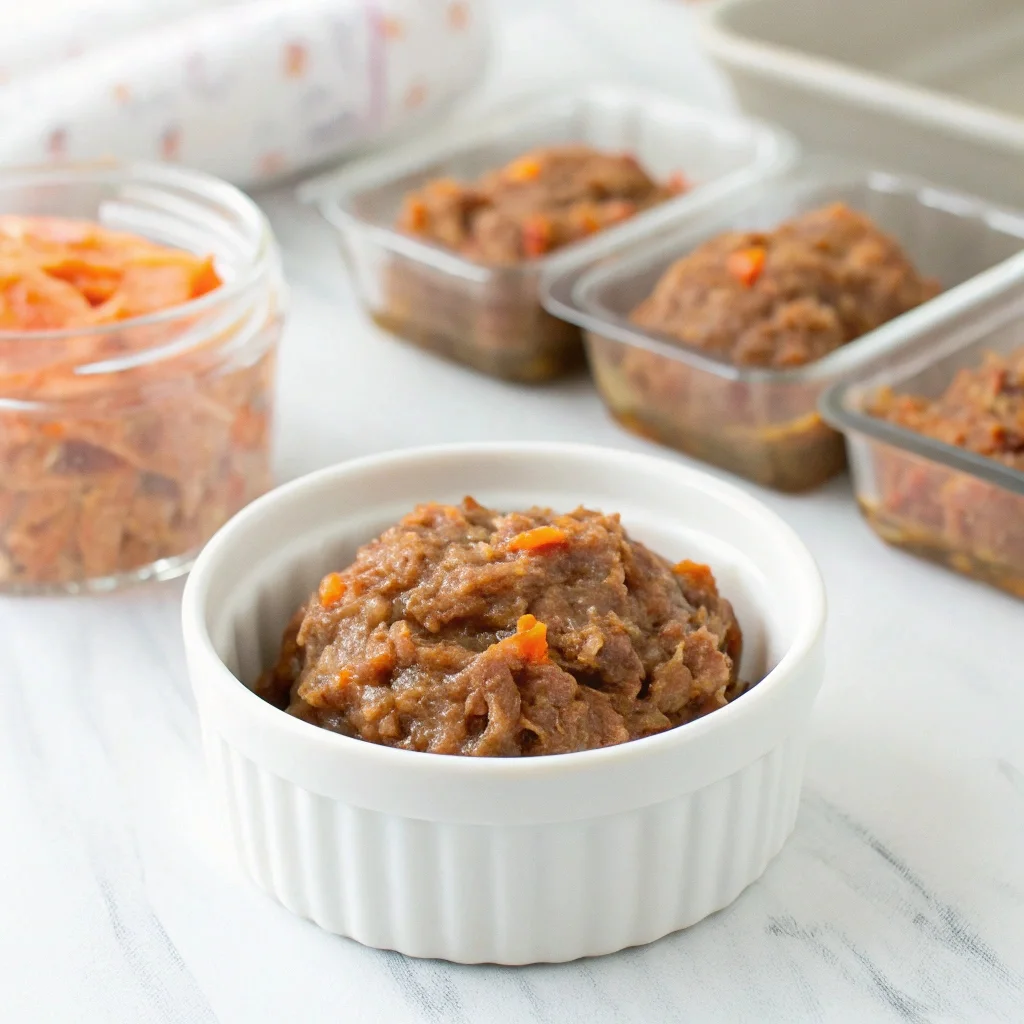
I use this recipe as a full meal, not just a treat. The beef gives it a rich taste, and the carrot adds a light fiber boost without overpowering the texture. Most cats prefer soft, slightly chunky food, and this fits that well.
What works best for me is the freezer-friendly setup. I prepare everything in one session and divide it into portions. This saves time and keeps feeding consistent, which is important for a cat’s routine.
I’ve also noticed that slightly warming the food after thawing improves smell and acceptance, especially for picky cats.
Why You’ll Love This Recipe (Pet Parent Perspective)
- Budget-Friendly: I spend less compared to premium cat food brands
- Full Control: I decide ingredient quality and freshness
- Easy Storage: Freeze and use anytime
- Flexible Portions: Adjust based on your cat’s size
- Good for Multi-Cat Homes: Easy to scale
- Time Efficient: One prep session lasts weeks
Essential Information Block
- Prep Time: About 1 hour
- Cook Time: 15–20 minutes
- Total Time: Around 2 hours
- Yield: 10–12 servings
- Portion Size: 1–2 tablespoons
- Shelf Life: Months frozen, 48–72 hours refrigerated
- Storage: Airtight freezer-safe containers
Equipment Needed
I keep things simple. A skillet, mixing bowl, and fork are enough for this recipe. Sometimes I use a blender for smoother texture, but it’s optional.
One thing I always follow is proper cleaning after handling raw beef. It reduces bacteria risk and keeps the kitchen safe.
Ingredients Section: Main Components
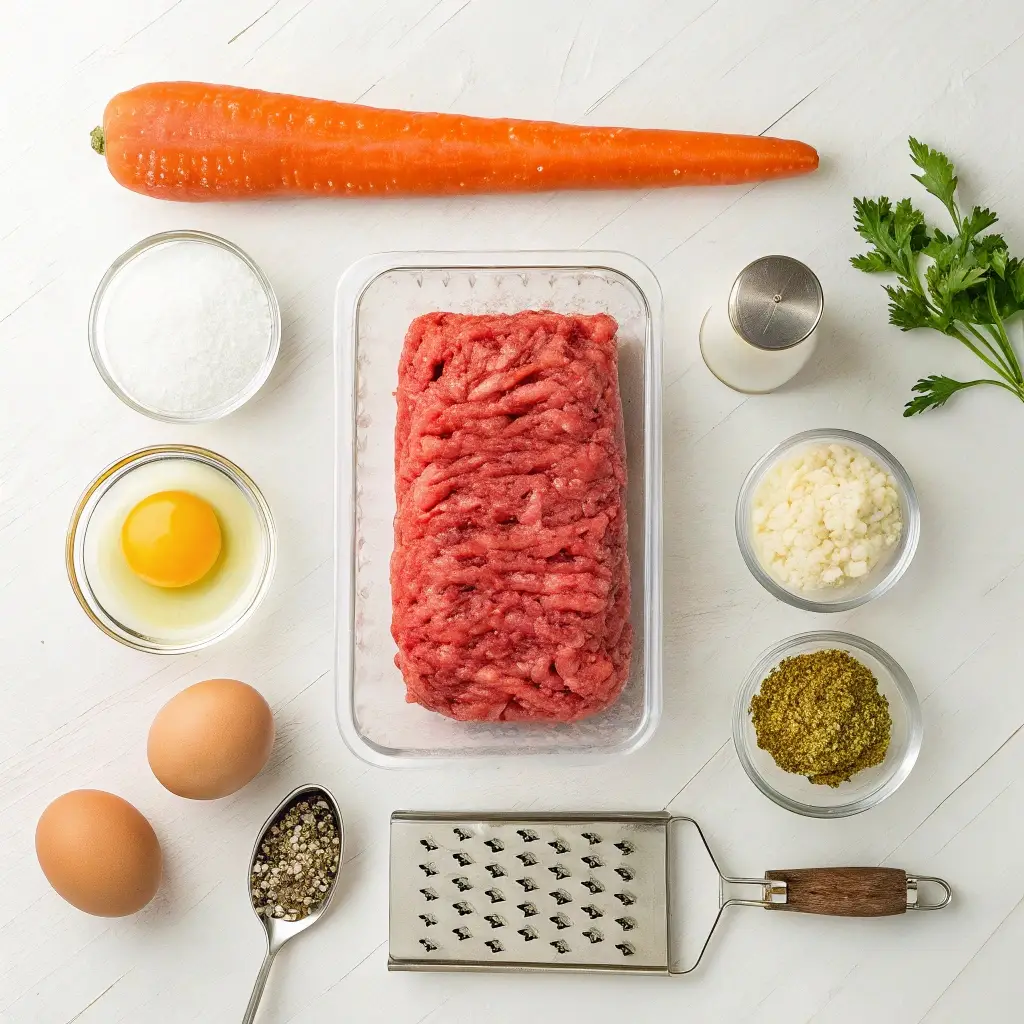
I focus on simple ingredients that cover nutrition basics.
- 2 pounds ground beef (around 85% lean)
- 3/4 cup water (helps hydration)
- 1 cooked egg (extra protein and nutrients)
- Fish oil capsules (omega-3 for coat health)
- Vitamin E and B-complex (support metabolism)
- Multivitamin (fills nutritional gaps)
- Taurine (critical for heart and vision)
- Lite salt with iodine (minerals)
- 3 tablespoons cooked grated carrot (fiber support)
From what I’ve learned, taurine is non-negotiable. Cats cannot produce enough on their own, so it must be added.
Expert Tips (Before Instructions)
I’ve tested this recipe multiple times, and a few things matter a lot.
Cook the beef just enough. Raw meat is unsafe, but overcooking removes moisture and reduces taste. I aim for soft and slightly juicy texture.
Always measure supplements correctly. Even small mistakes can affect long-term health.
If your cat is picky, warming the food slightly after thawing can improve acceptance.
Instructions
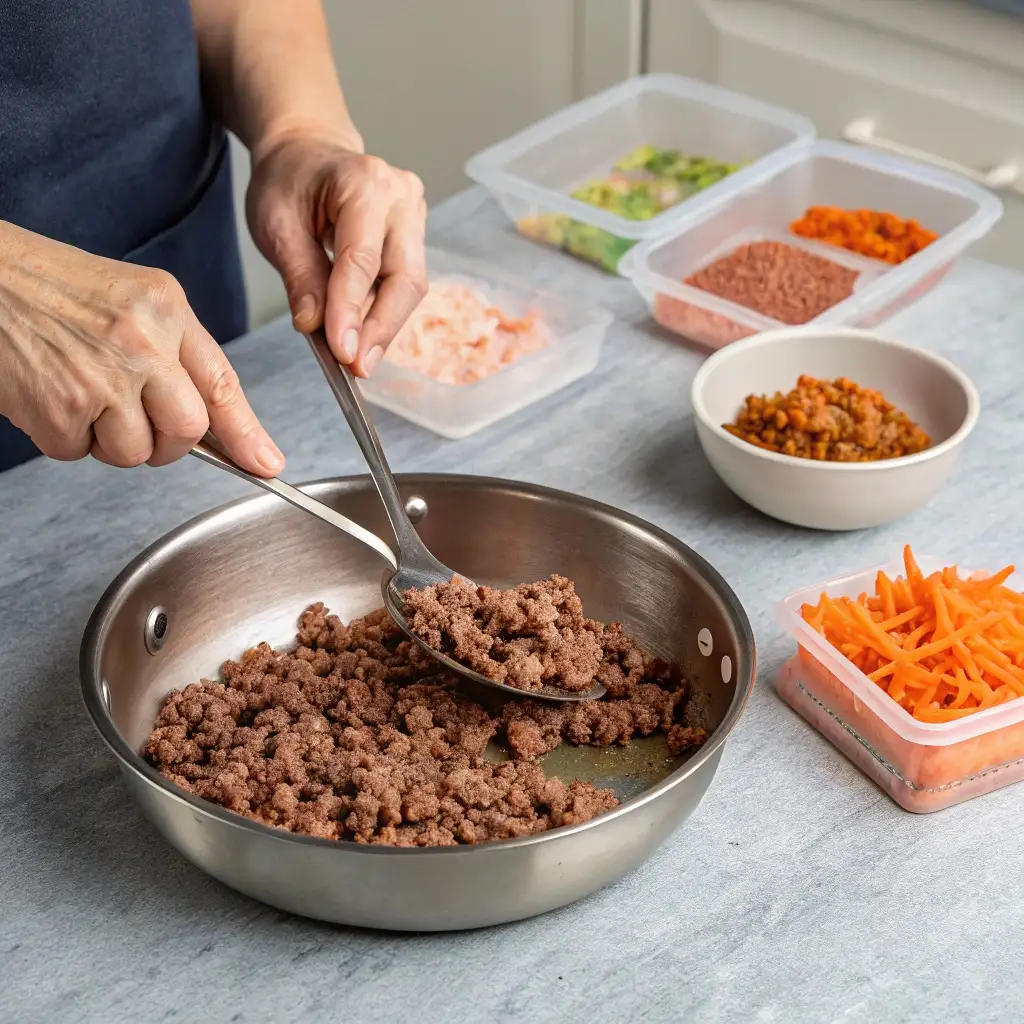
Preparation
I cook the ground beef in a pan for about 15–20 minutes until it’s partially cooked. I keep a bit of moisture for better texture.
Mixing
Once cooled, I break the beef into small, soft pieces. I avoid turning it into paste because cats prefer texture.
Supplement Blend
I mix water, egg, fish oil, vitamins, taurine, and salt in a bowl until smooth. This helps distribute nutrients evenly.
Combining
I mix everything together with grated carrot. I usually use my hands to make sure it blends properly.
Portioning and Storage
I divide it into small portions, seal, label, and freeze. I thaw overnight before feeding.
Variations and Substitutions
I adjust this recipe based on my cat’s needs.
Sometimes I replace beef with turkey for a lighter option. If I skip egg, I increase healthy fats slightly.
For sensitive digestion, I reduce the carrot amount. For older cats, I add more water for softer texture.
Small changes like these help personalize the recipe without affecting overall balance.
Pro Tips and Success Secrets
I always use fresh beef because quality directly affects health.
Batch cooking works best for me. I usually prepare several weeks’ worth in one go. Freezing in thin layers makes thawing faster.
I also store supplements in a cool, dark place to maintain their effectiveness.
Serving Guidelines
I follow a simple rule: feed about 2–3% of body weight daily.
For example, a 12-pound cat needs around 3–4 tablespoons per day, split into two meals.
I avoid overfeeding because even small extra portions can lead to weight gain over time.
Safety Considerations
I never serve raw beef due to bacterial risk. Proper cooking is necessary for safety.
I also keep portions small to reduce choking risk, especially for smaller cats.
Carrots are generally safe, but I still monitor digestion. Some cats may react differently.
If a cat has kidney or health issues, I always recommend consulting a vet before switching to homemade food.
#5. A Freezer-Friendly Salmon & Spinach Cat Food Recipe

I started making this recipe when my cat lost interest in her regular food and I noticed how expensive quality options were getting. I needed something healthier, cost-effective, and easy to prepare in advance.
This salmon and spinach recipe helped me solve all three problems. It combines high-quality protein, omega-3 fats, and light fiber into a balanced homemade meal. I prepare it in batches, freeze portions, and use it throughout the week without daily cooking.
From my experience and research, homemade cat food can lower feeding costs by 20–35% while improving ingredient quality. This recipe is simple, freezer-friendly, and works well even for picky eaters.
Recipe Overview
I use this recipe as a complete meal rather than a treat. Salmon gives it a strong flavor most cats enjoy, and spinach adds a small nutritional boost without overpowering the dish.
What works best for me is the freezer method. I cook once, portion everything, and store it for later use. This keeps feeding consistent and reduces daily effort.
I’ve also noticed that warming the food slightly after thawing improves smell and increases acceptance, especially for picky cats.
Why You’ll Love This Recipe (Pet Parent Perspective)
- Budget-Friendly: I spend less compared to premium cat food
- Ingredient Control: I choose fresh and clean ingredients
- Easy Storage: Freeze and use anytime
- Flexible Portions: Adjust based on your cat’s size
- Good for Multiple Cats: Easy to scale
- Time-Saving: One prep session lasts weeks
Essential Information Block
- Prep Time: About 45 minutes
- Cook Time: 10–15 minutes
- Total Time: Around 1.5 hours
- Yield: 10–12 servings
- Portion Size: 1–2 tablespoons
- Shelf Life: Months frozen, 48–72 hours refrigerated
- Storage: Airtight freezer-safe containers
Equipment Needed
I usually keep things simple. A pan, mixing bowl, and fork are enough. Sometimes I use a blender if I want a smoother texture, but it’s optional.
I always clean everything properly after cooking fish. The smell sticks, and hygiene is important when preparing pet food.
Ingredients Section: Main Components

I focus on ingredients that support a cat’s core nutritional needs.
- 1.5 pounds salmon (boneless)
- 3/4 cup water (supports hydration)
- 1 cooked egg (extra protein and nutrients)
- Fish oil capsules (omega-3 boost)
- Vitamin E and B-complex (support metabolism)
- Multivitamin (fills nutritional gaps)
- Taurine (essential for heart and vision)
- Lite salt with iodine (minerals)
- 2 tablespoons cooked chopped spinach (fiber support)
From what I’ve learned, taurine is critical because cats cannot produce enough naturally, so I always include it.
Expert Tips (Before Instructions)
I’ve tested this recipe multiple times, and a few things make a big difference.
Cook the salmon lightly. Raw fish can carry parasites, but overcooking reduces taste and texture. I aim for soft and flaky consistency.
Measure supplements carefully. Too much or too little can affect long-term health.
If your cat is picky, warming the food slightly after thawing improves smell and acceptance.
Instructions

Preparation
I cook the salmon on low heat for about 10–15 minutes until it’s partially cooked and still soft inside.
Flaking
After cooling, I break the salmon into small flakes. I avoid turning it into paste because cats prefer texture.
Supplement Mix
I mix water, egg, fish oil, vitamins, taurine, and salt in a bowl until smooth. This helps distribute nutrients evenly.
Combining
I mix everything together with chopped spinach. I prefer using my hands to ensure even mixing.
Portioning and Storage
I divide the mixture into small portions, seal, label, and freeze. I thaw overnight before feeding.
Variations and Substitutions
I adjust this recipe depending on my cat’s needs.
Sometimes I replace salmon with mackerel for variety. If I skip egg, I increase healthy fats slightly.
For sensitive digestion, I reduce spinach. For older cats, I add more water for a softer texture.
These small changes help customize the meal without affecting overall balance.
Pro Tips and Success Secrets
I always use fresh salmon because quality directly affects nutrition.
Batch cooking works best for me. I usually prepare several weeks’ worth at once. Freezing in thin portions makes thawing faster.
I also store supplements in a cool, dark place to maintain their effectiveness.
Serving Guidelines
I follow a simple rule: feed about 2–3% of body weight daily.
For example, an 8-pound cat needs around 2–3 tablespoons per day, split into two meals.
I avoid overfeeding because even small extra portions can lead to weight gain over time.
Safety Considerations
I never serve raw salmon due to parasite risk. Proper cooking is necessary for safety.
I keep portions small to reduce choking risk, especially for smaller cats.
Spinach is generally safe in small amounts, but I still monitor digestion because some cats may react differently.
If a cat has kidney or medical issues, I always recommend consulting a vet before switching to homemade food.
All content on this site is written and reviewed by our experienced team to ensure it is accurate, reliable, and helpful for our readers. Our Our Process page explains how we carefully research and create high-quality content, while our Team page introduces the professionals behind our work. We also provide clear guidelines for content or image concerns on our Image Removal page, so you can trust that we prioritize transparency, quality, and reader safety.